Workflows
Automate multi-step follow-ups: a chain of text, voice and button messages sent with delays in between. Follow the steps below to build your first flow. Green rings show where to click in the relevant steps.
1. Open Workflows and click New Workflow to start.
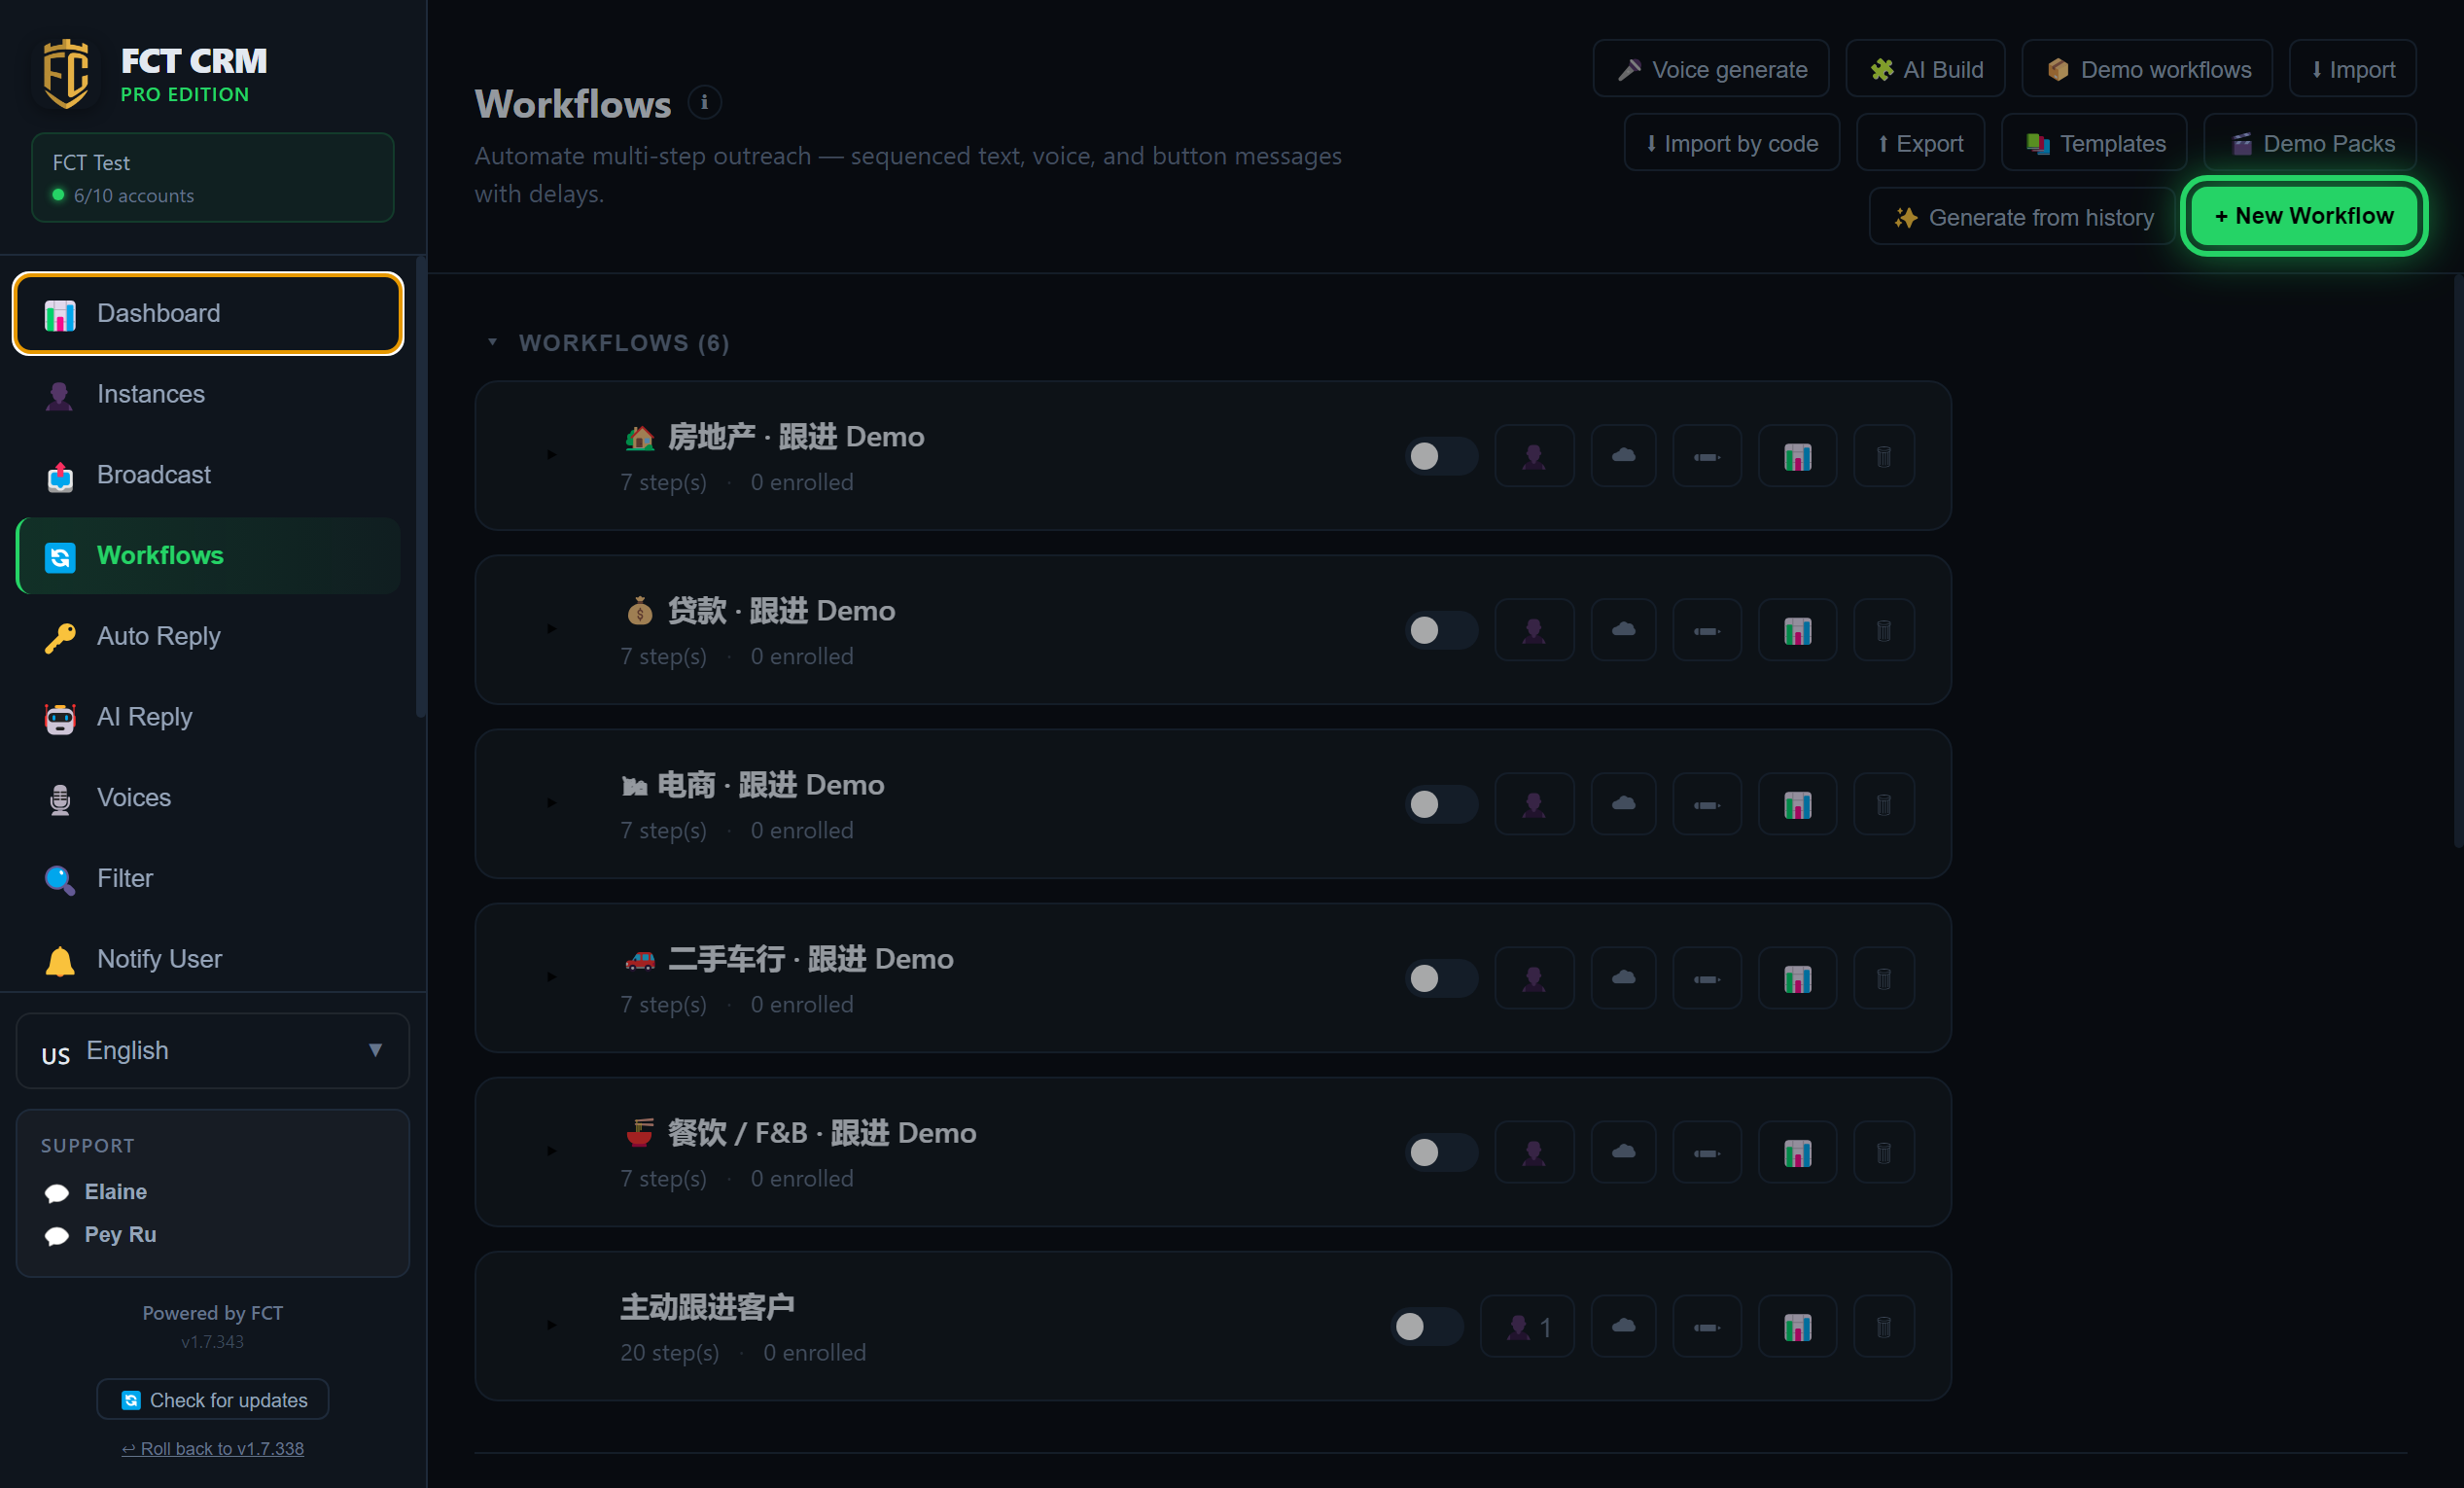
- Click Workflows in the left menu. The upper half on the right lists the workflows you already have. In the lower half, Pipeline lists the contacts enrolled across all your workflows.
- Click the green New Workflow button at the top right. A window opens asking you to pick an industry and a language.
- Each existing workflow has a switch on the right of its row. The workflow only runs when the switch is on. The small person icon next to the switch is for assigning accounts, the pencil icon opens the editor, and the bin icon deletes the workflow.
- If you would like the AI to write the flow from your past chats, click Generate from history on the toolbar instead. How to do that is covered in the last section of this page.
2. Pick an industry and a language, then click Generate to get a ready-made draft, or click Blank workflow to start from scratch.
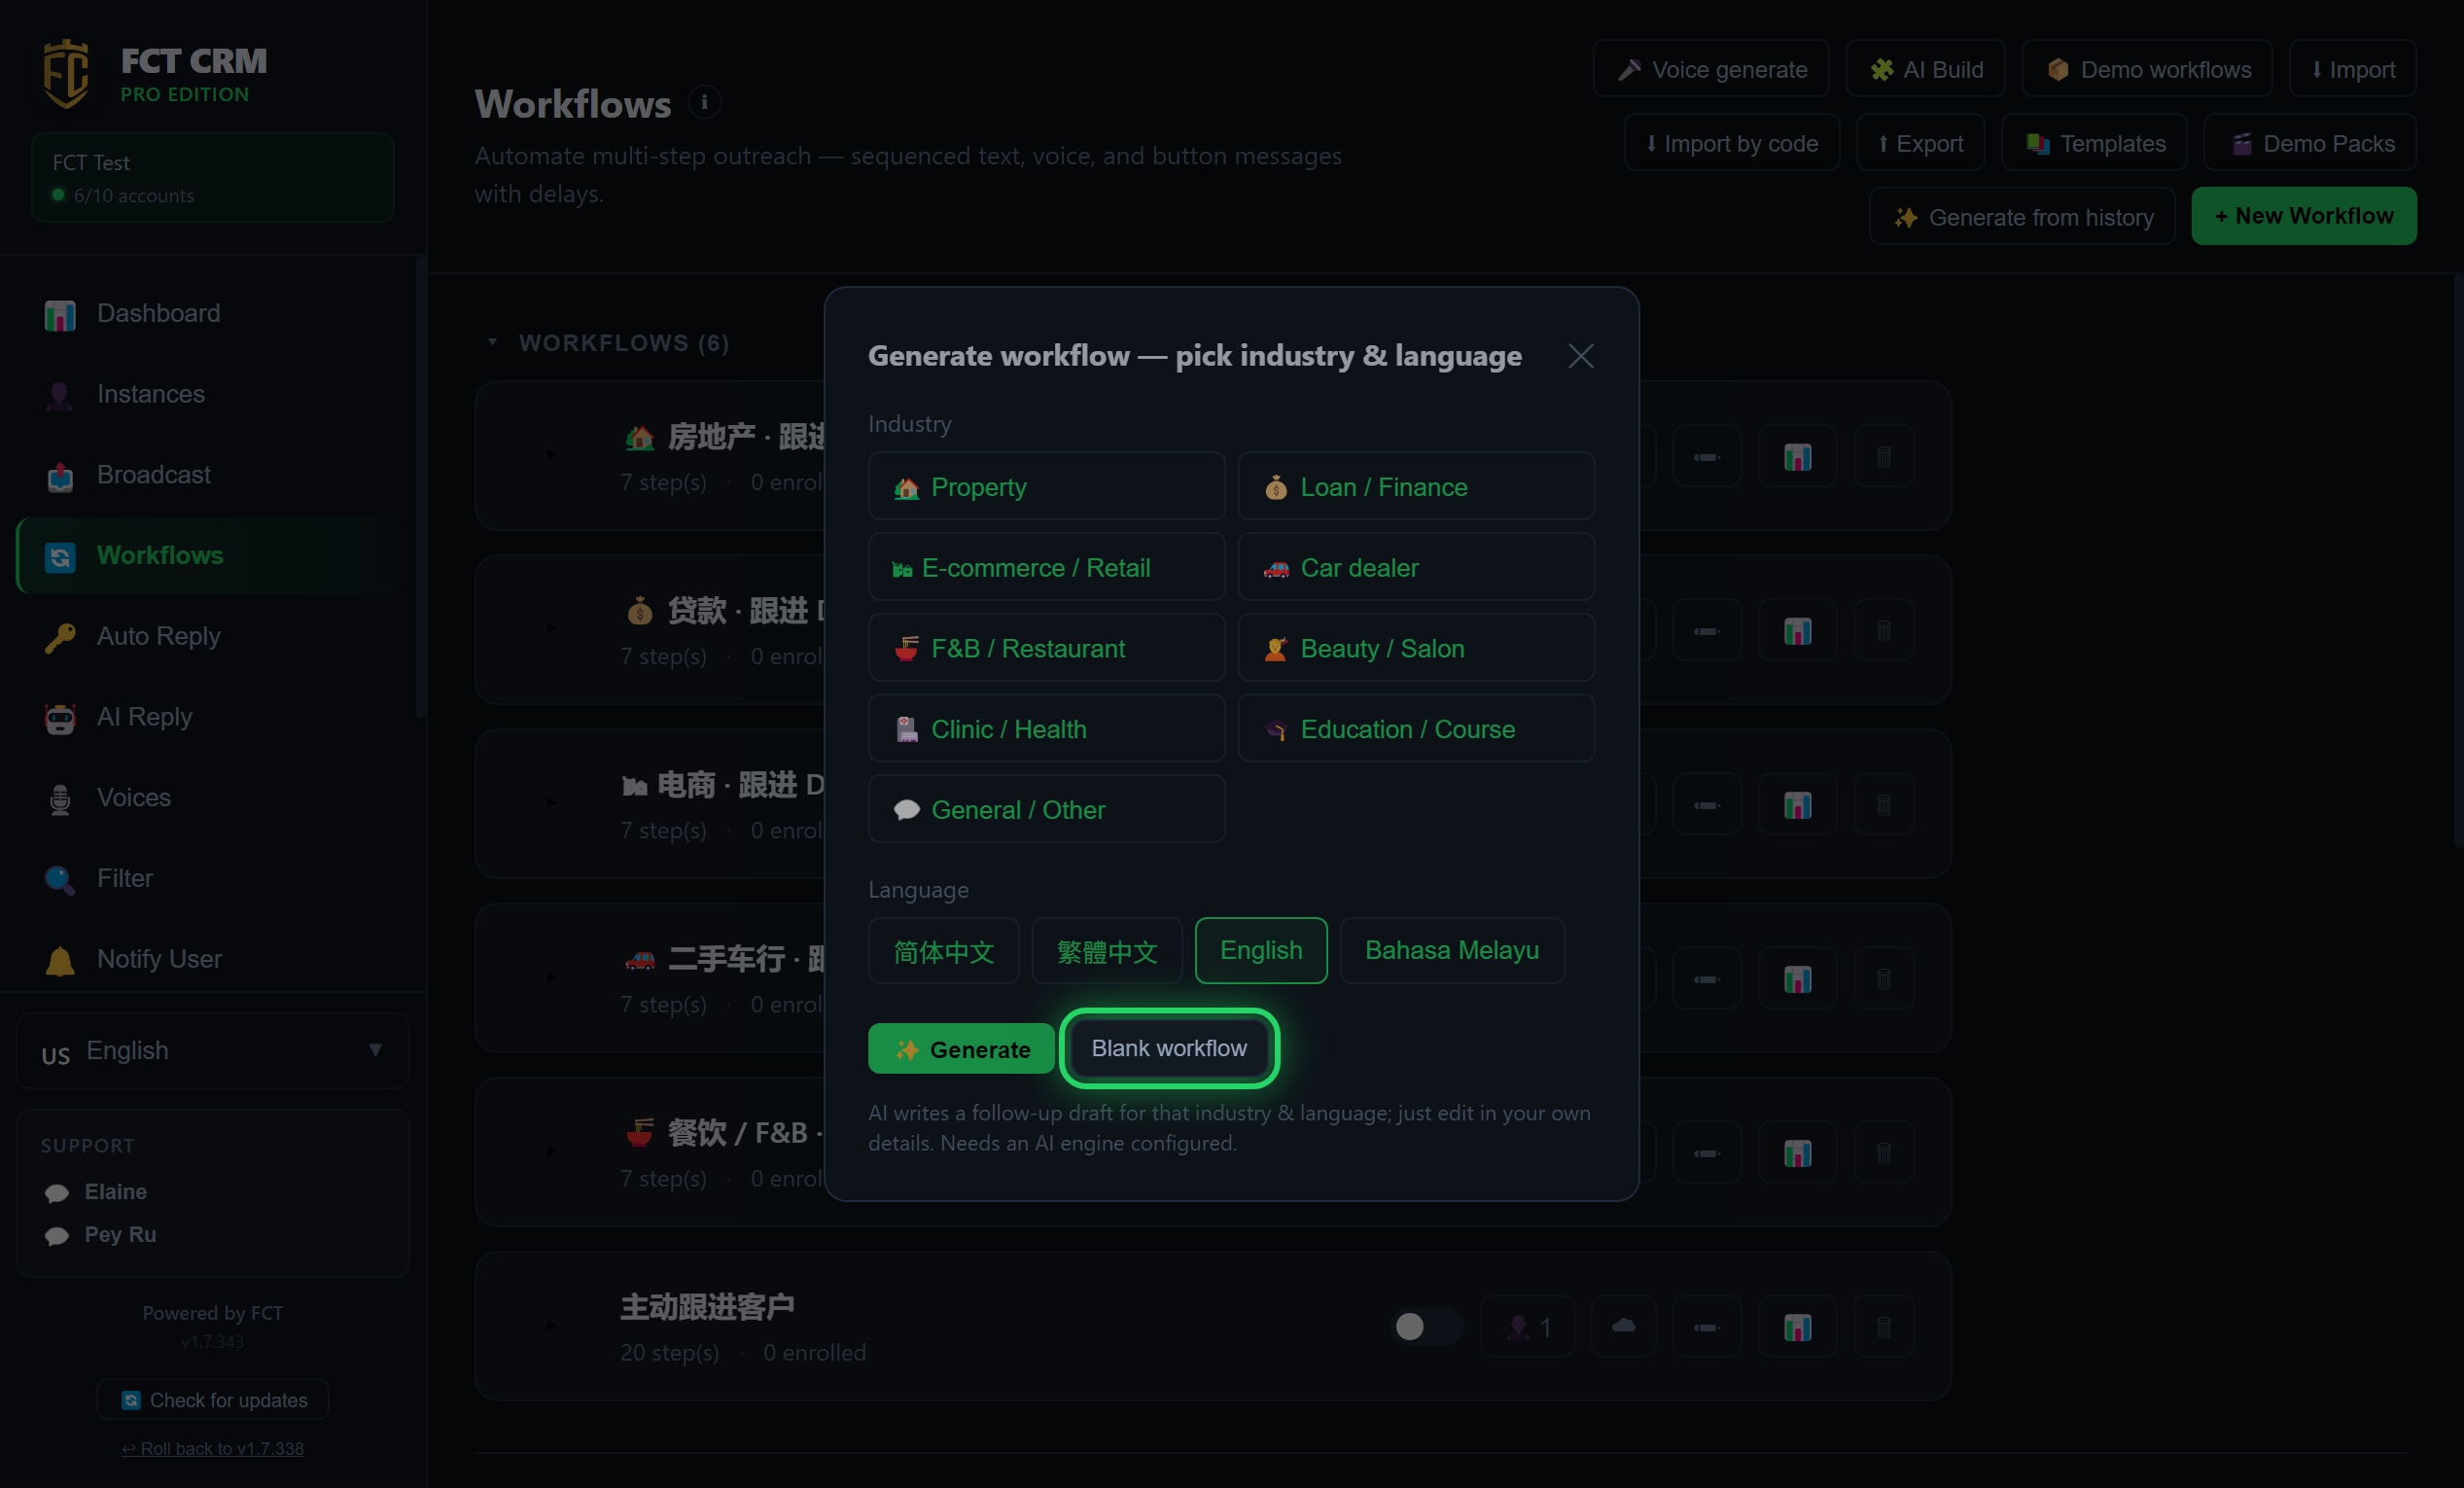
- Under Industry, click the industry closest to your business.
- Under Language, click the language you normally use with your customers.
- Click Generate and wait a moment. The follow-up draft written by the AI opens directly in the editor, and you then change its content to your own details.
- If you do not want to use the AI, click Blank workflow. The editor opens a flow called "Sample Workflow (edit me)". It already contains three sample messages and two waits, so you can simply edit it.
Generate needs an AI engine first
Generate needs an AI engine to be set up beforehand. If none is set up yet, it tells you that generation failed, and then opens the same sample workflow for you to edit by hand.
3. In Settings, name your workflow and tick which accounts run it. If you tick no account at all, the workflow never triggers on its own, and the list shows "No account assigned — never fires". Entry triggers, the conflict rule and exit keywords are also set here.
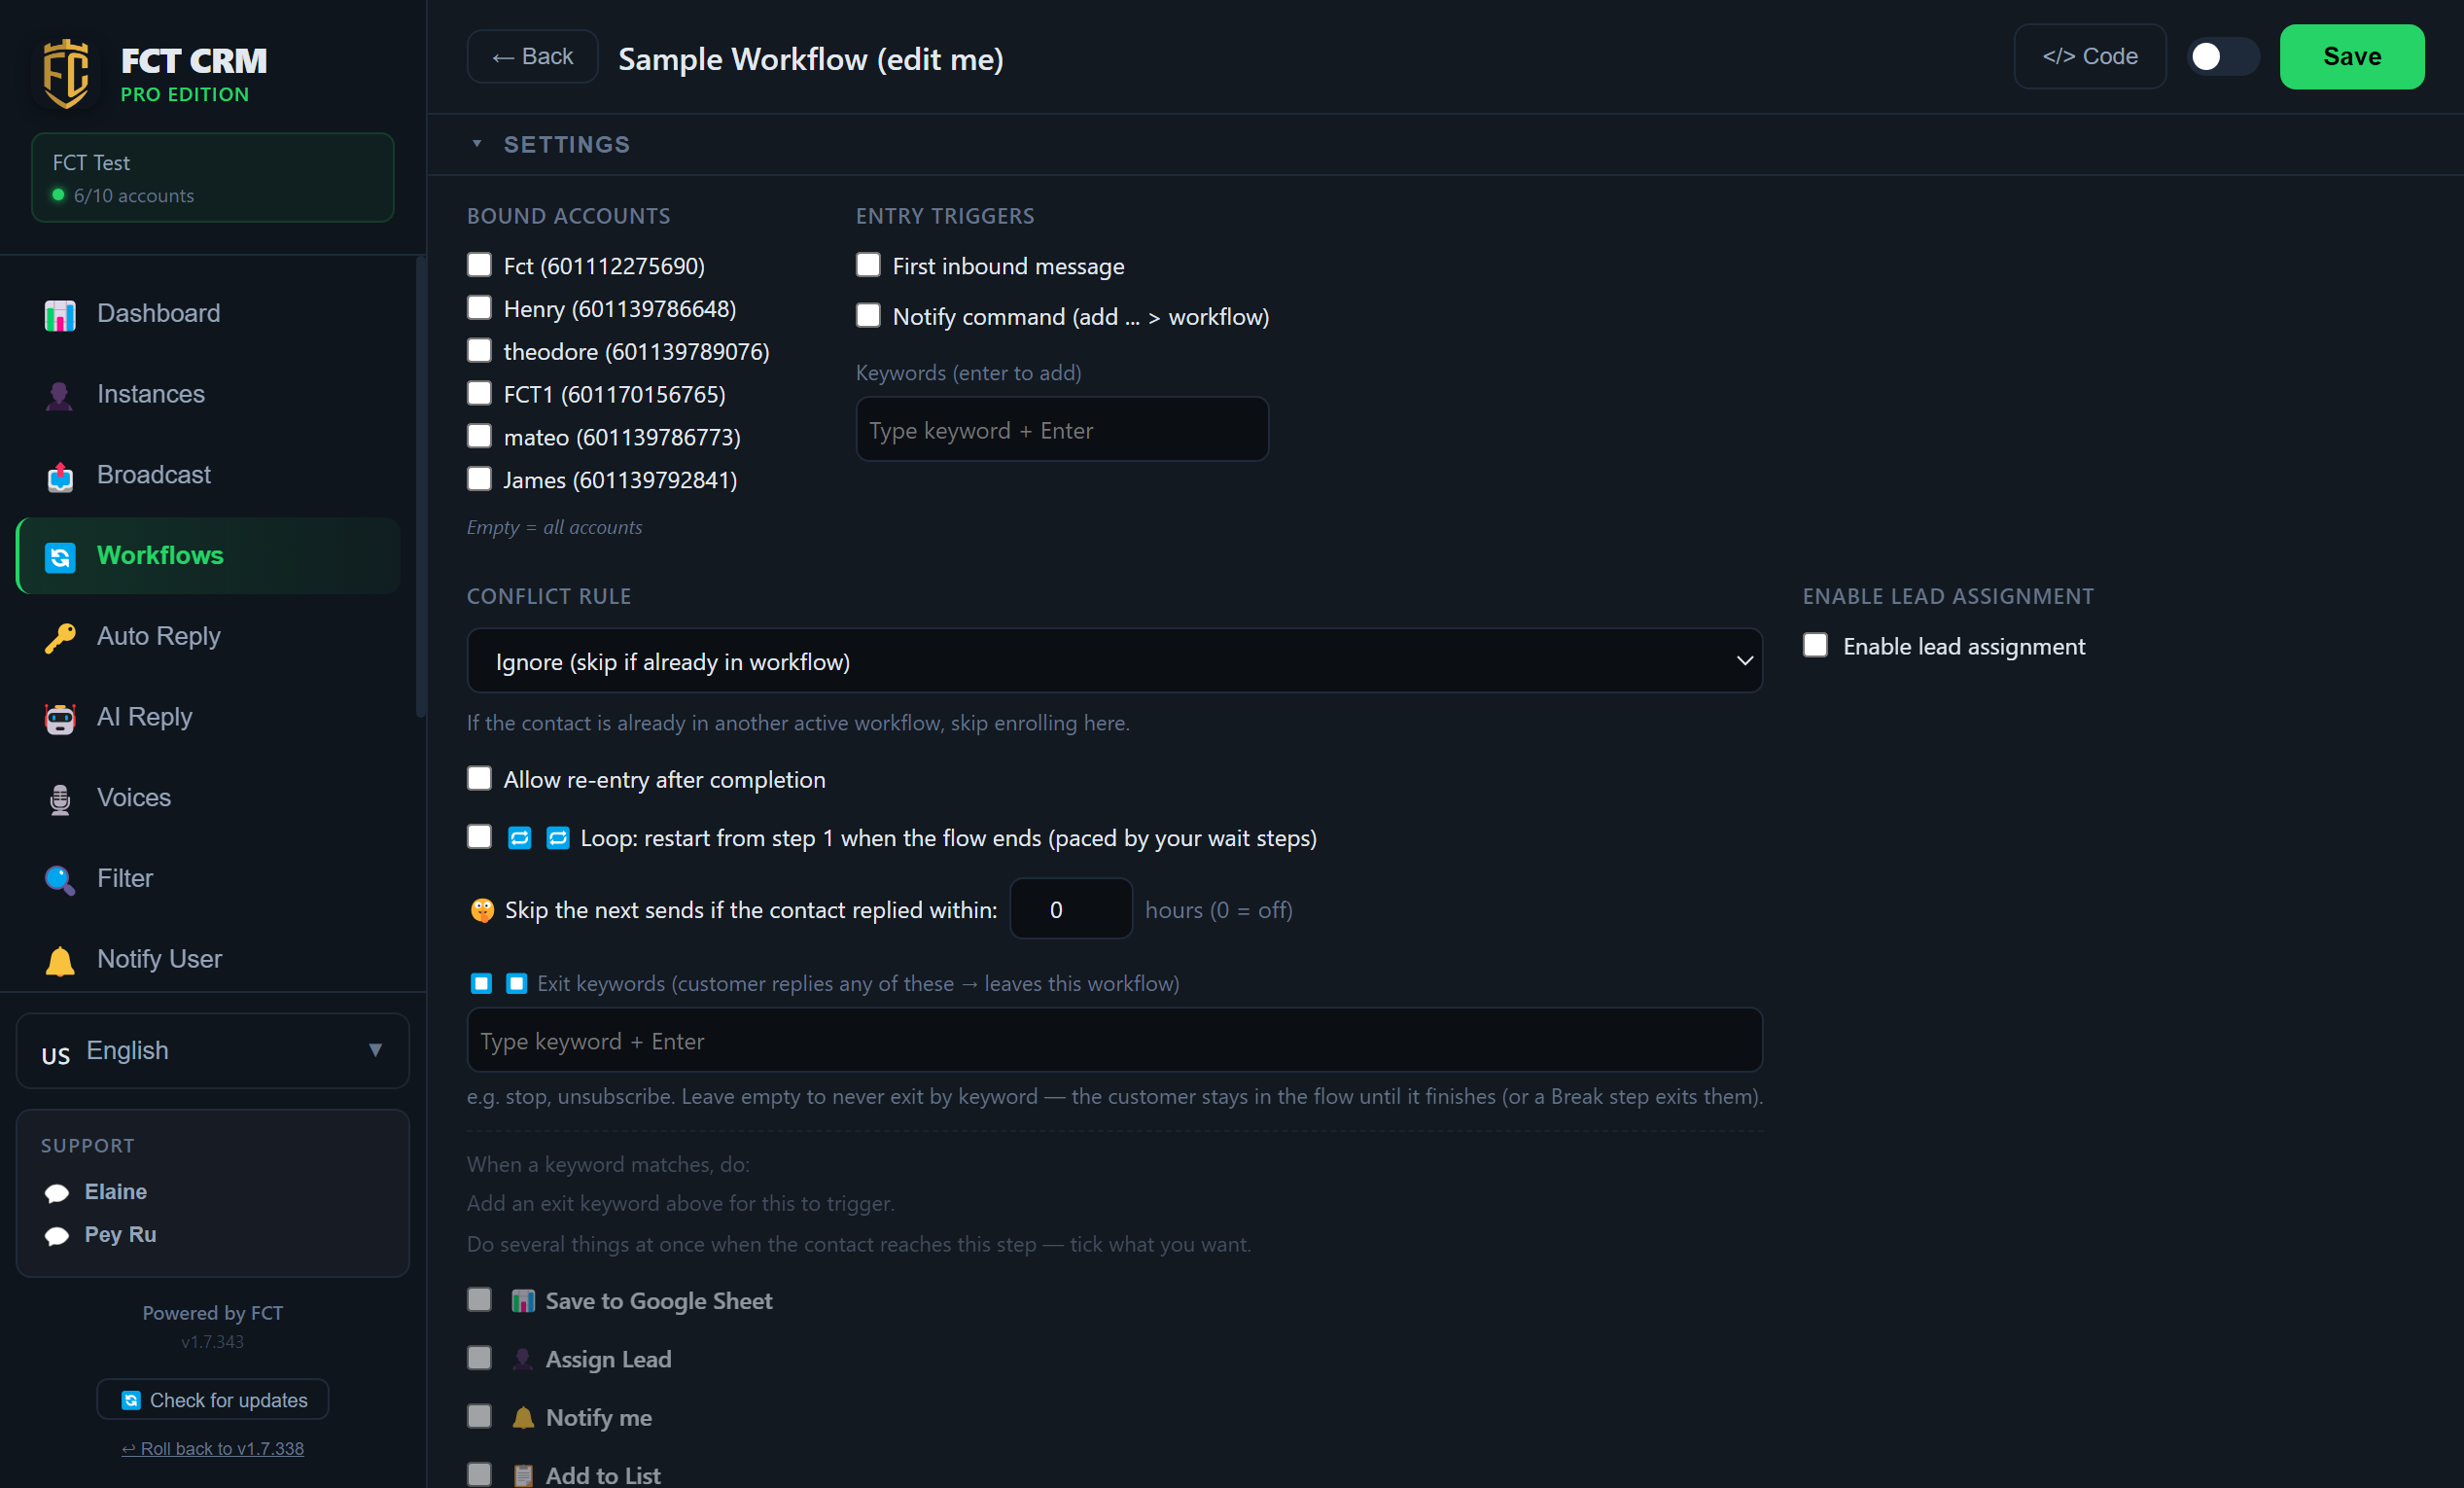
- In the name field next to Back at the very top of the page, type the name of this workflow.
- Under Bound Accounts, tick the accounts that should run this workflow.
- Under Entry Triggers, choose how a customer enters. You can tick First inbound message, or you can type a word in the keyword field and press Enter, so that the customer enters when they send that keyword.
- Conflict rule decides what happens when a contact is already in another flow: choose Ignore (skip if already in workflow), or choose Exit old workflow, enter this one.
- Quiet hours is ticked by default. Messages that fall due inside this window are postponed until the window ends, and they are not lost. You can change the two times next to it.
- In the Exit keywords field, type a word and press Enter, for example "stop". When a customer's reply matches one of them, they leave this workflow.
With no account ticked, it never triggers on its own
The hint under Bound Accounts reads "None ticked = this workflow never triggers on its own". You need to tick at least one account for a customer's message to bring them into this workflow.
4. Scroll down and click the plus button to add a step, then choose its type: Send Text, Send Voice, a Menu, a Wait, an If / Else branch and more. Add as many steps as you need, then click Save.
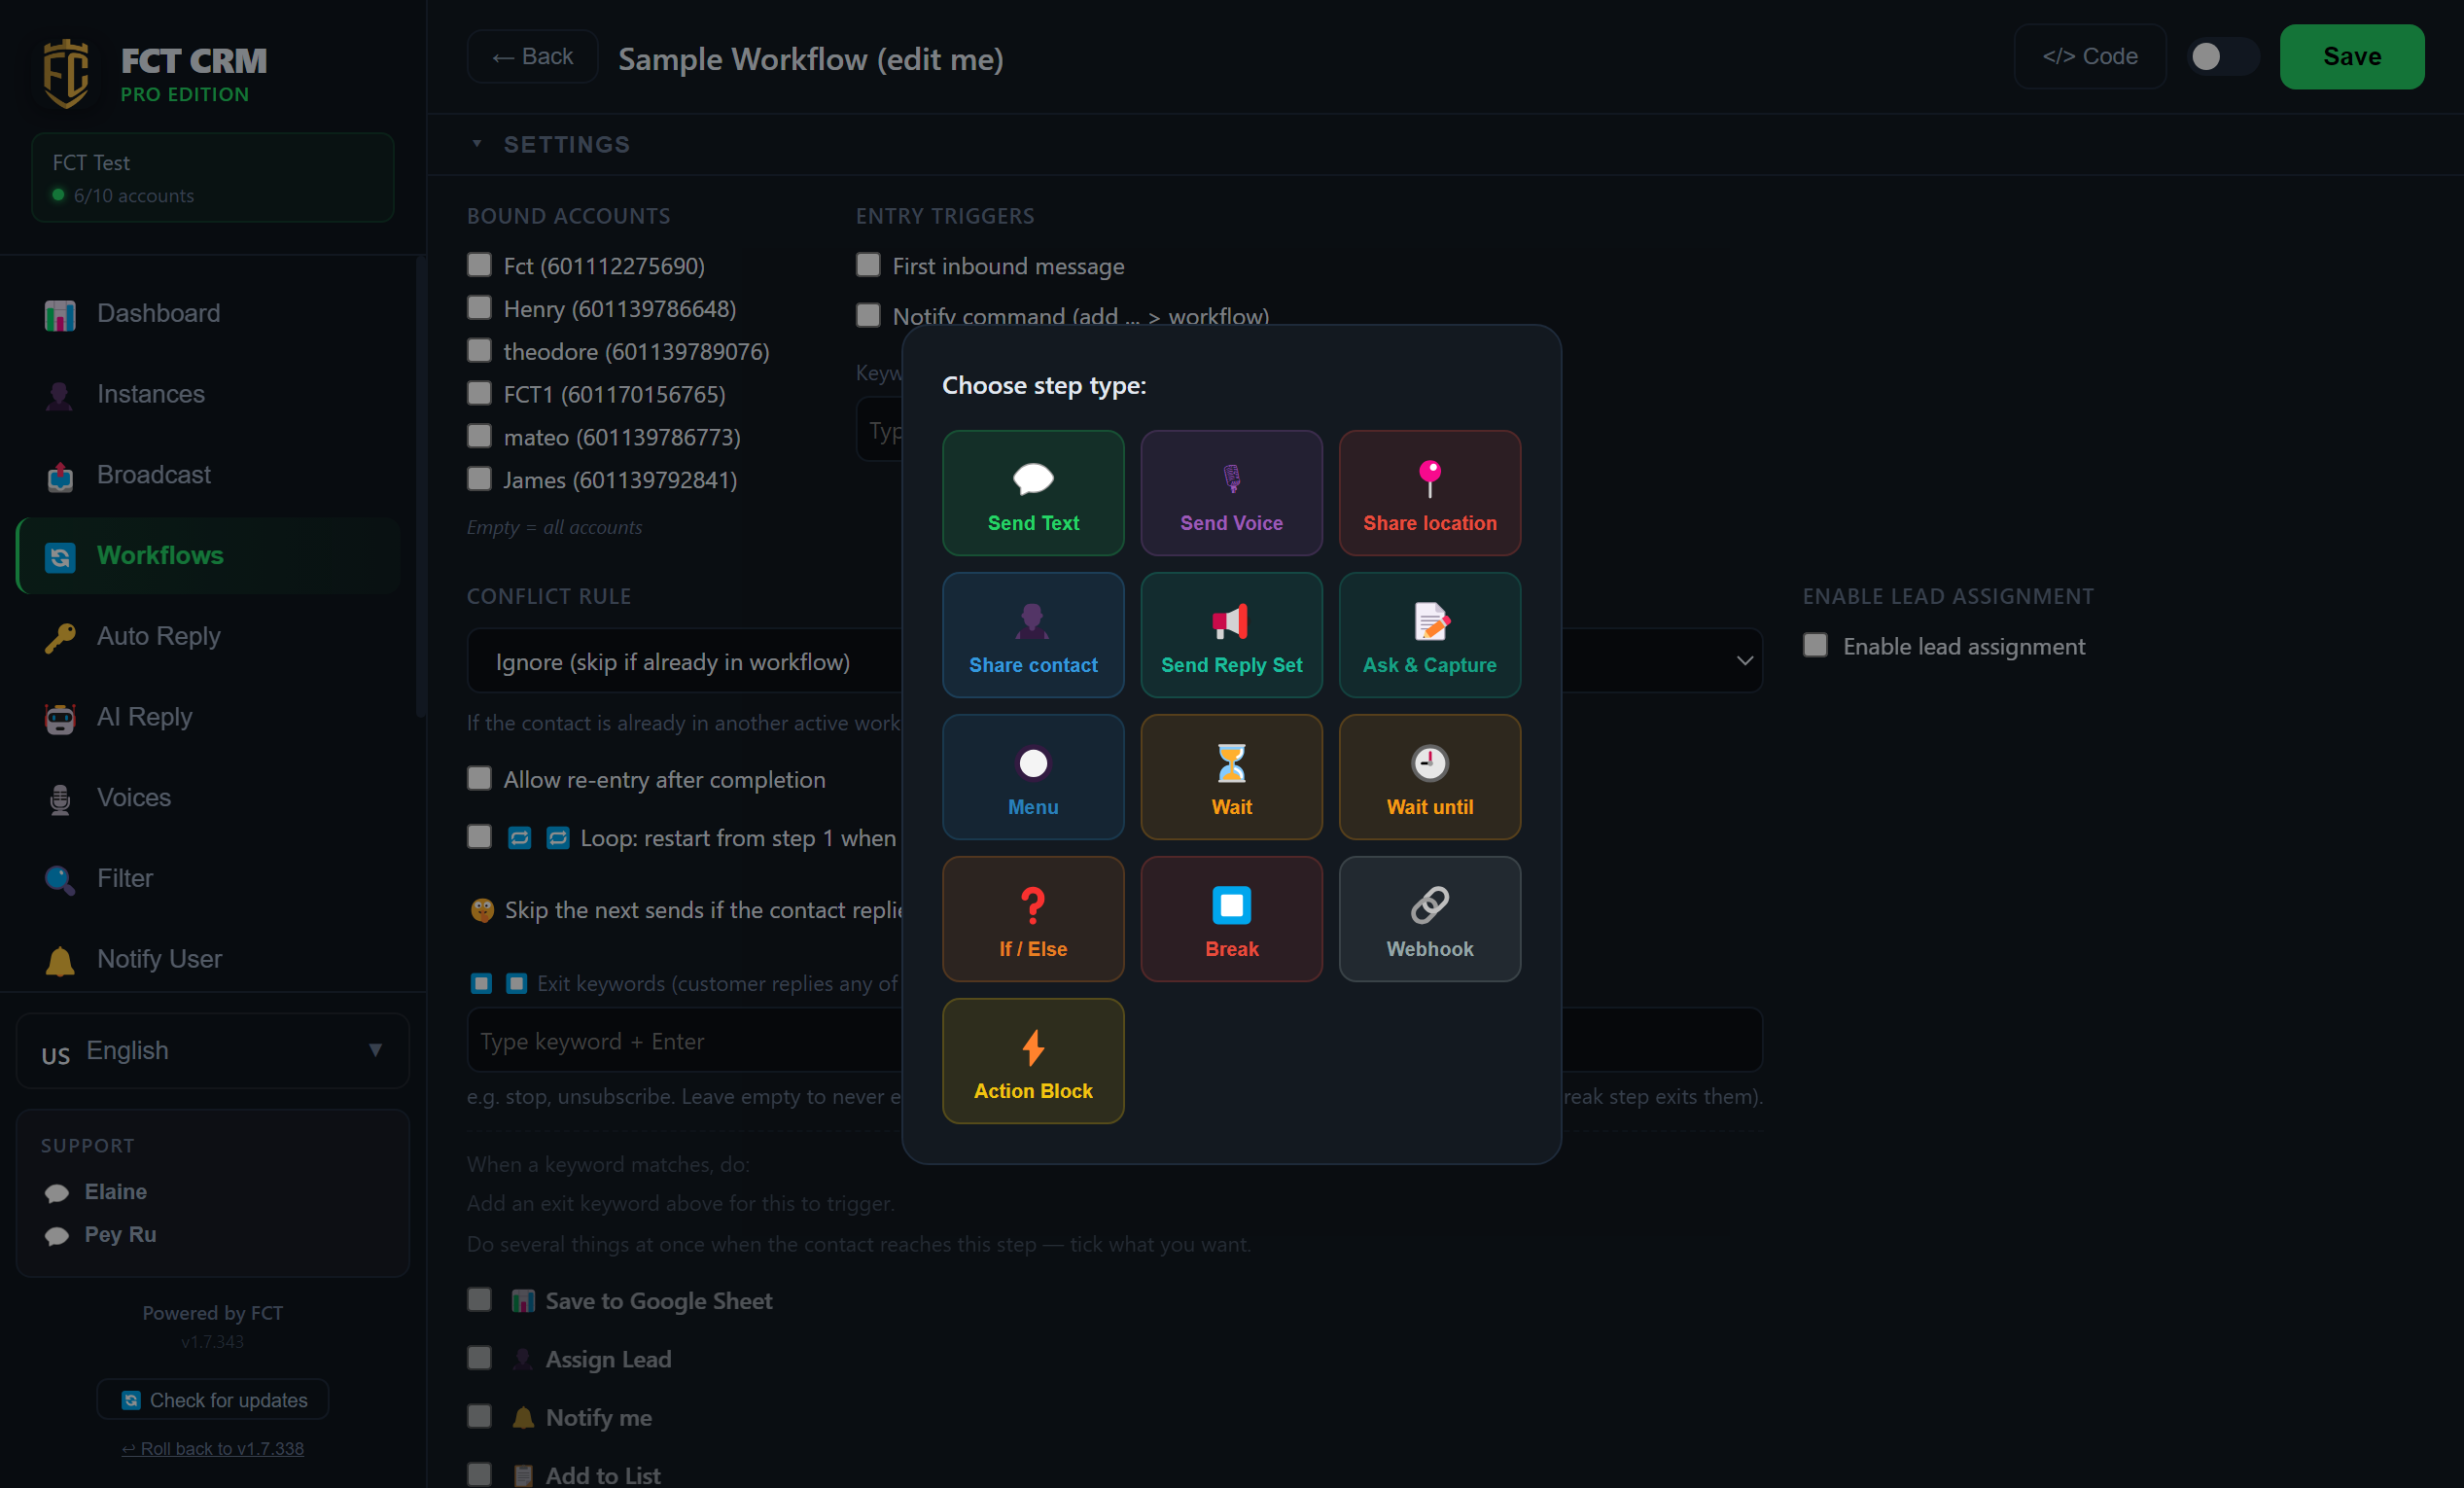
- Scroll down to the steps area and click the + button at the position where you want to insert a new step. If the flow is still empty, click Add first step. The Choose step type picker opens.
- Click a type. Send Text and Send Voice send a message. Wait pauses for a while before continuing. Menu lets the customer pick from several options. If / Else follows different branches depending on a condition. Break ends the flow at that point.
- The new step appears in the flow. Click the step and fill in its content under Step Config, such as the text to send or how long to wait.
- Repeat the steps above until the whole follow-up is in place.
- Click Save at the top right. The switch to the left of Save is the enable switch. The workflow only runs when it is on.
Remember to set up the Communication Layer
Steps only send messages out in order. Questions the customer asks along the way are answered by the Communication Layer, where you need to choose an FAQ, a reply set or an AI template. If it is not set up, this workflow will not answer anything the customer asks after the steps have been sent.
5. Back on the list, the person button assigns which accounts run this workflow.
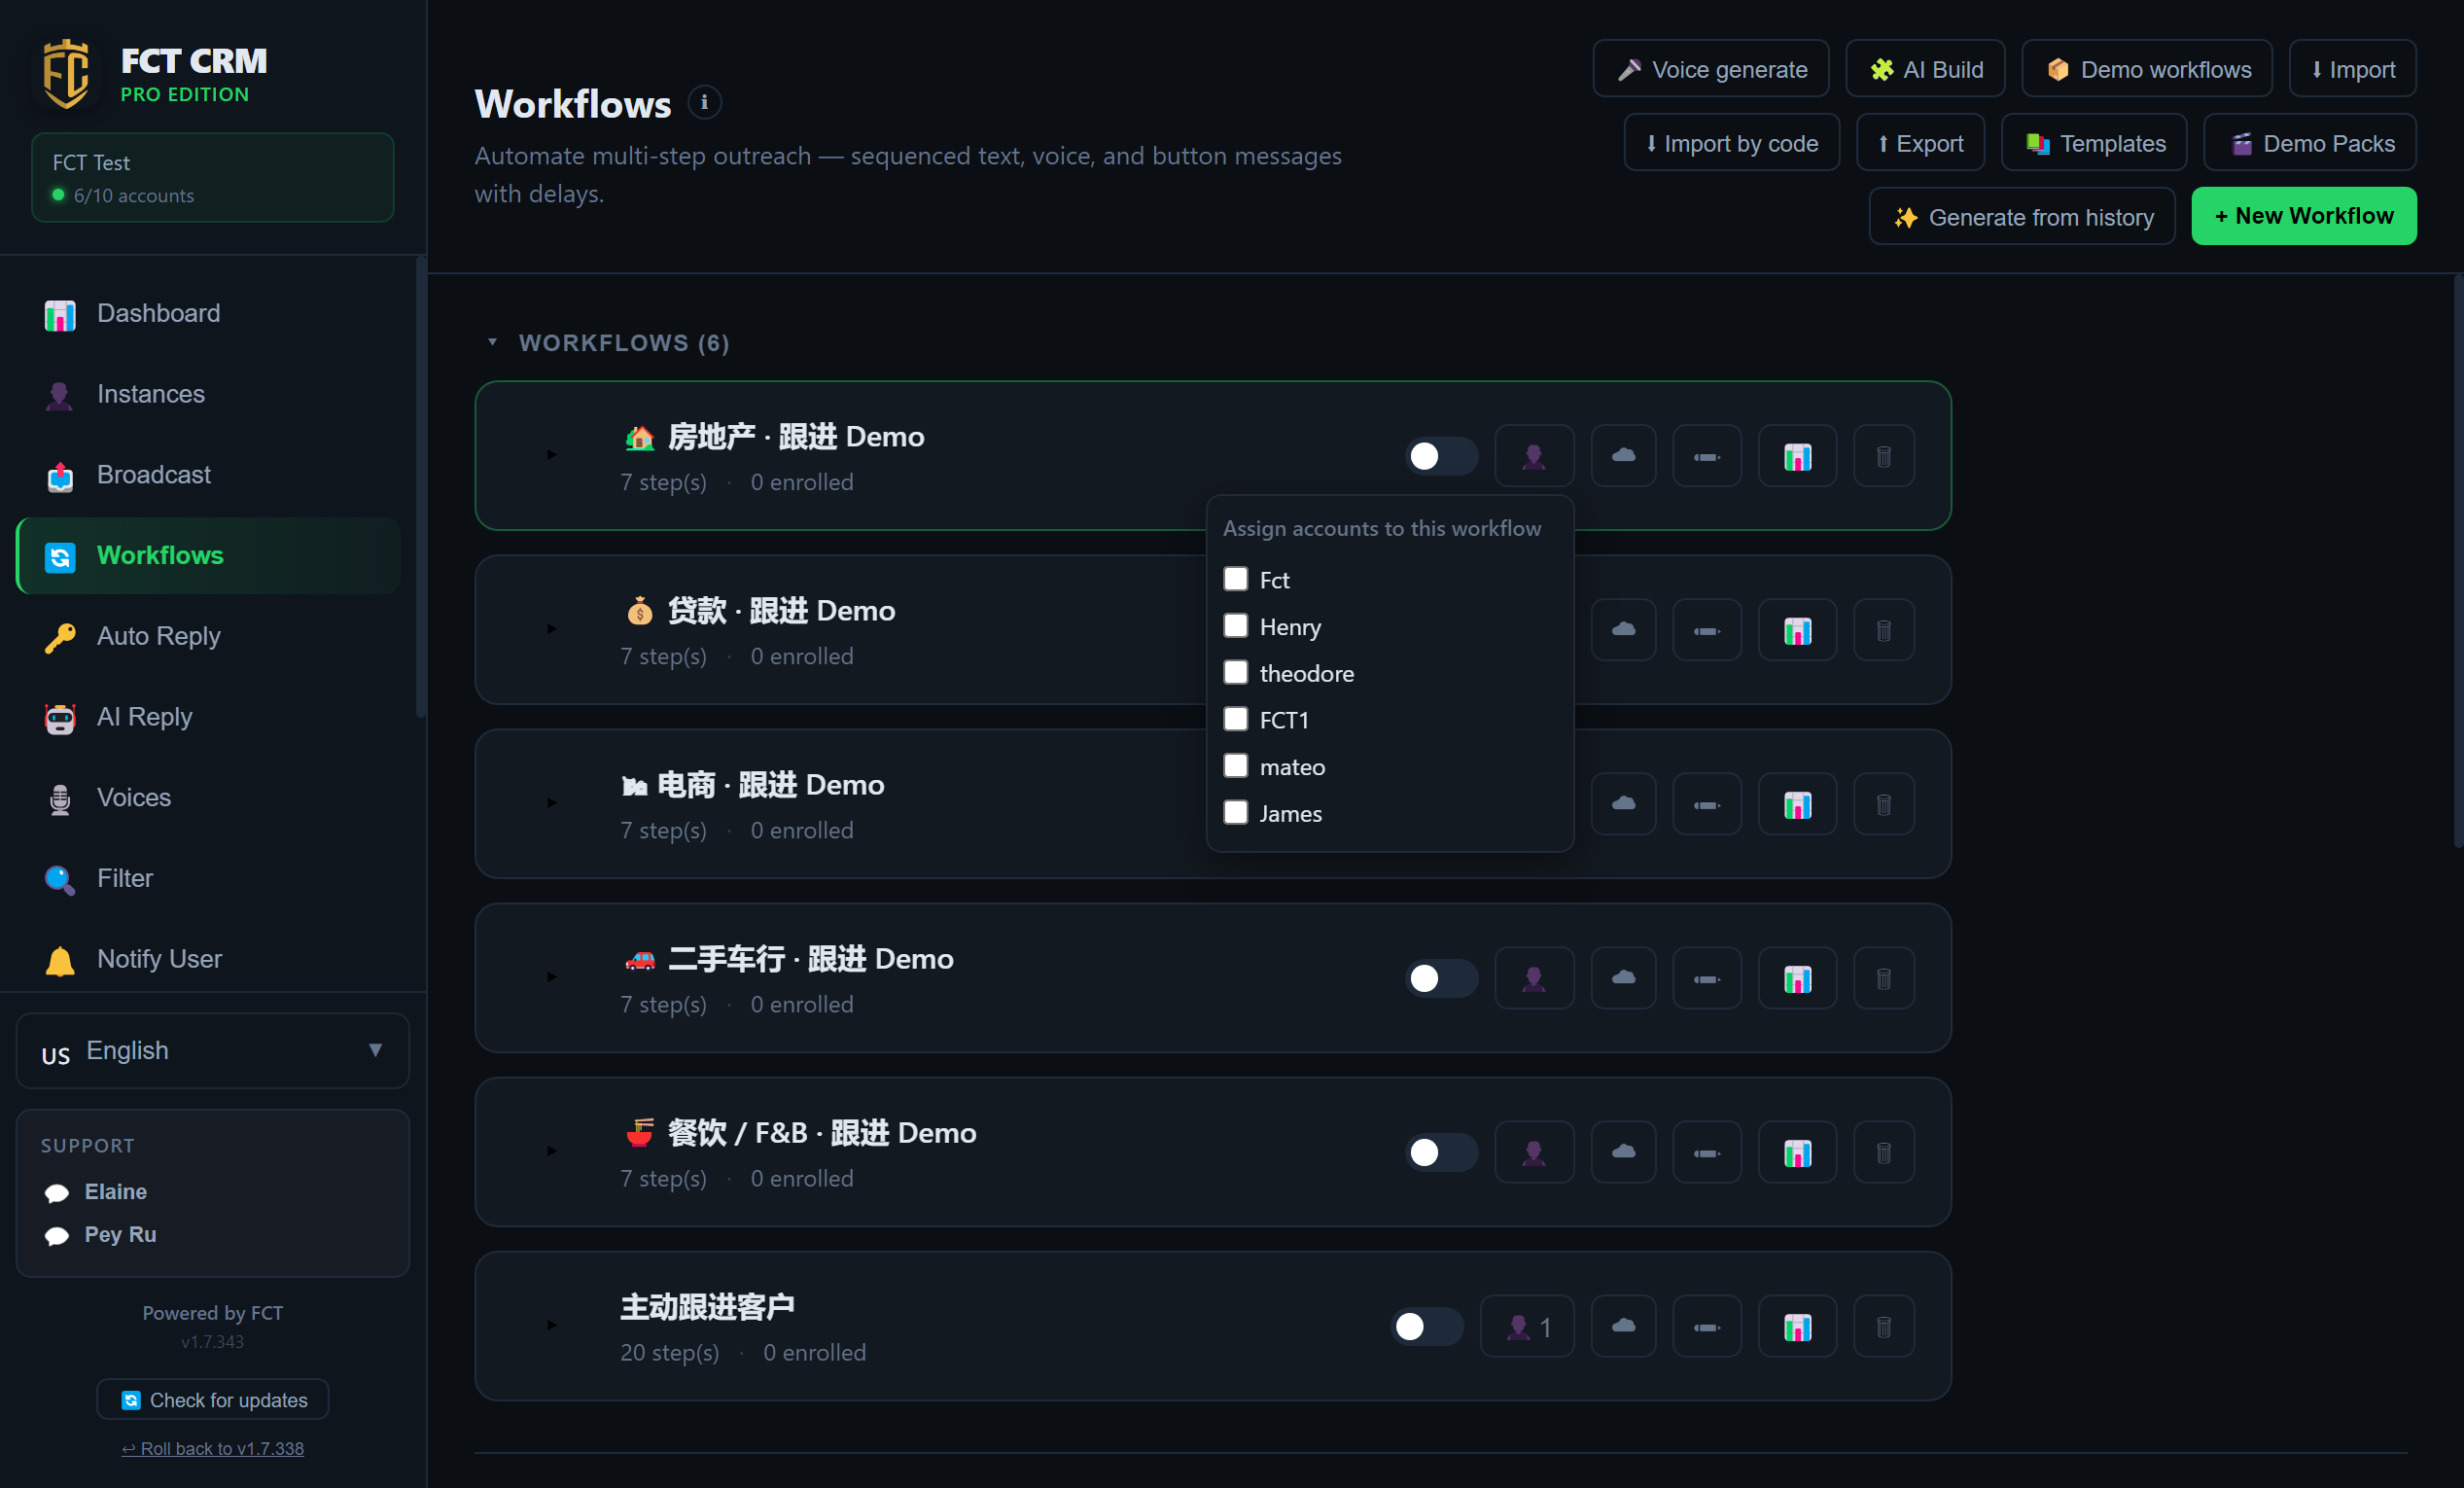
- Click Back at the top left to return to the workflow list.
- On the row of the workflow you want to assign, click the person icon. A small Assign accounts to this workflow window opens.
- Tick the accounts that should run it. Each tick takes effect immediately, and there is nothing else to save. The number next to the person icon is how many accounts are assigned.
- Click the empty space outside the small window to close it.
- Turn on the switch on the left of this row to enable the workflow. If the switch is on but no account is assigned, the row shows "No account assigned — never fires".
6. Click Enroll Contacts to add people into the flow. It starts from step 1 and sends according to the delays you set.
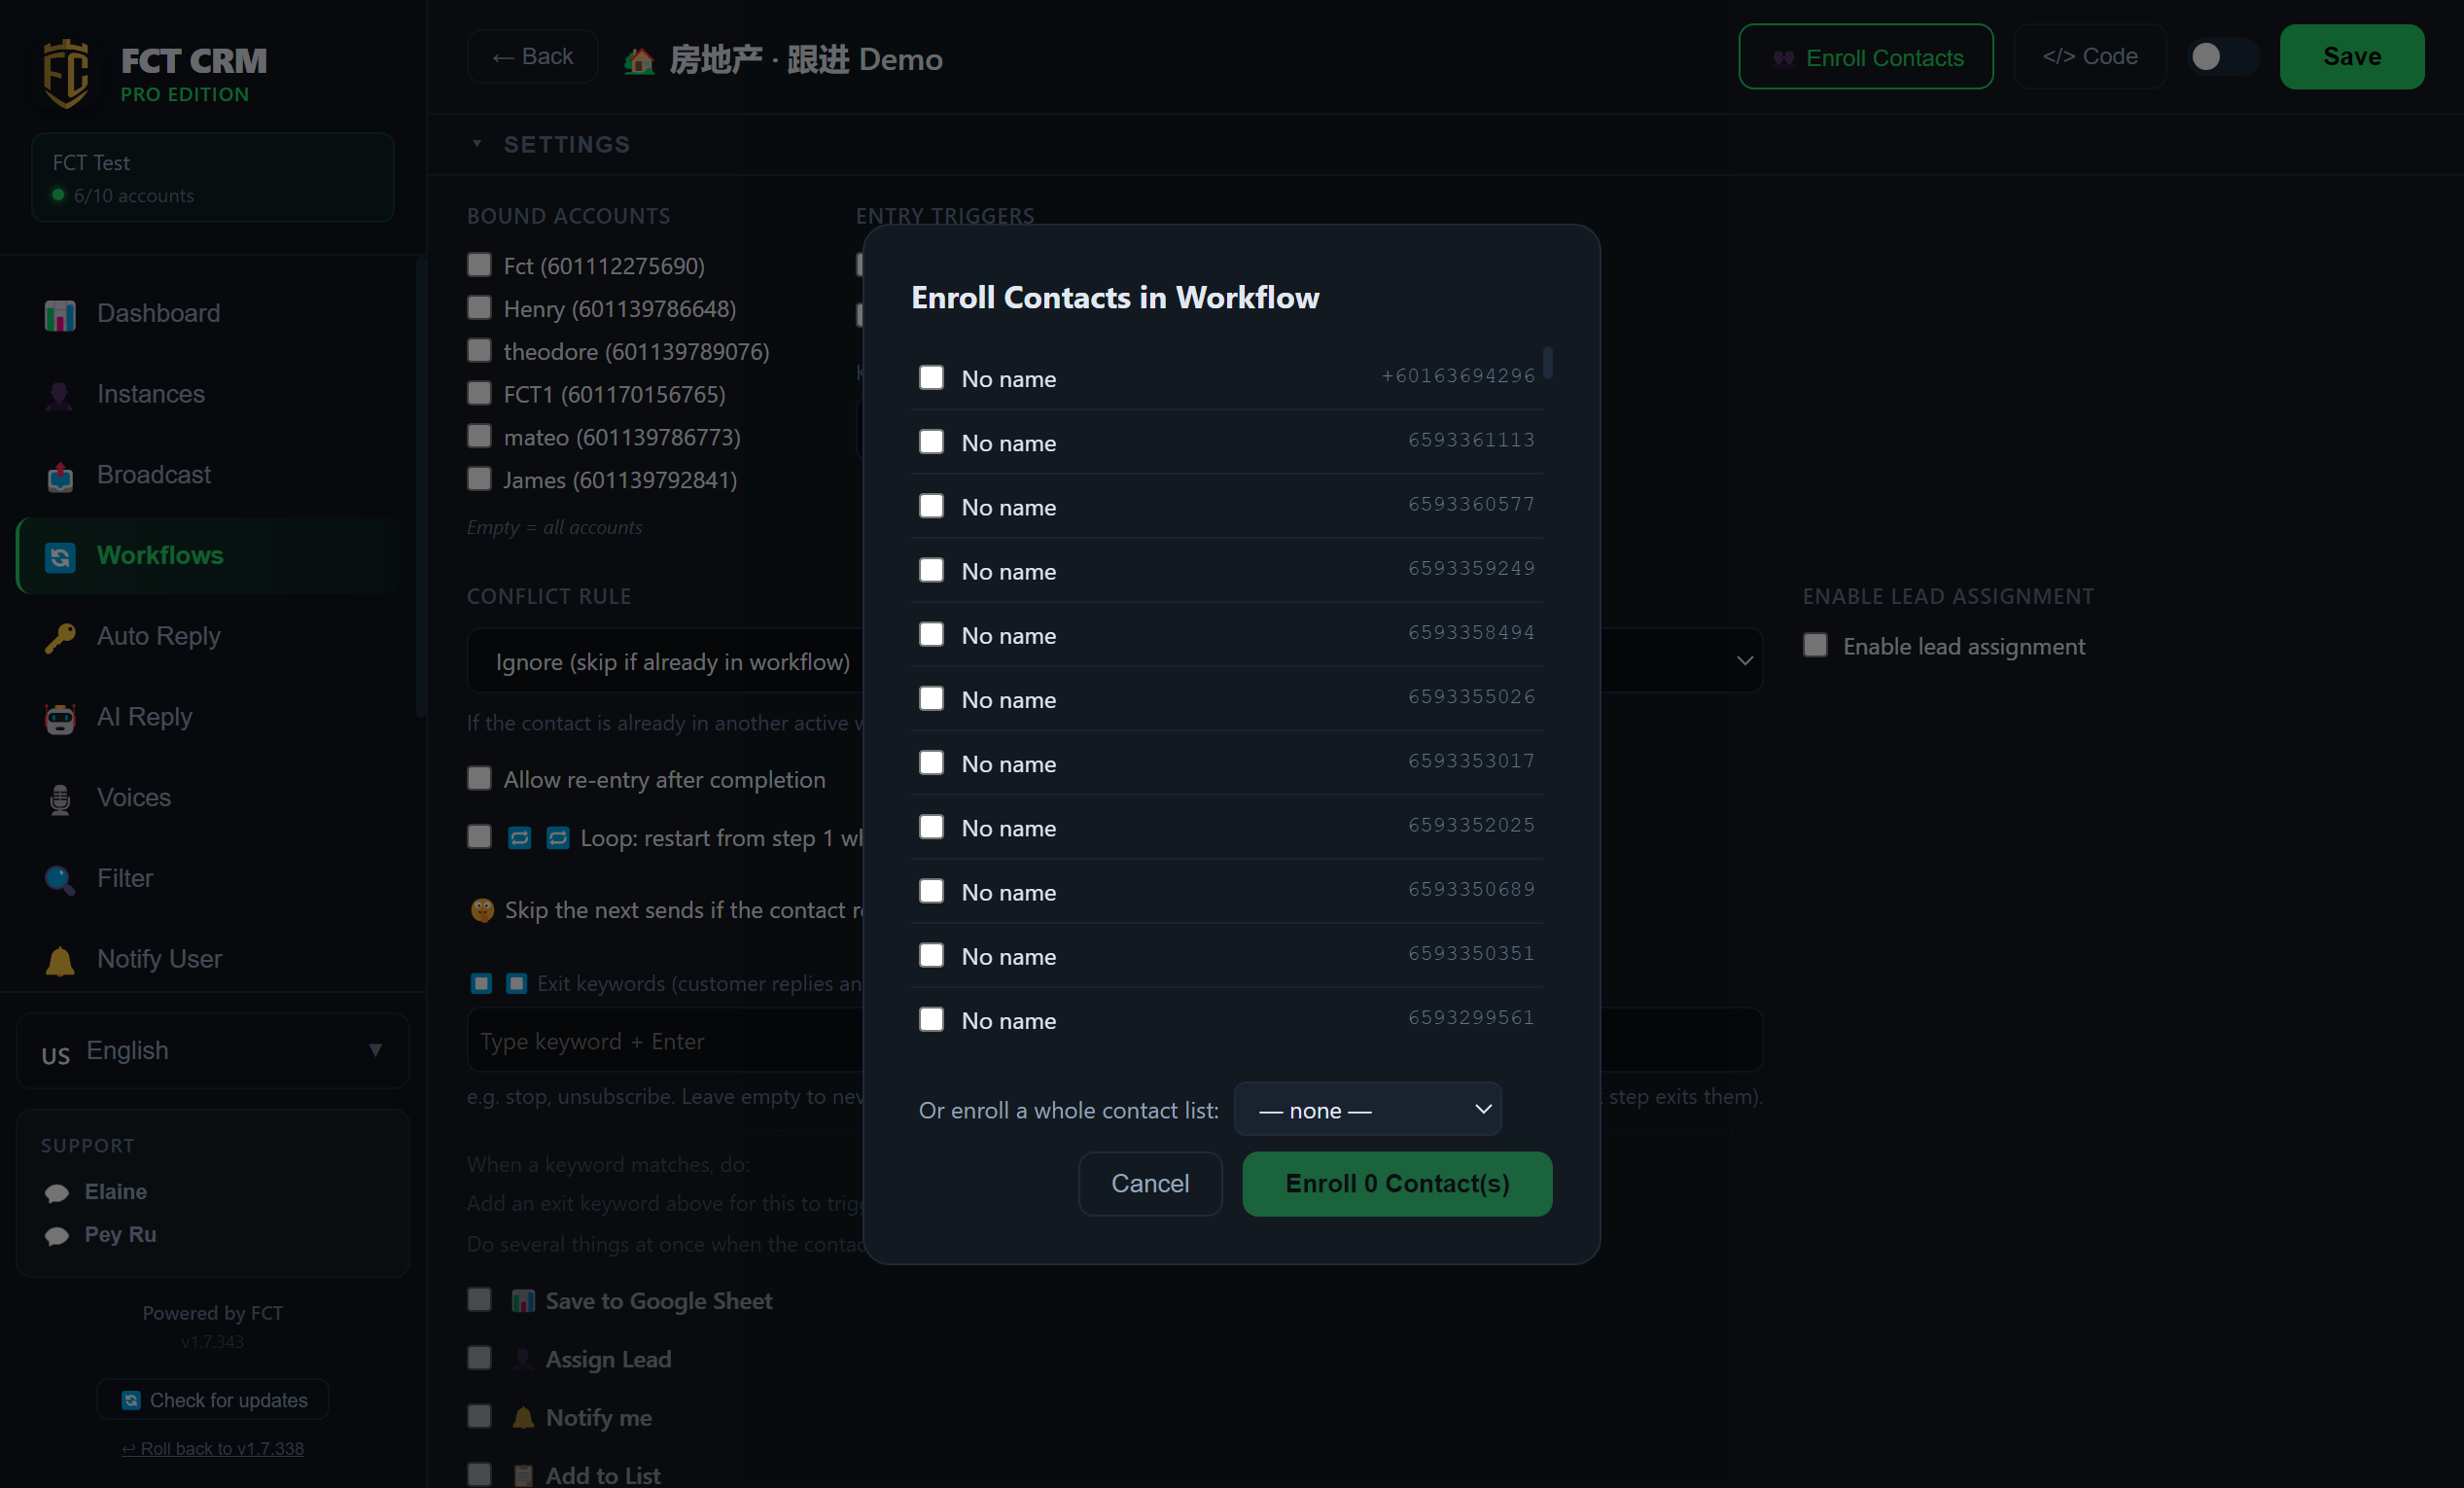
- In the list, click the workflow's pencil icon to open it, then click Enroll Contacts at the top. This button only exists on a workflow that has been saved.
- In the Enroll Contacts in Workflow window that opens, tick the contacts you want to enroll.
- To add a whole batch at once, choose a list in the dropdown to the right of Or enroll a whole contact list:. The members of that list are ticked automatically.
- Click the Enroll N Contact(s) button at the bottom right. The number on the button is how many people you have selected.
- Back on the workflow list, the Pipeline below shows which step each person has reached.
After enrolling, an account must be able to send
If enrolling warns you that there is no account to send from, or that the assigned account is not connected, connect an account or assign one first. Otherwise the messages cannot go out.
Generate a workflow from past chats
Hand the AI the chats where you closed a deal in the past. It extracts your follow-up wording and timing and generates a draft workflow. An AI engine needs to be set up under Engines first.
- At the top right of the workflow list, click 💬 Generate from history.
- Choose an account and tick the chats to learn from.
- Deals closed before the number was paired can be used too: click Import a chat exported from the phone (.zip / .txt), choose the file exported from the phone, then under I am choose which side of the chat is you.
- Click Generate. Check the wording, the wait time and the order of every step, then click Edit in builder or Save.
How to export a chat on the phone
- Android: open the chat, tap the three dots at the top right, tap More, tap Export chat, then choose Include media.
- iPhone: open the chat, tap the contact's name at the top, tap Export Chat, then choose Attach Media.
Transfer the .zip file you get to the computer and select it. If you chose to include media, the pictures and files you sent at the time come in with it and are attached to the matching steps.
The picture is not on this computer
If the original picture or file of a step is not on this computer, that step is left with an empty slot. After saving, simply pick the file again in the editor.
Save leads to a Google Sheet
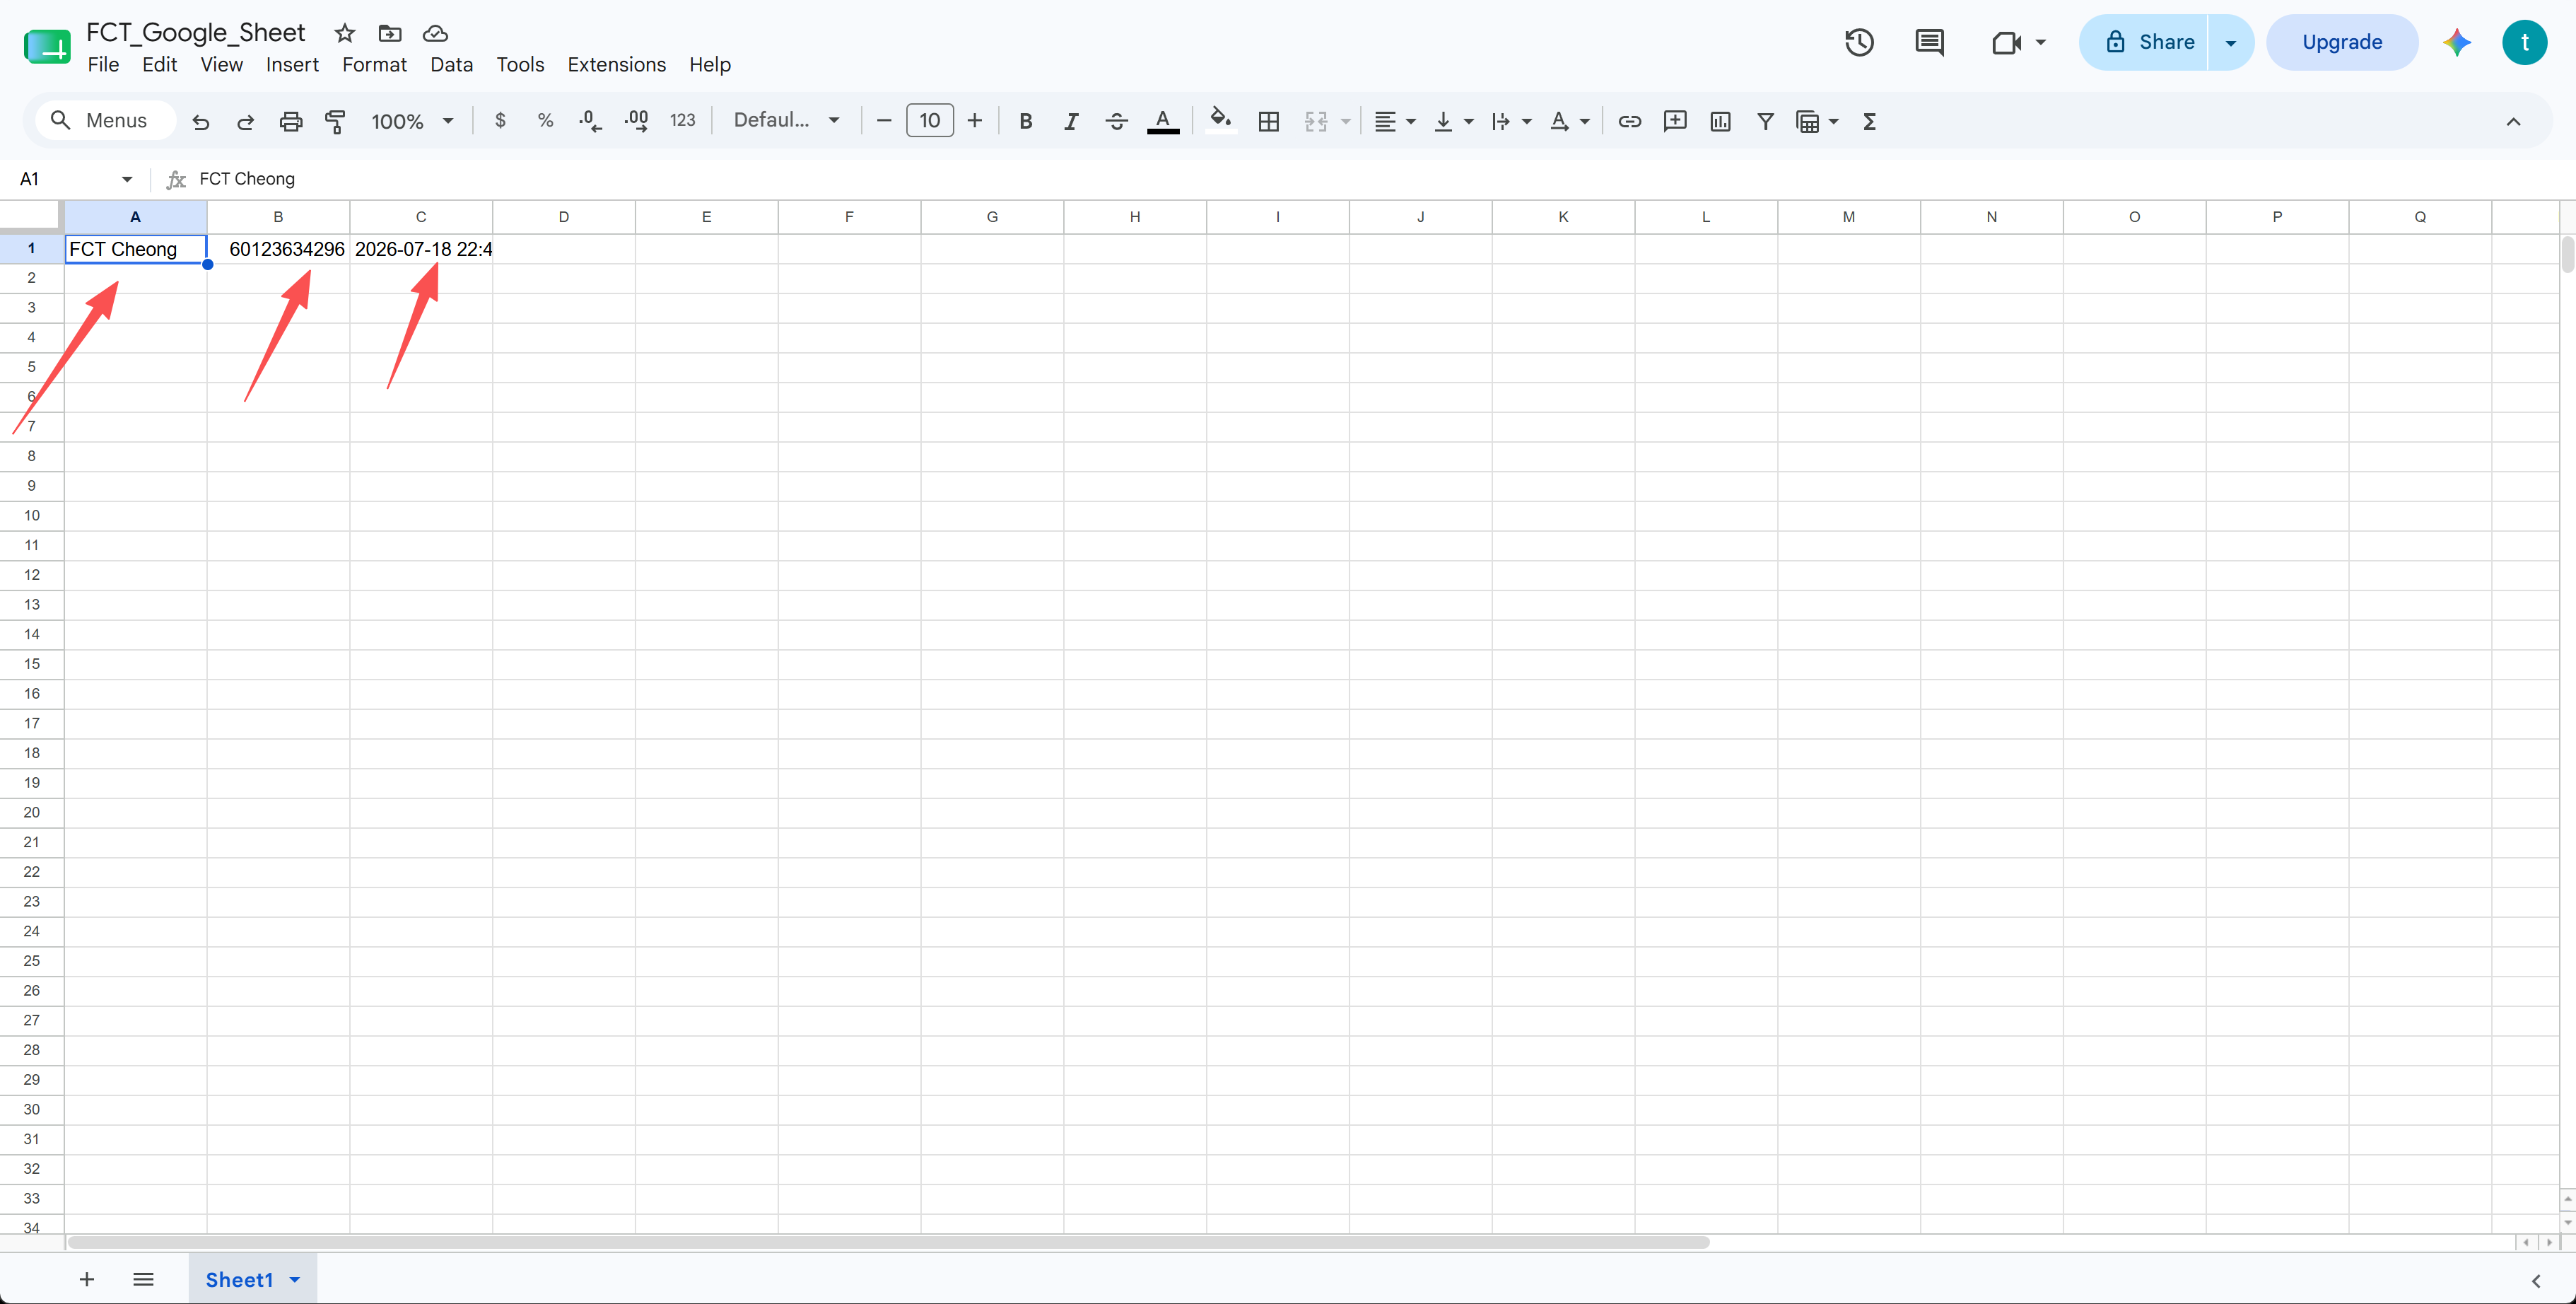
Log every new lead automatically — an Action Block step appends each contact's name, phone and time as a new row in your own Google Sheet.
1. In a workflow, add an Action Block step and tick "Save to Google Sheet", then choose which columns to save — Name, Phone, Date/Time, Tags, Workflow.
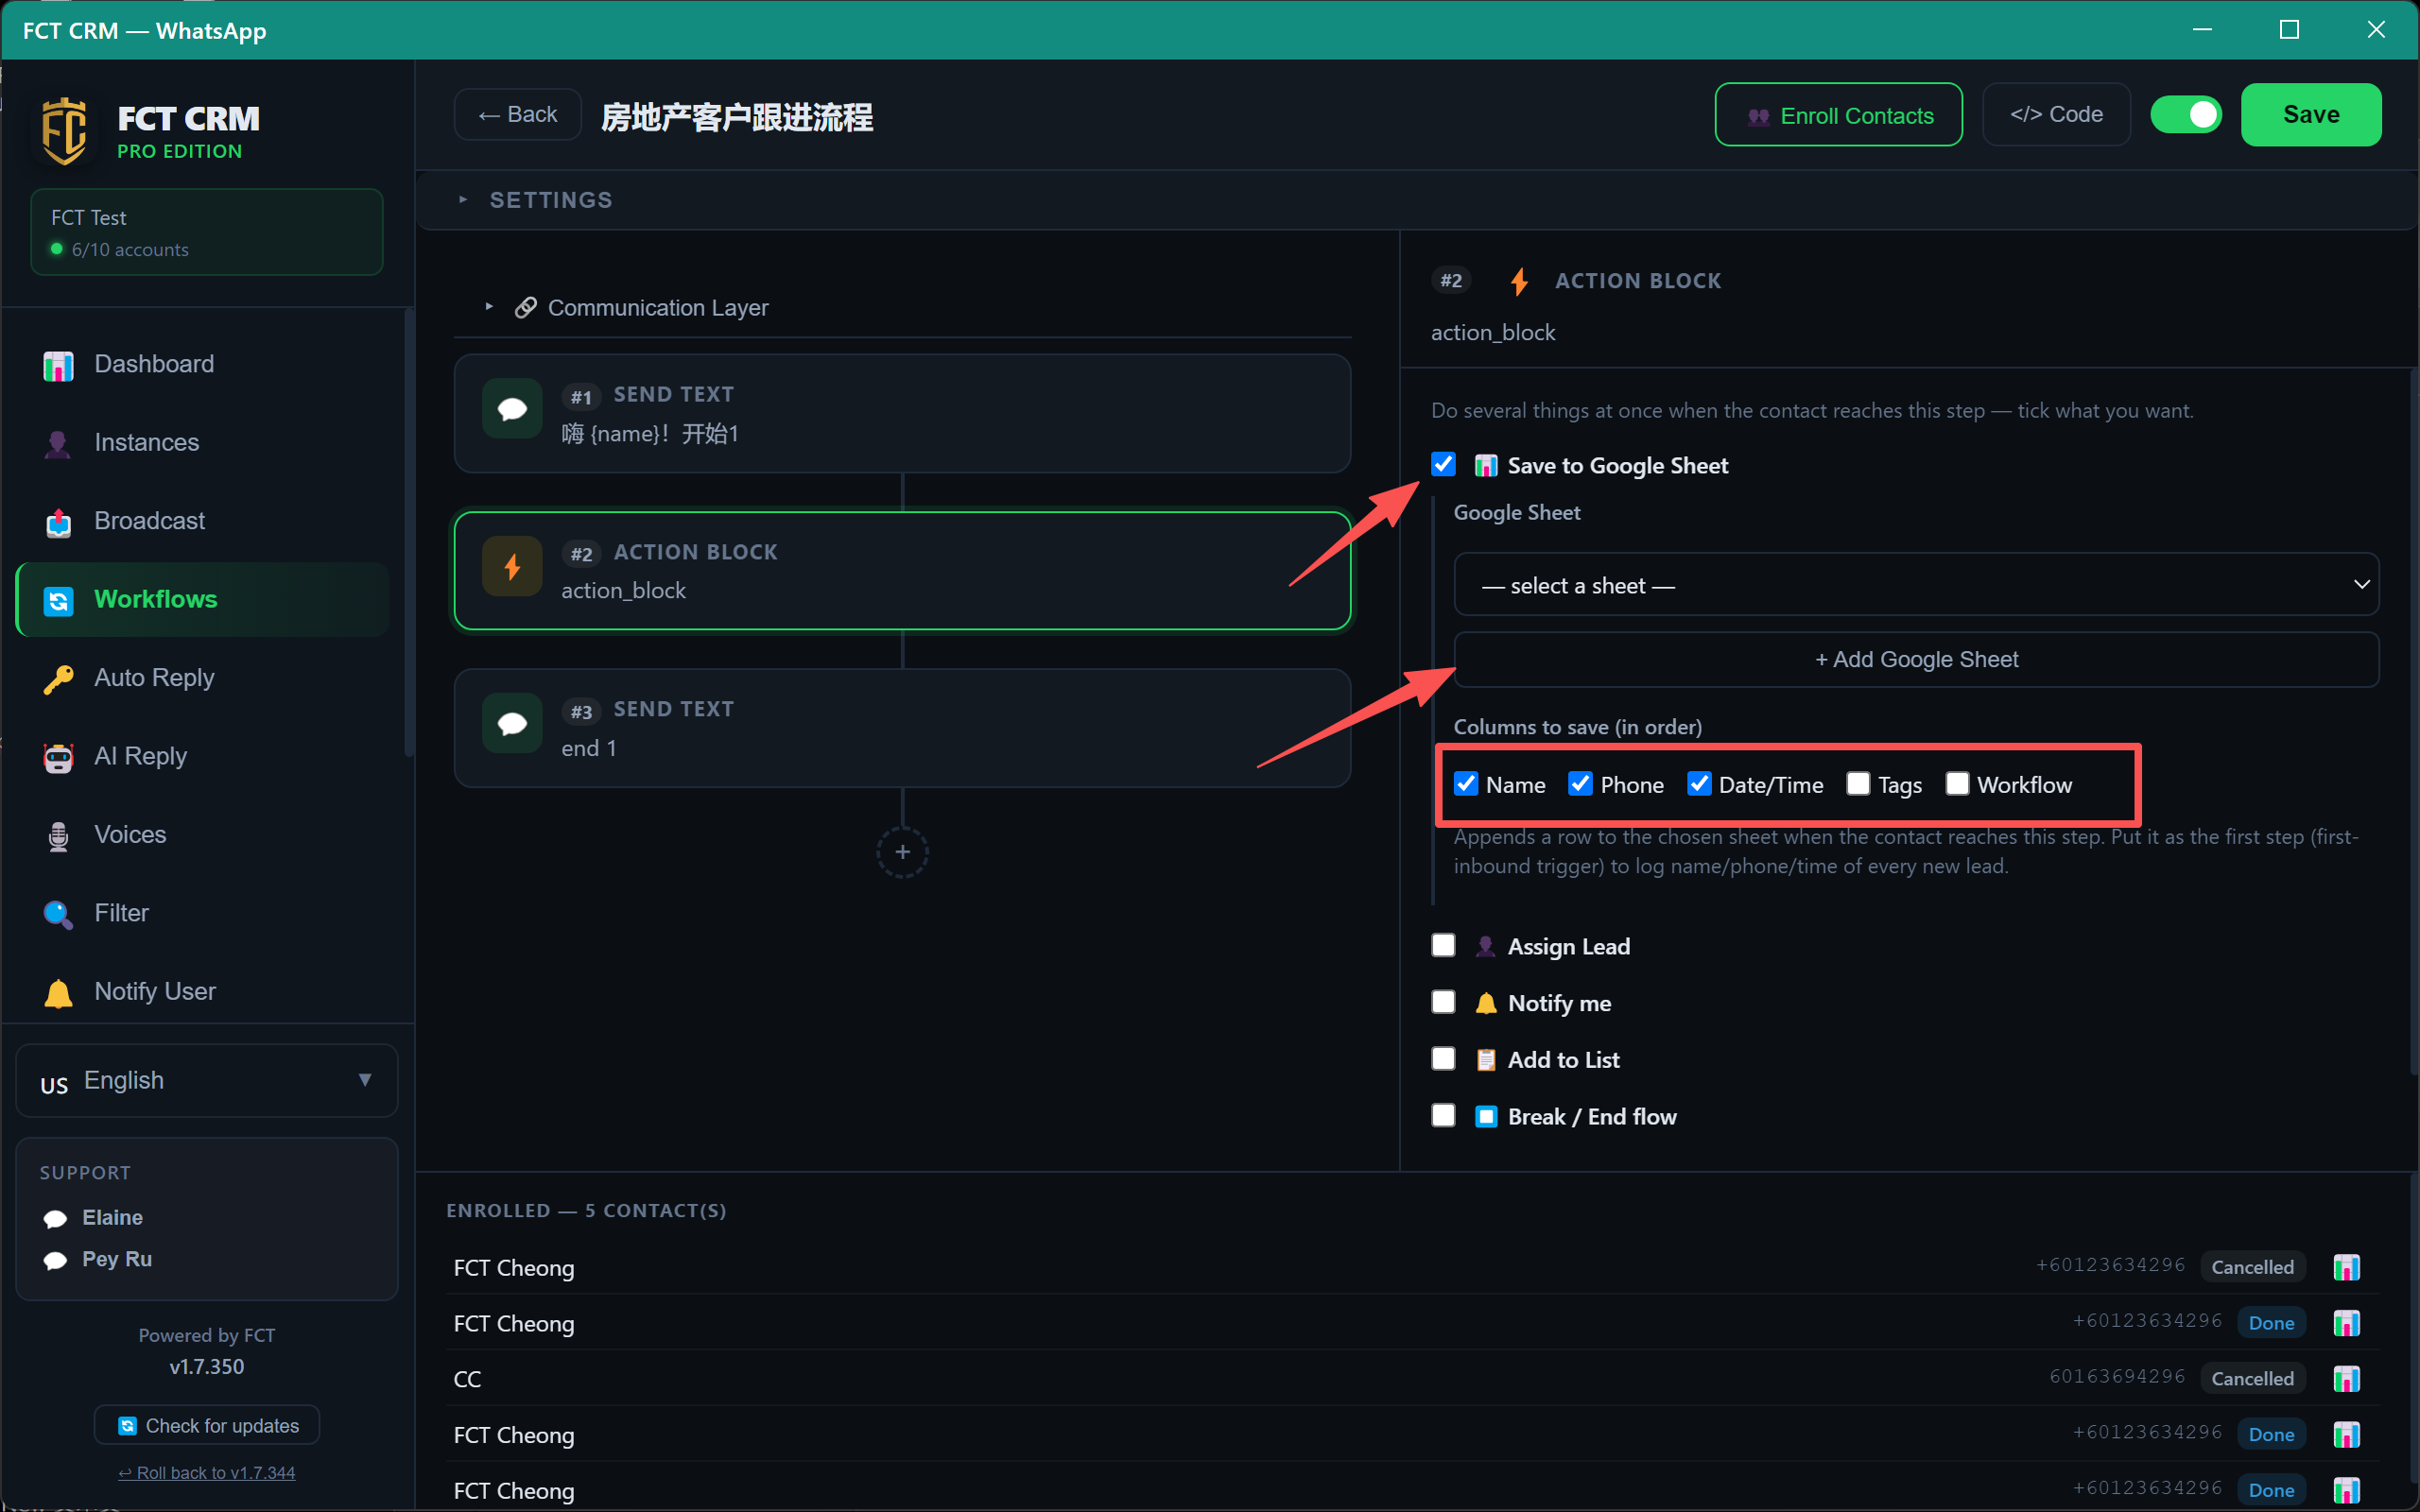
2. Click "+ Add Google Sheet" to open the setup panel, then click "Copy script" — you'll paste it into Google in a moment.
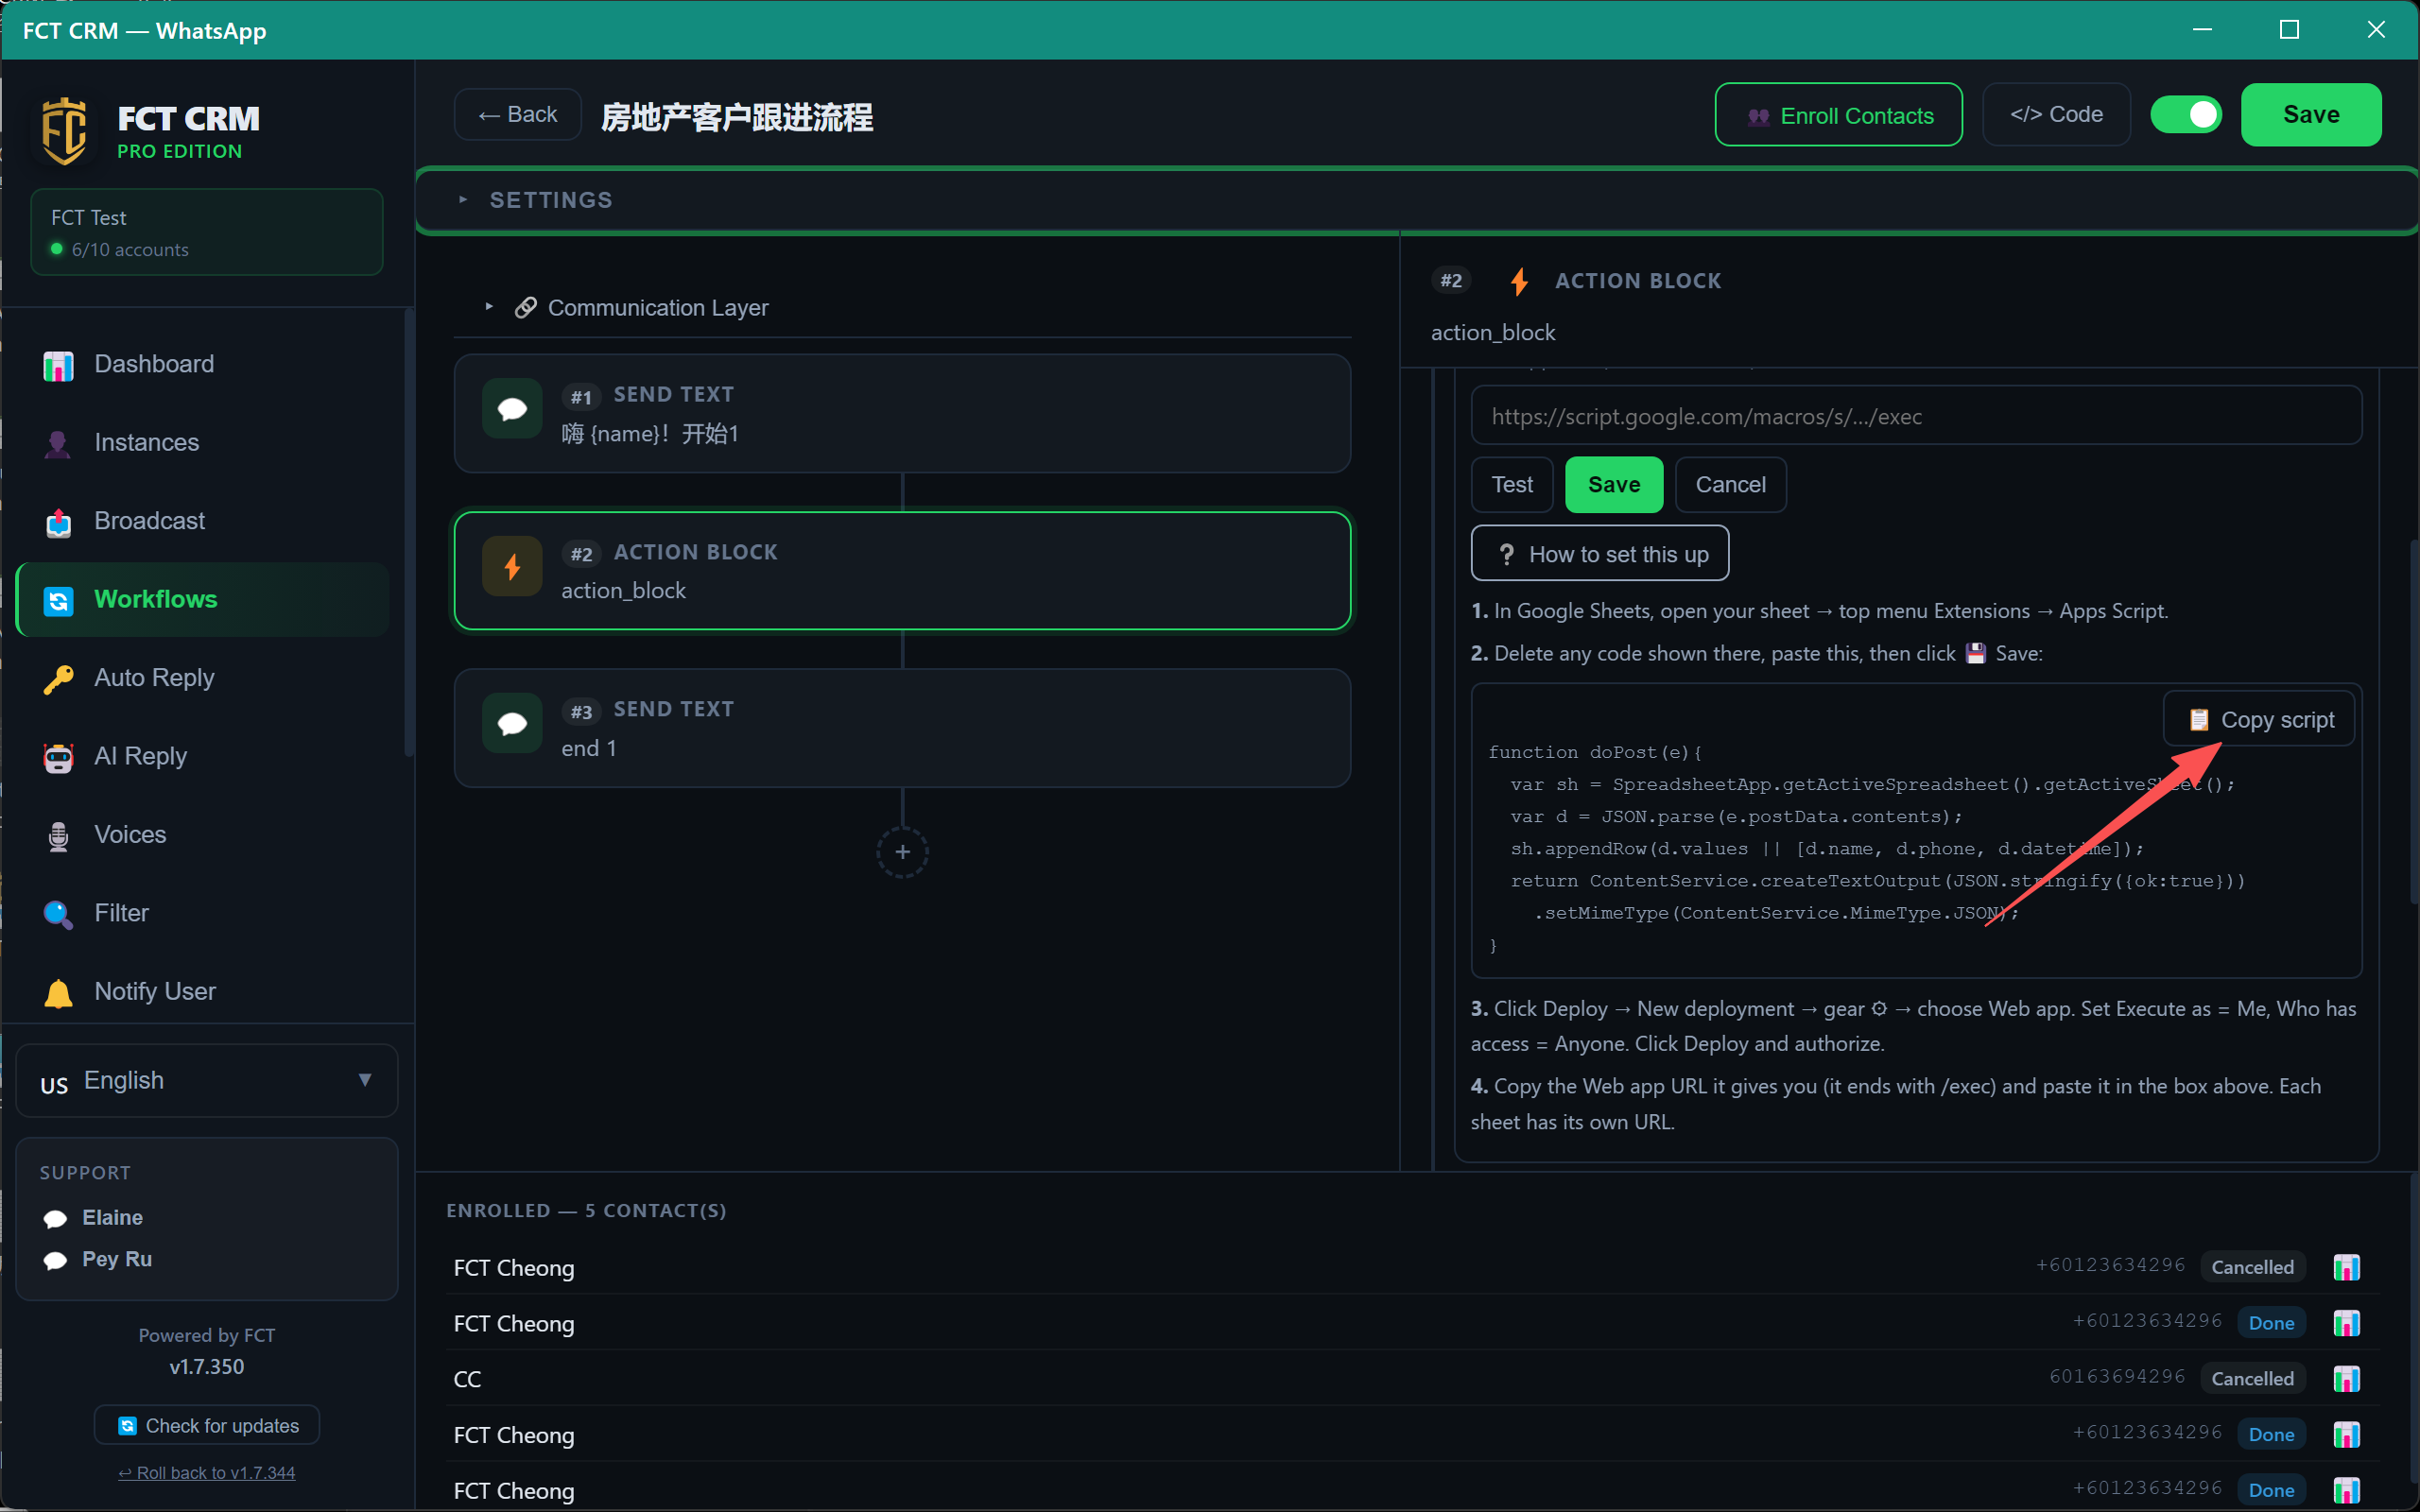
3. In a new browser tab, open Google Sheets from the Google apps menu.
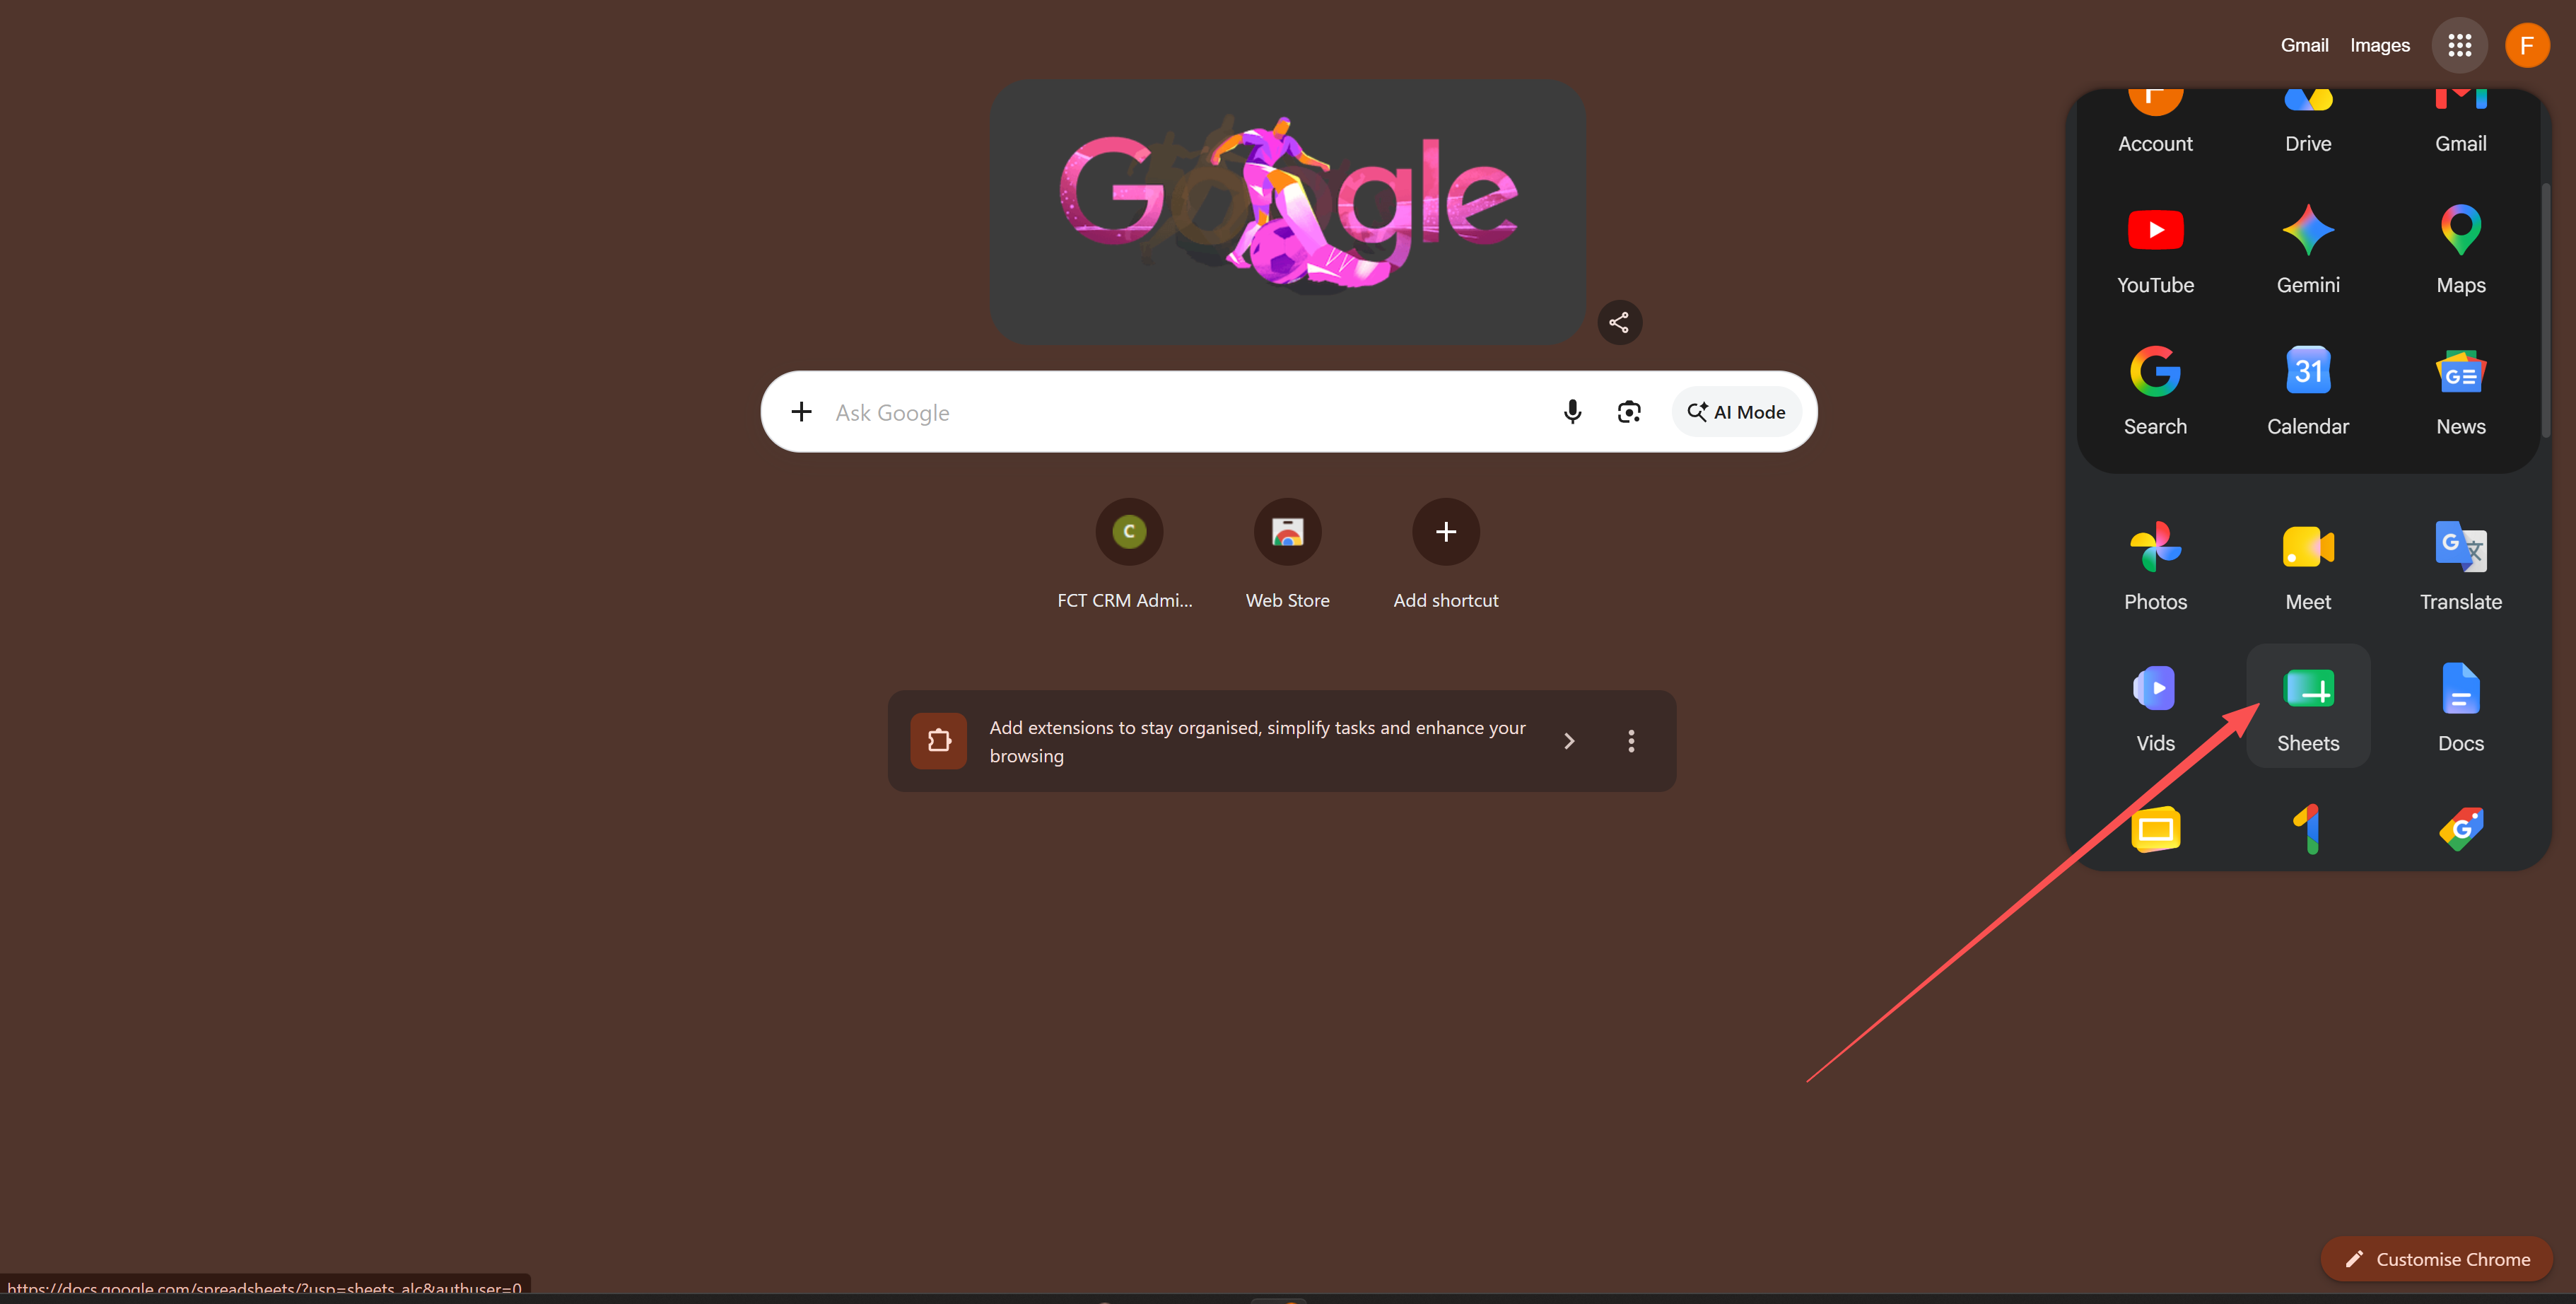
4. Click "Blank spreadsheet" to create a new sheet.
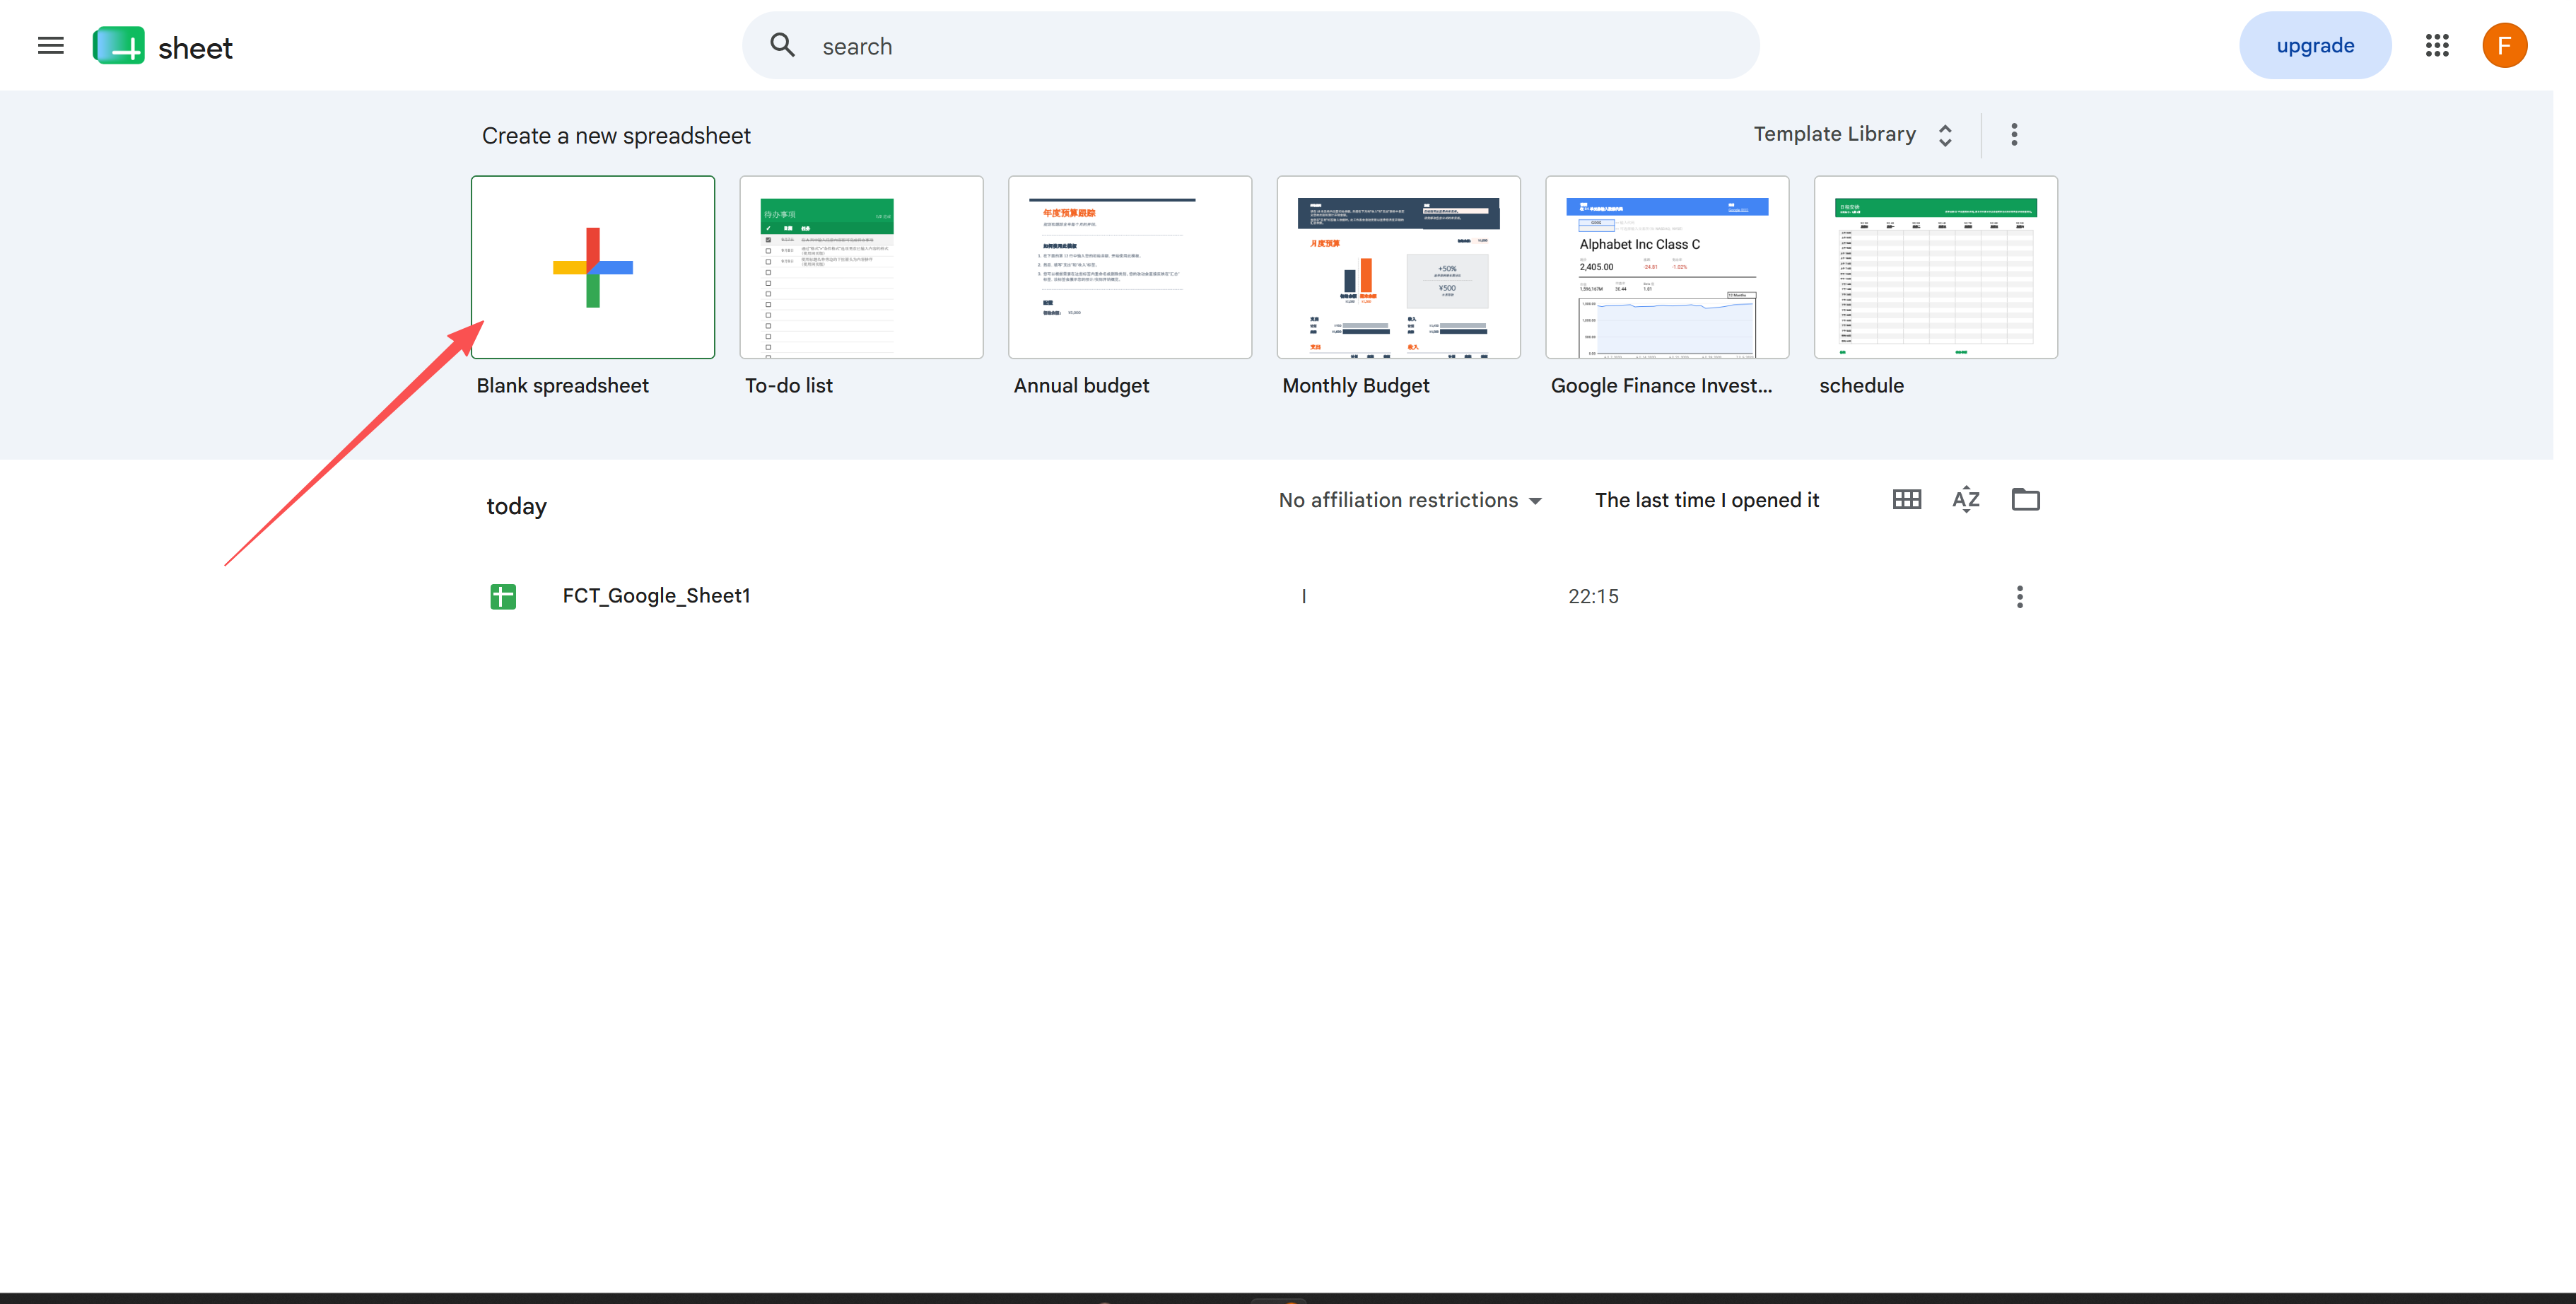
5. In the sheet, open the Extensions menu and click "Apps Script".
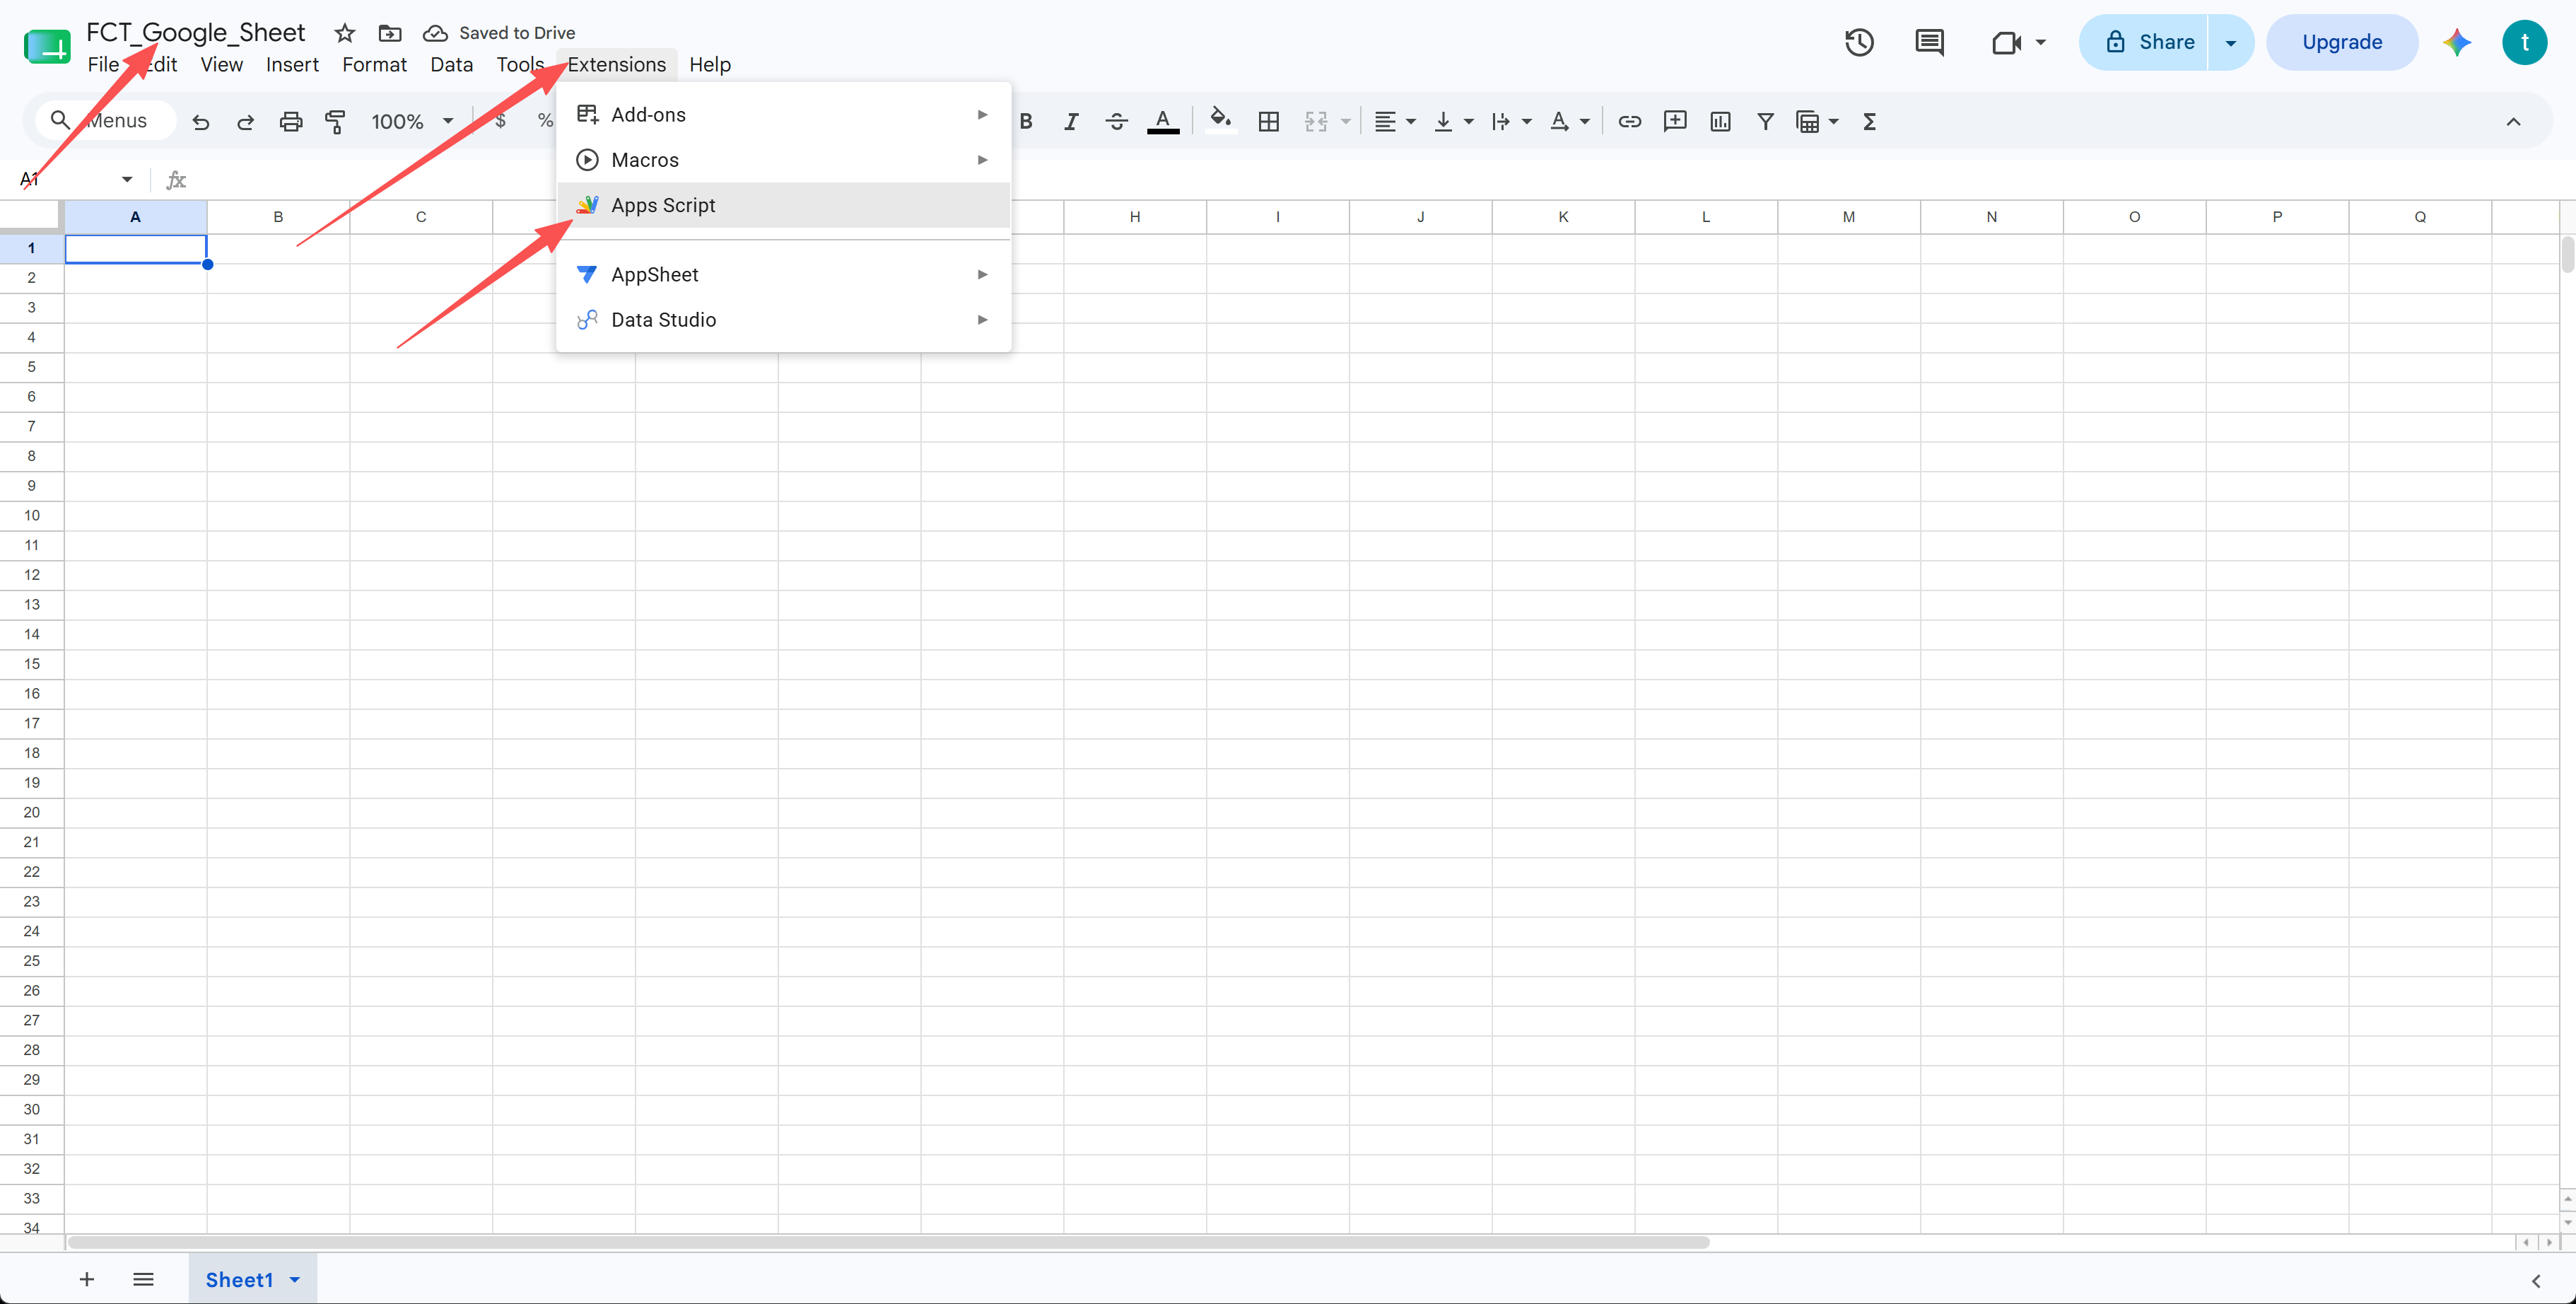
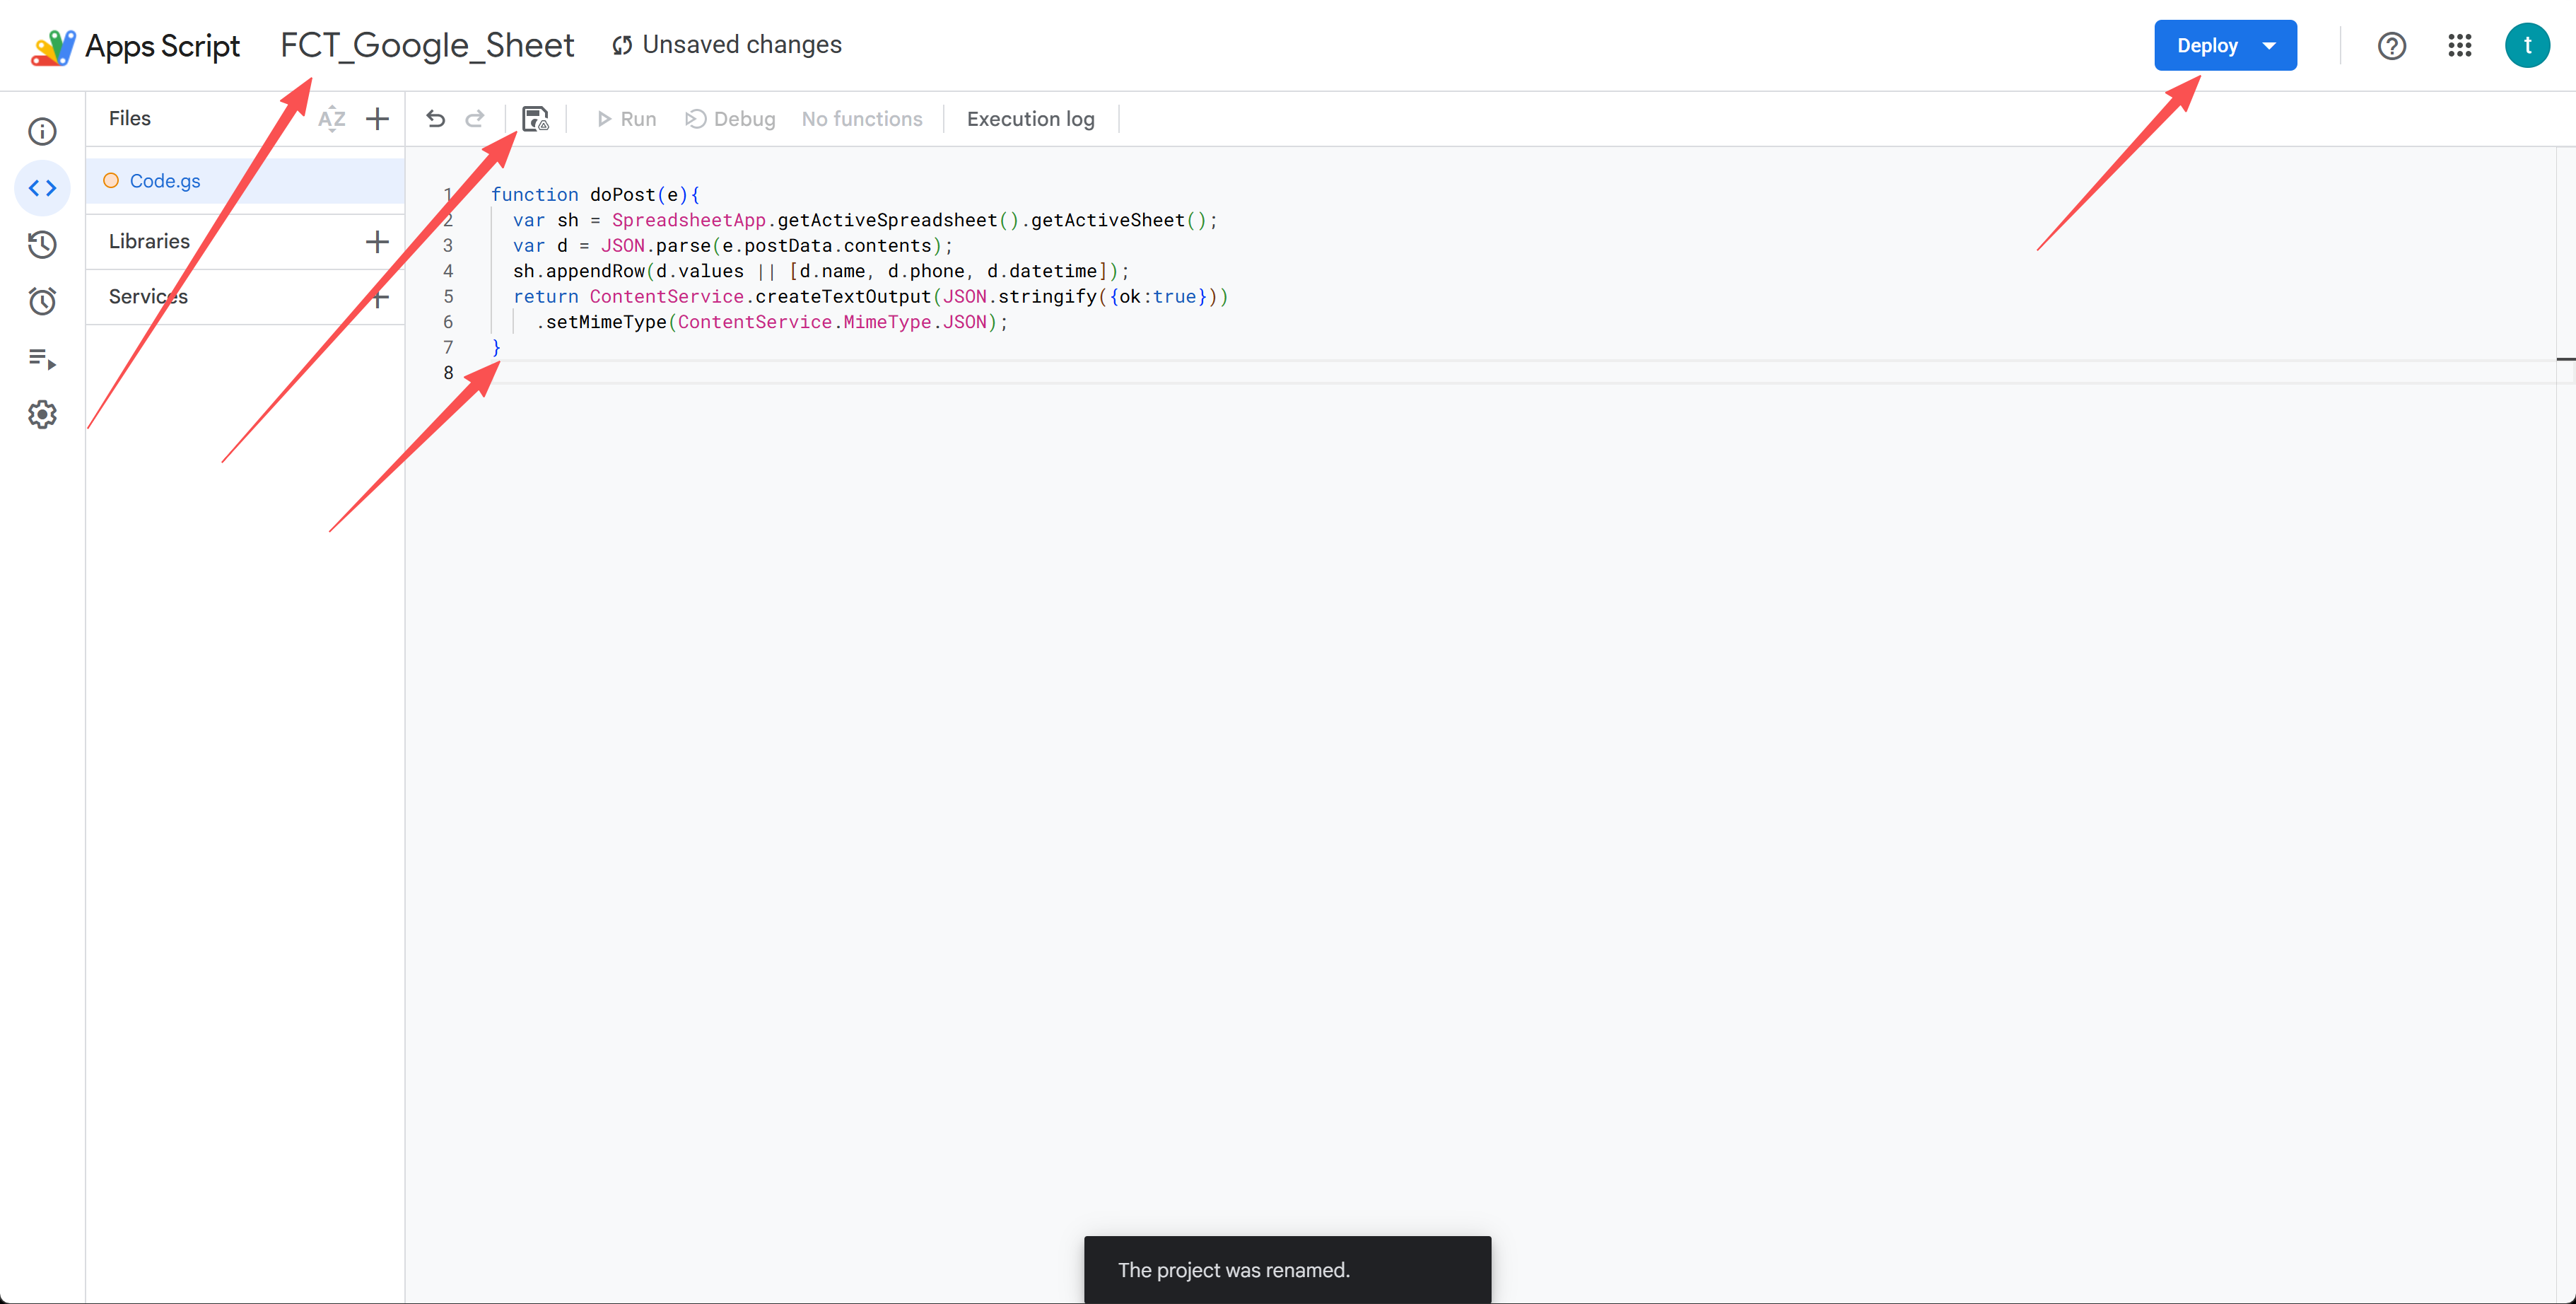
6. Delete any code already in the editor, paste the script below, then click the Save icon.
function doPost(e) {
  var sh = SpreadsheetApp.getActiveSpreadsheet().getActiveSheet();
  var d = JSON.parse(e.postData.contents);
  sh.appendRow(d.values || [d.name, d.phone, d.datetime]);
  return ContentService
    .createTextOutput(JSON.stringify({ ok: true }))
    .setMimeType(ContentService.MimeType.JSON);
}
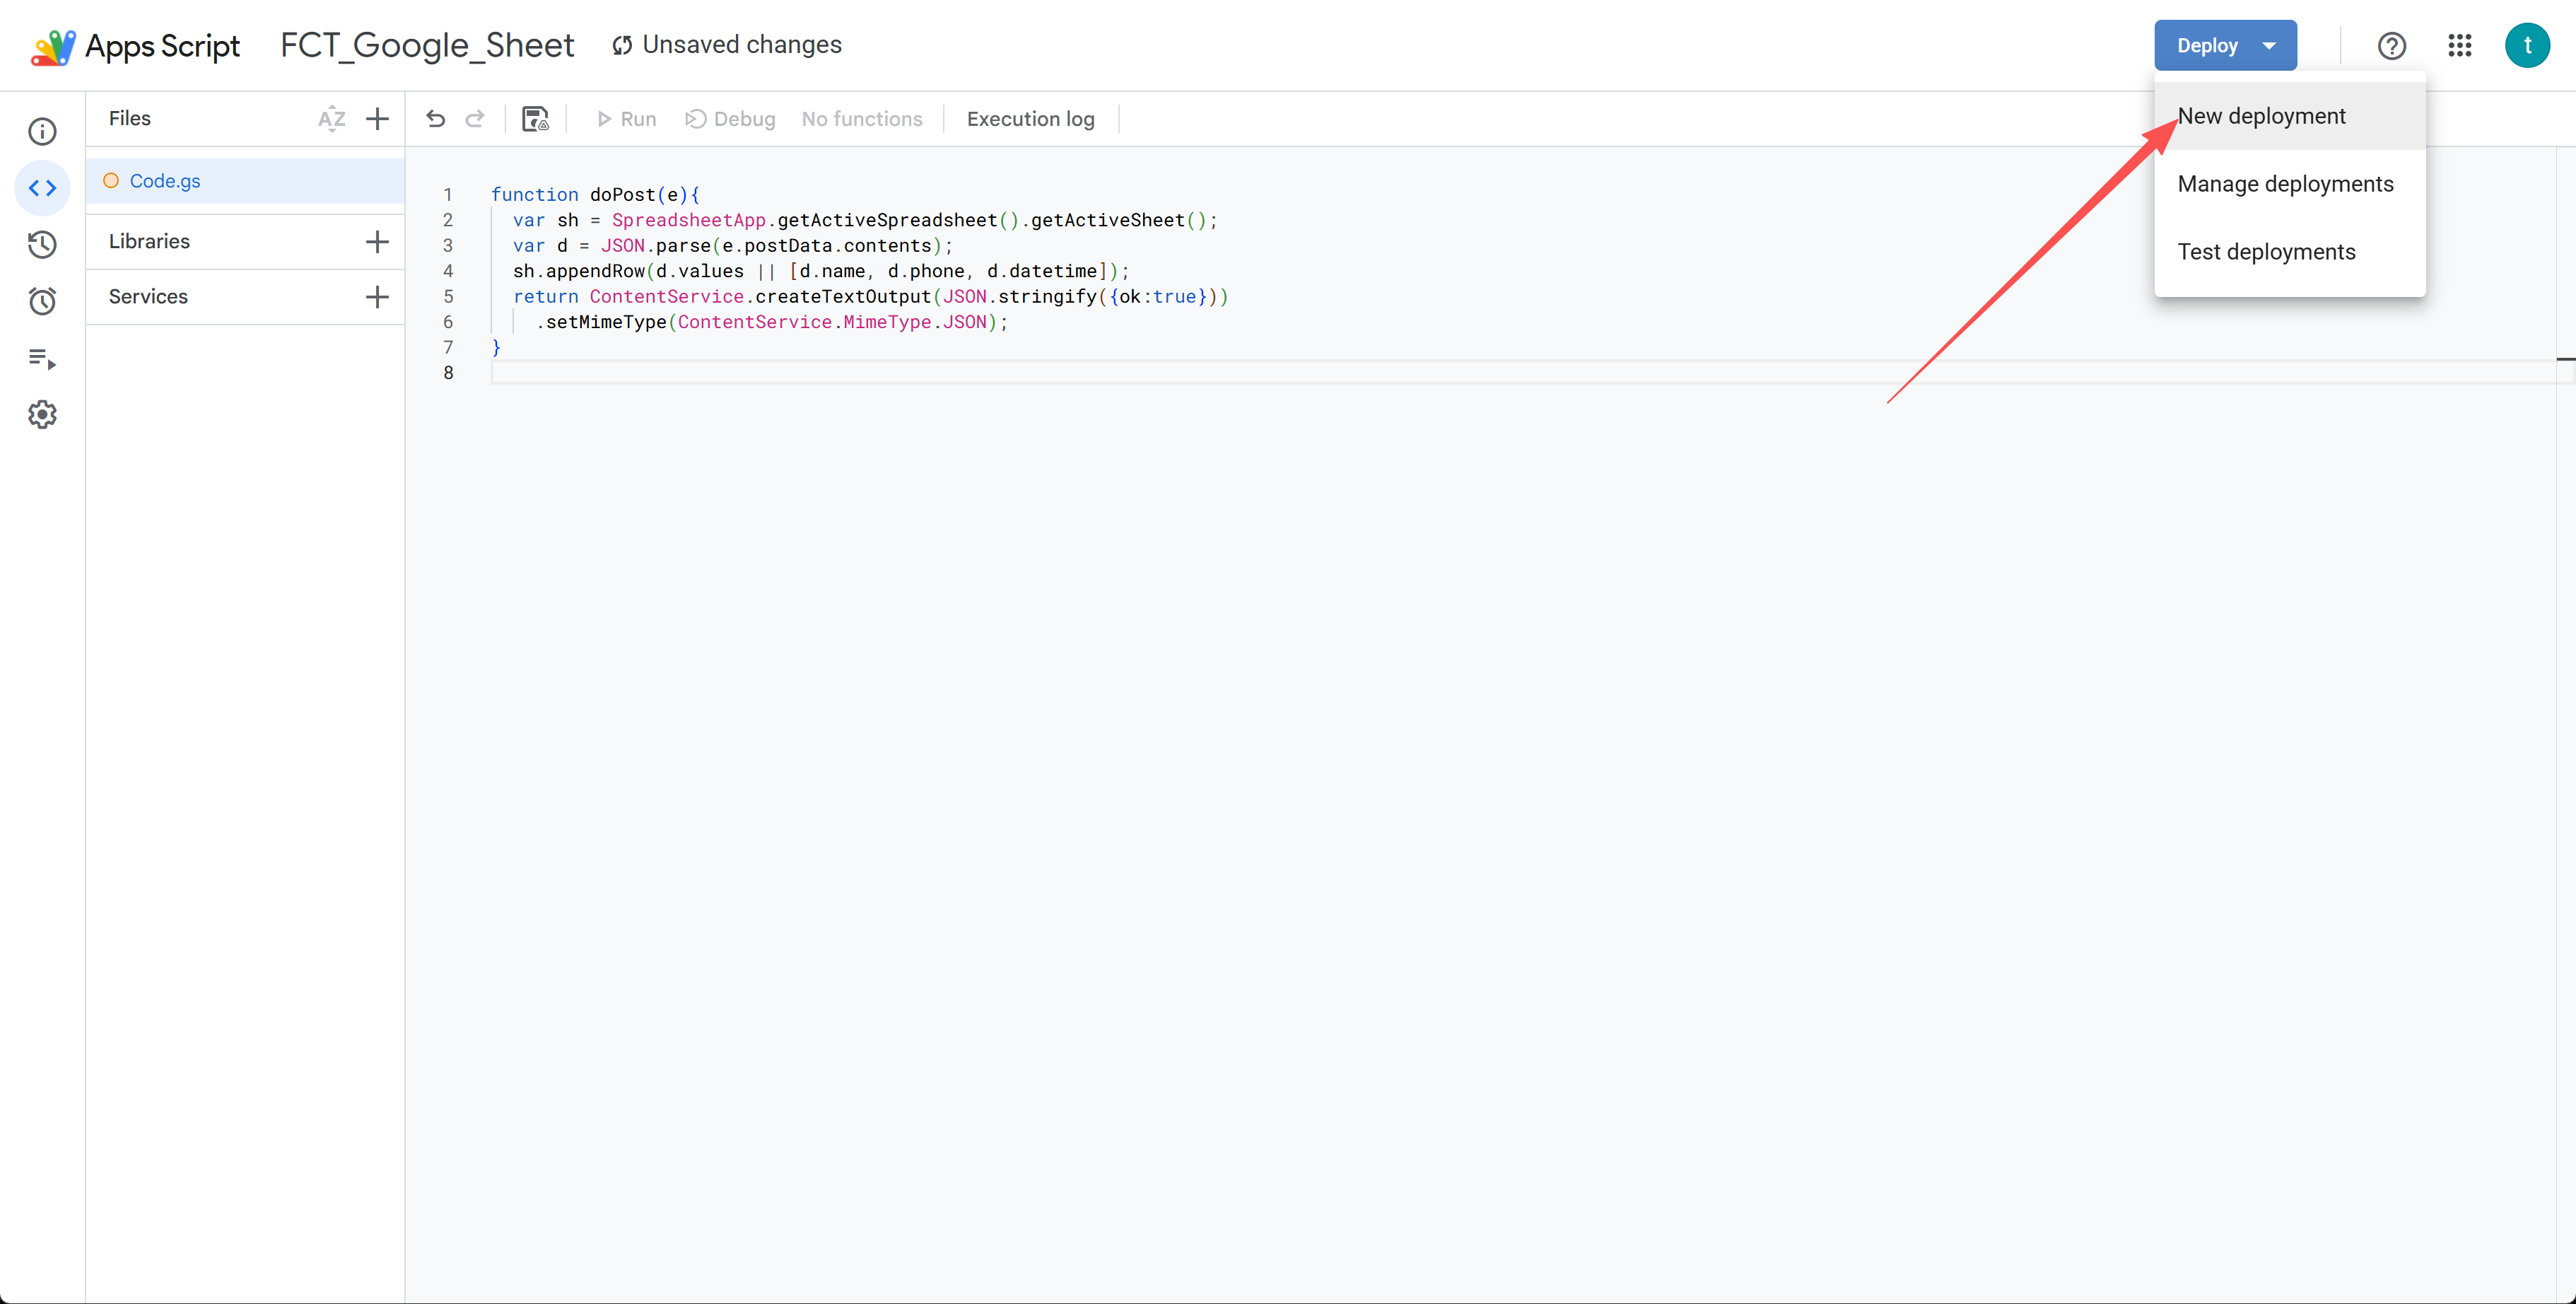
7. Click "Deploy" → "New deployment".
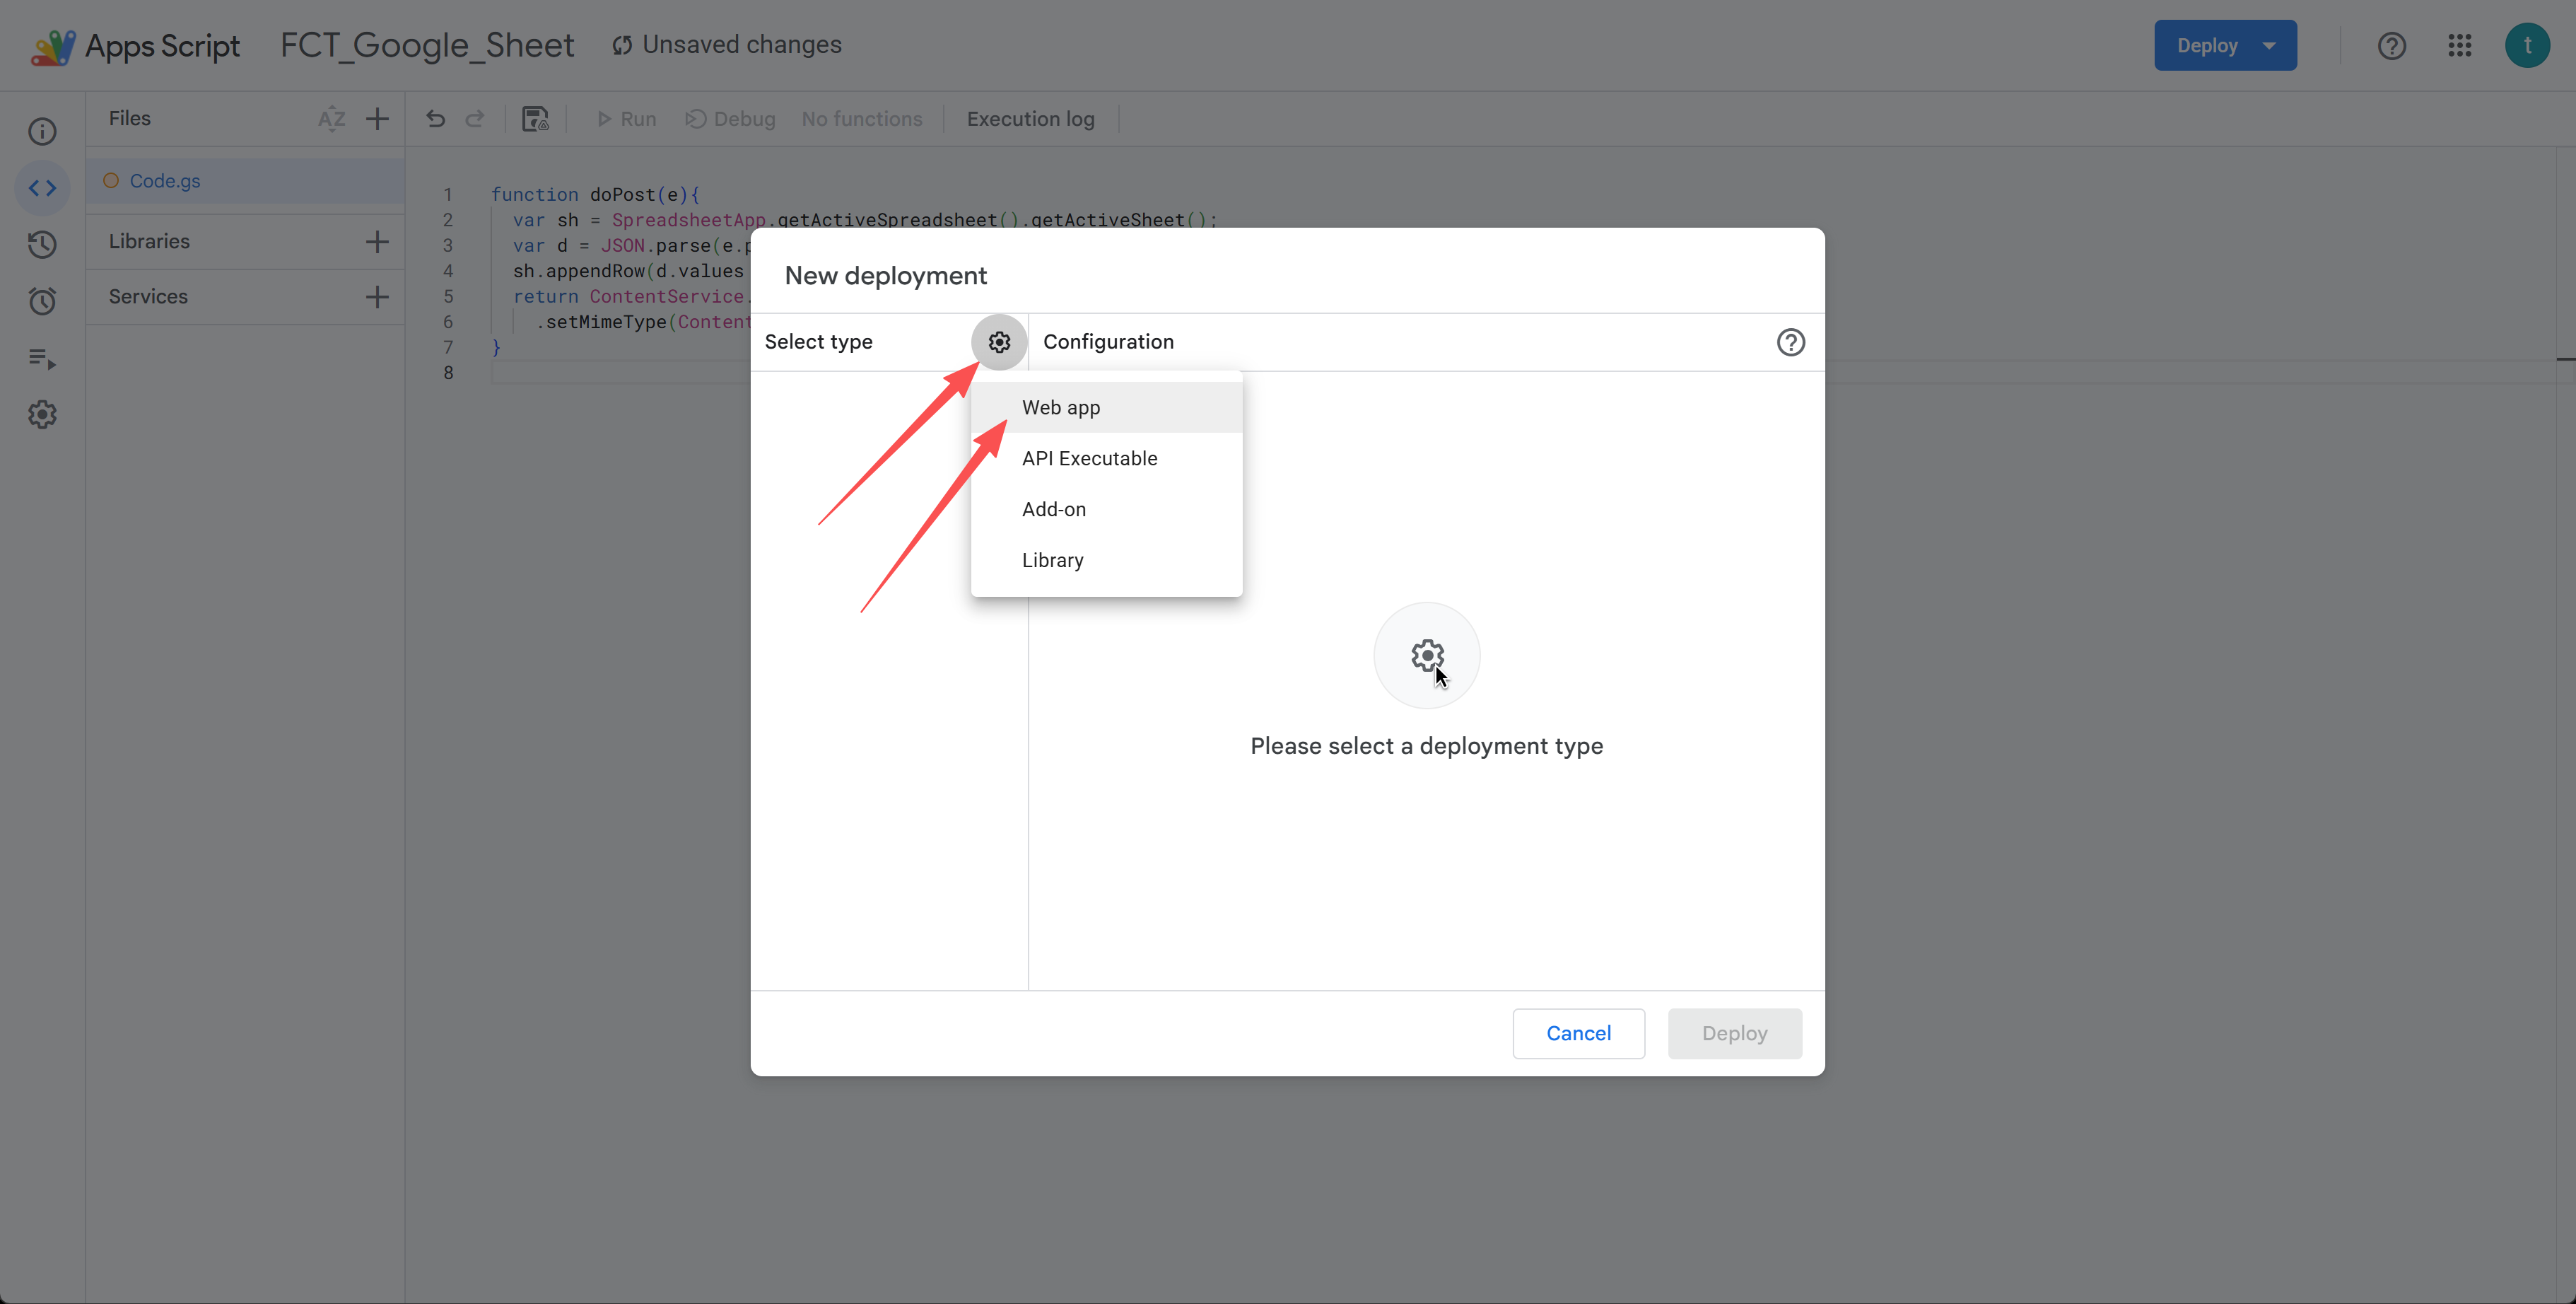
8. Click the gear icon next to "Select type" and choose "Web app".
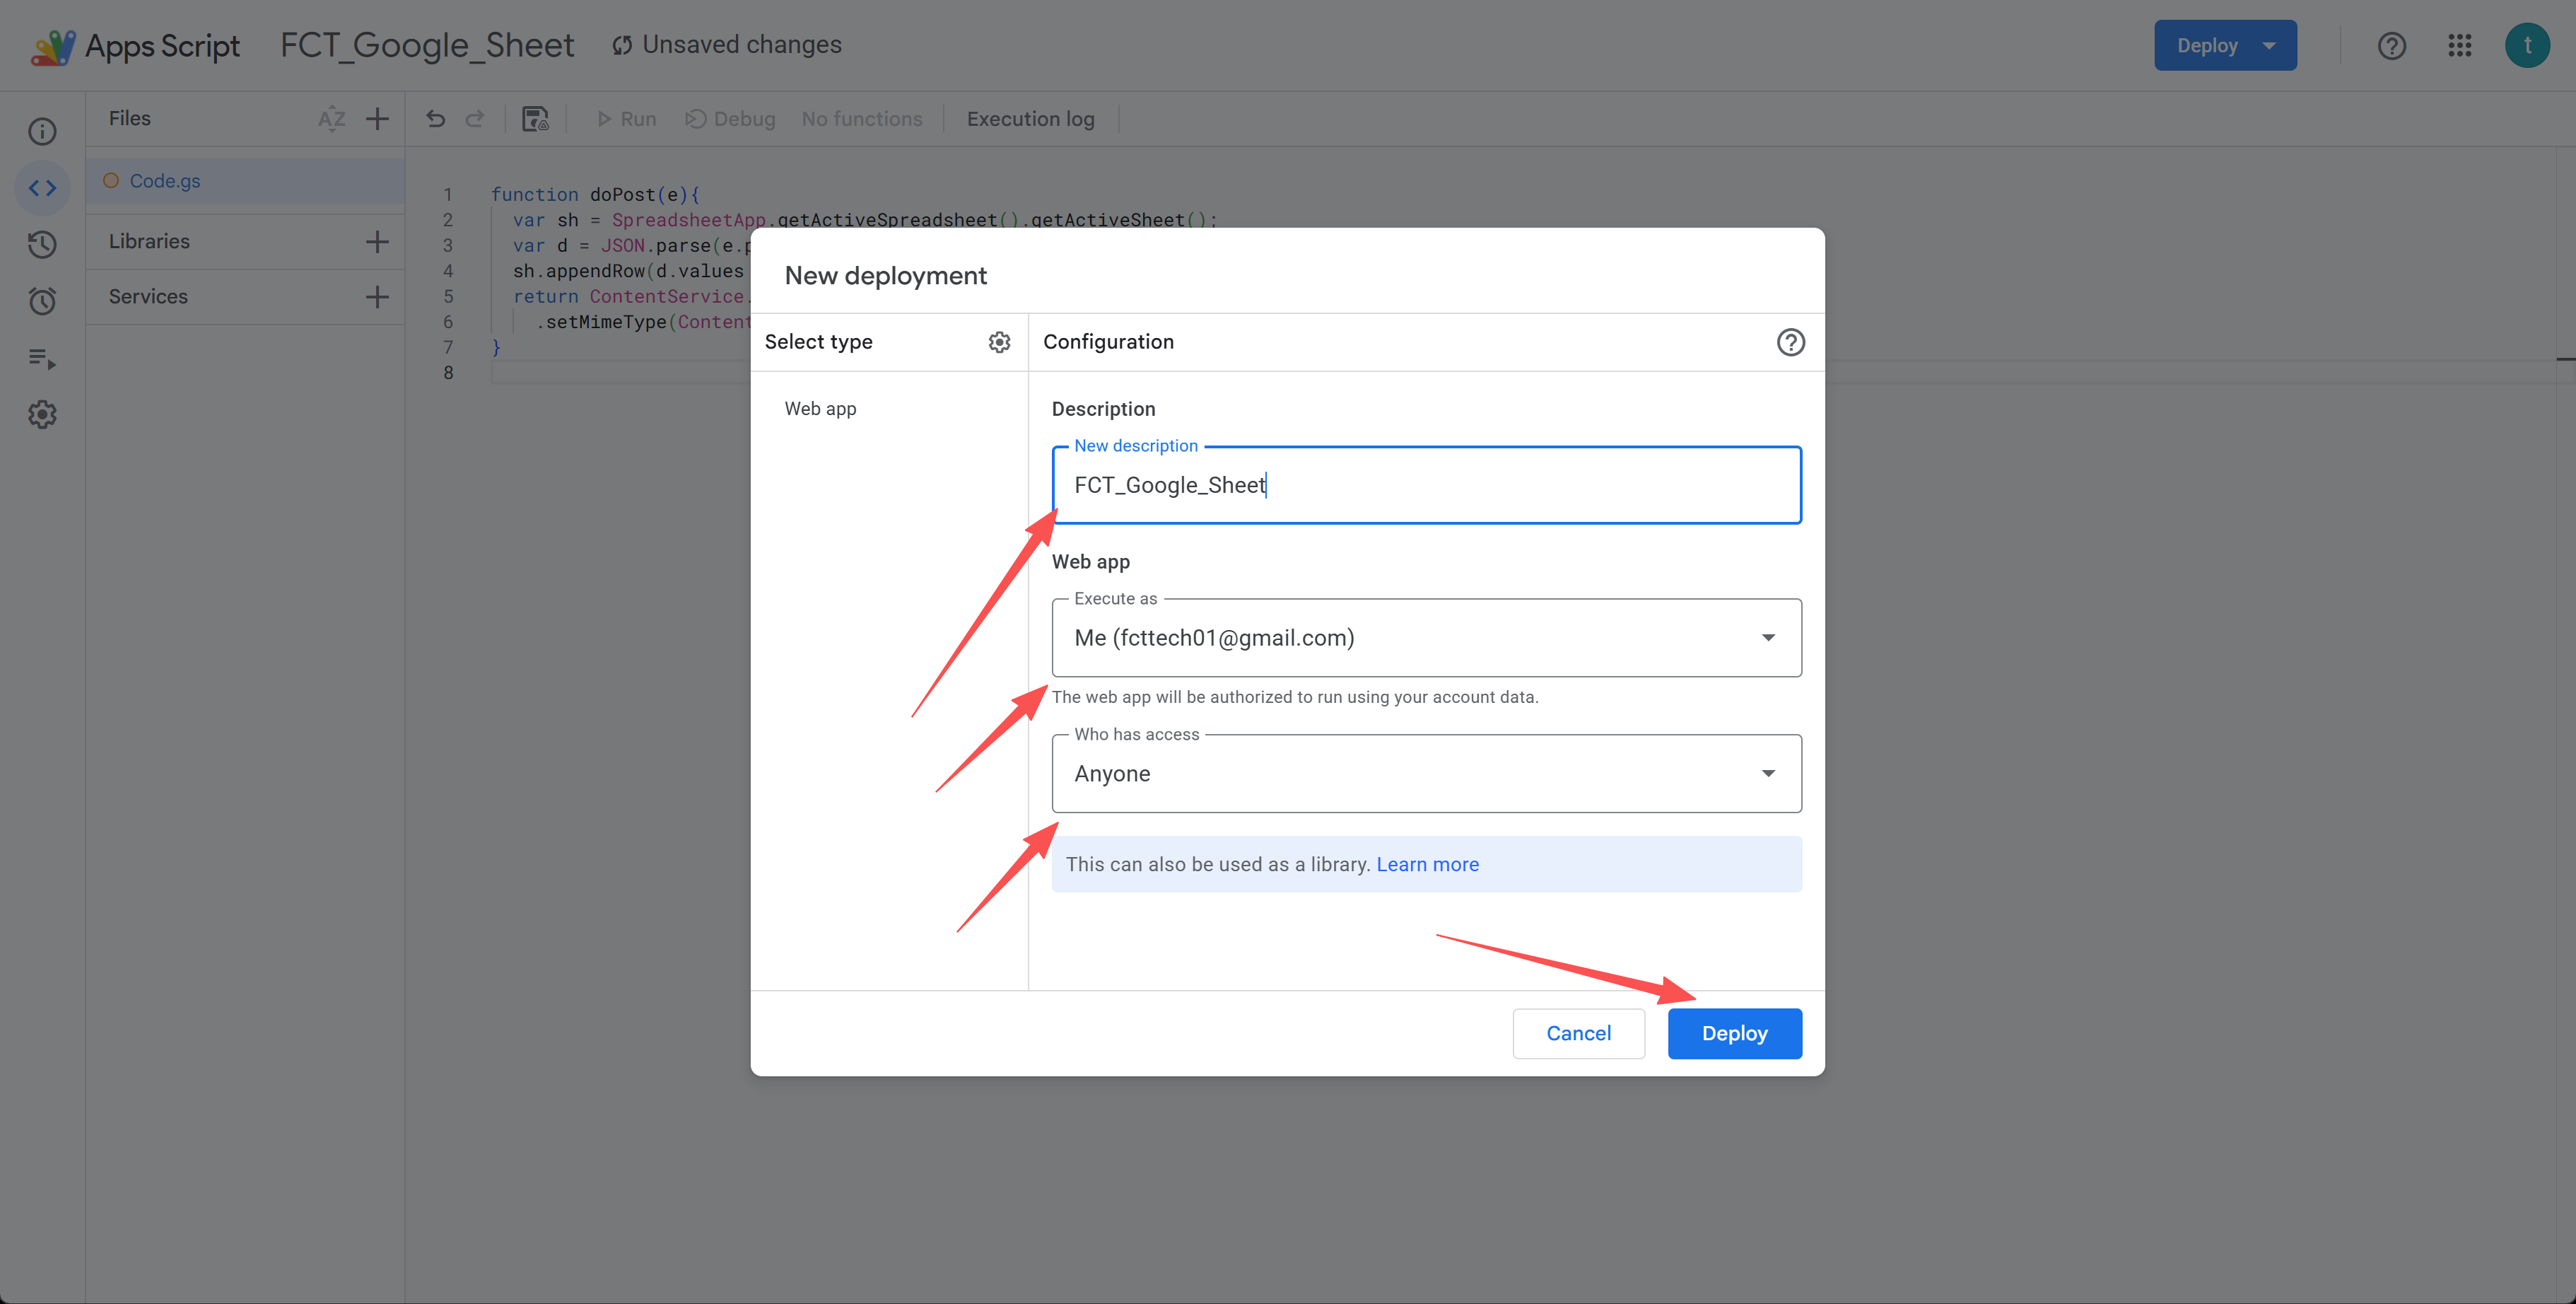
9. Set "Execute as" to Me and "Who has access" to Anyone (this is critical — the app can't post to the sheet otherwise), then click Deploy.
10. Click "Authorize access" and pick your Google account.
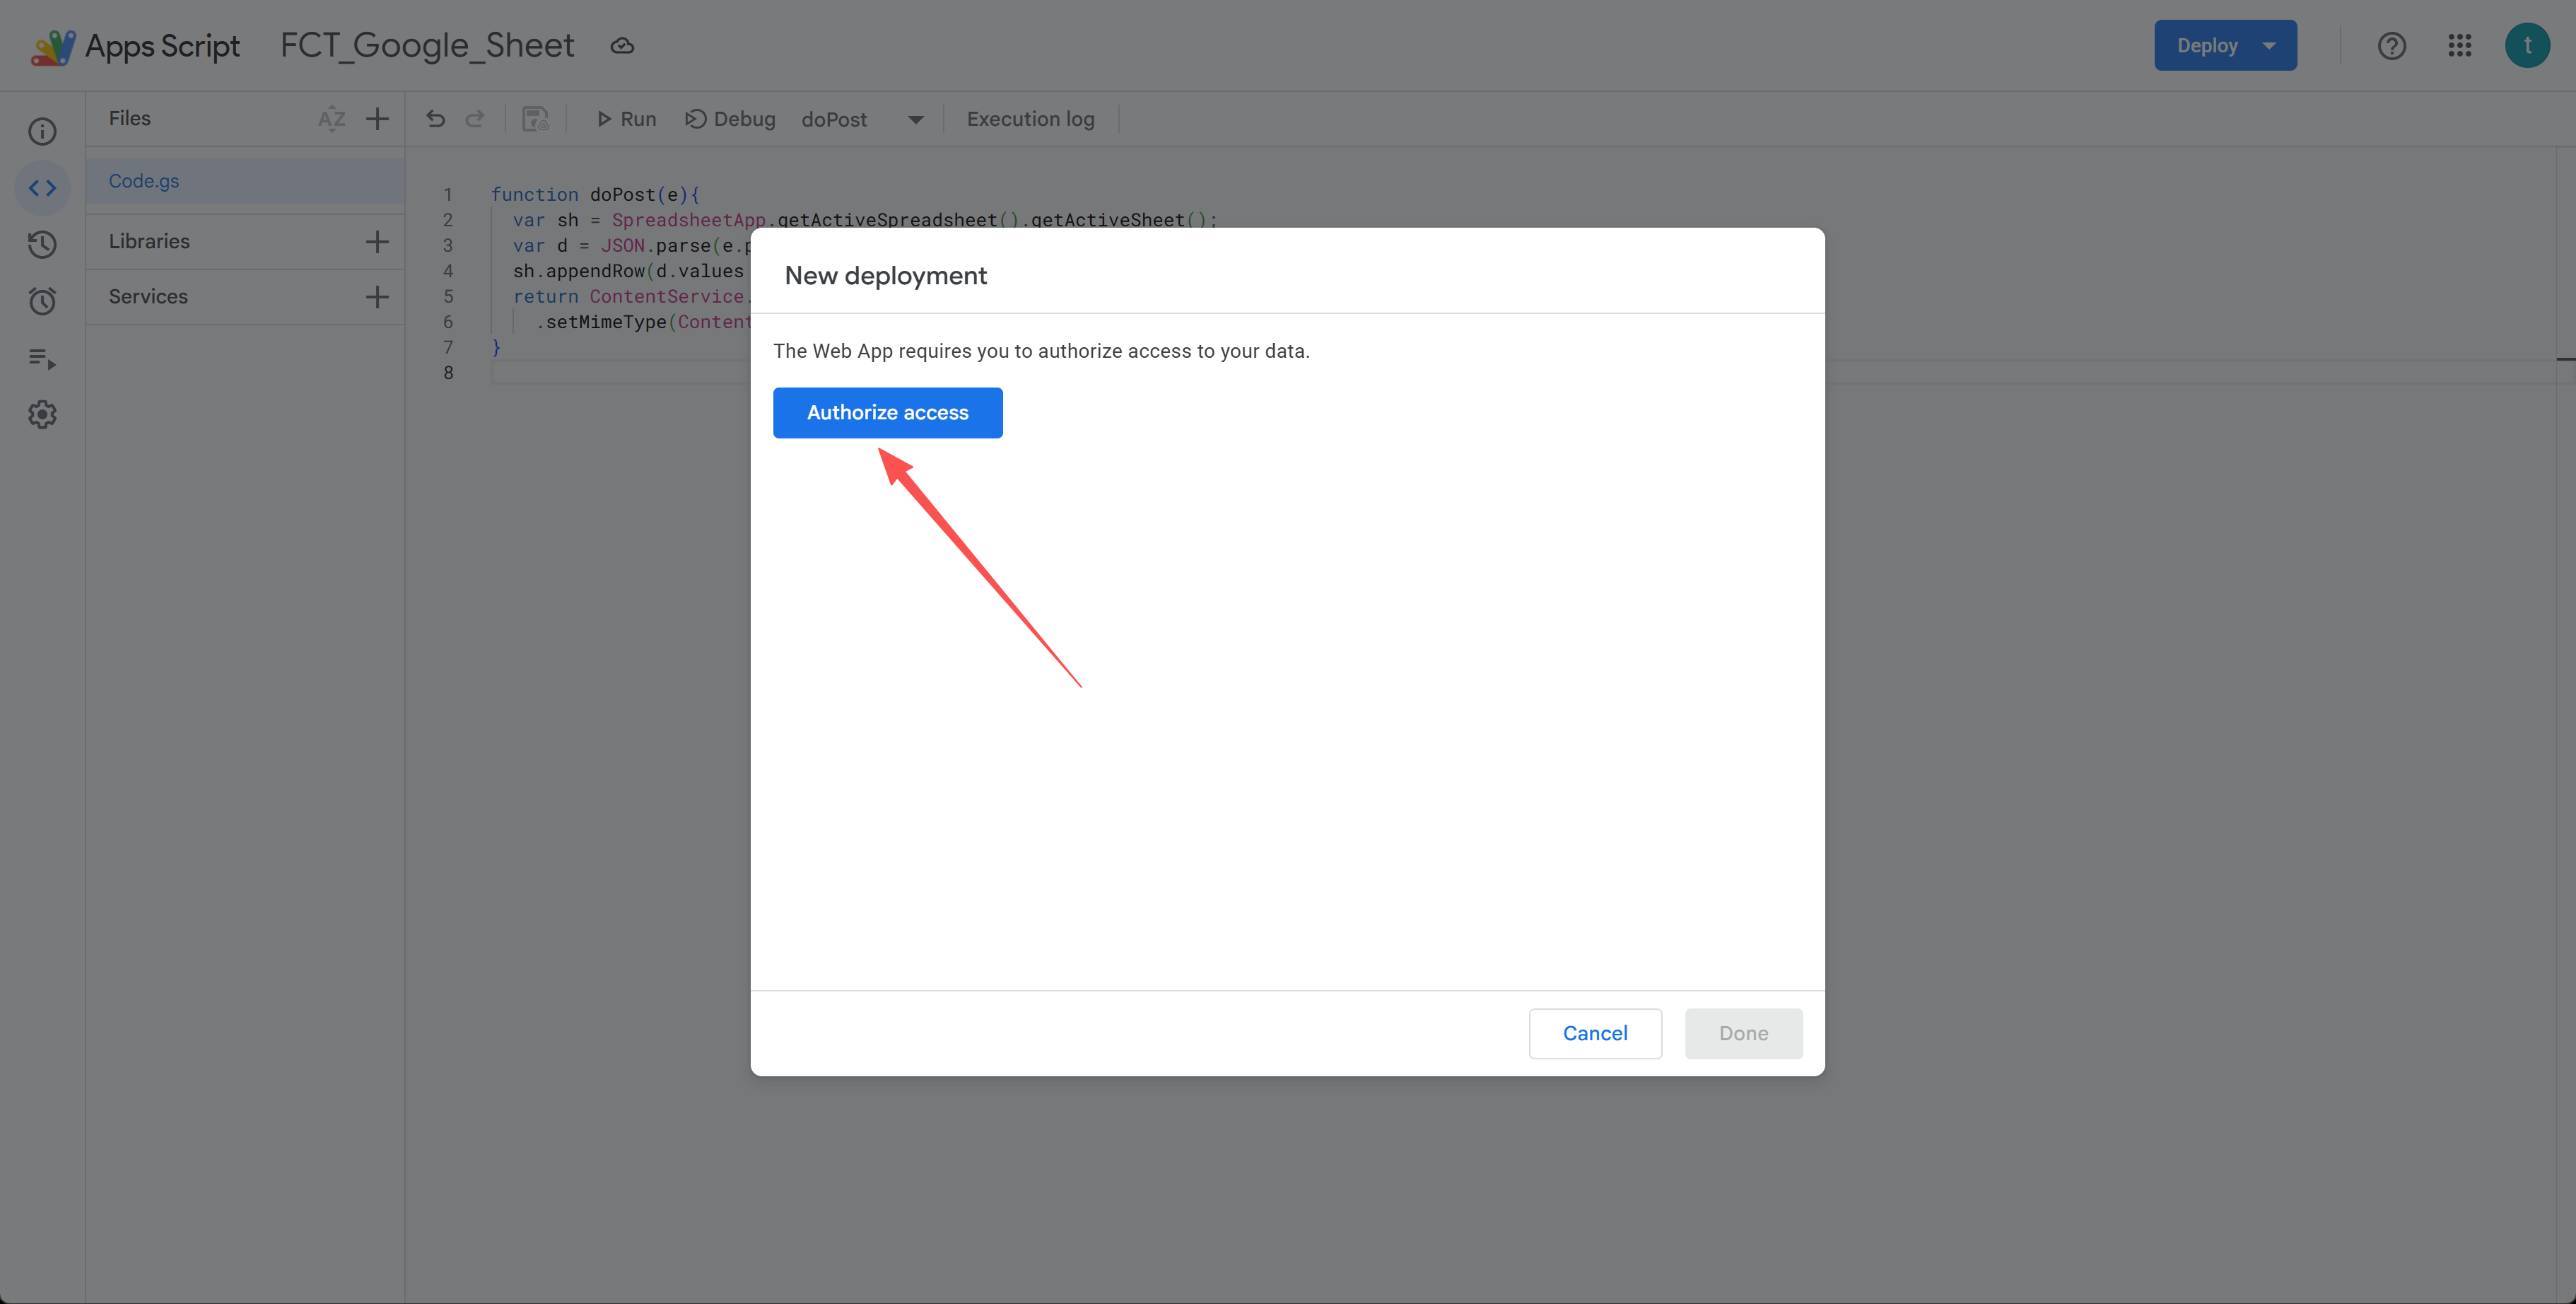
11. On the "Google hasn't verified this app" screen, click "Advanced".
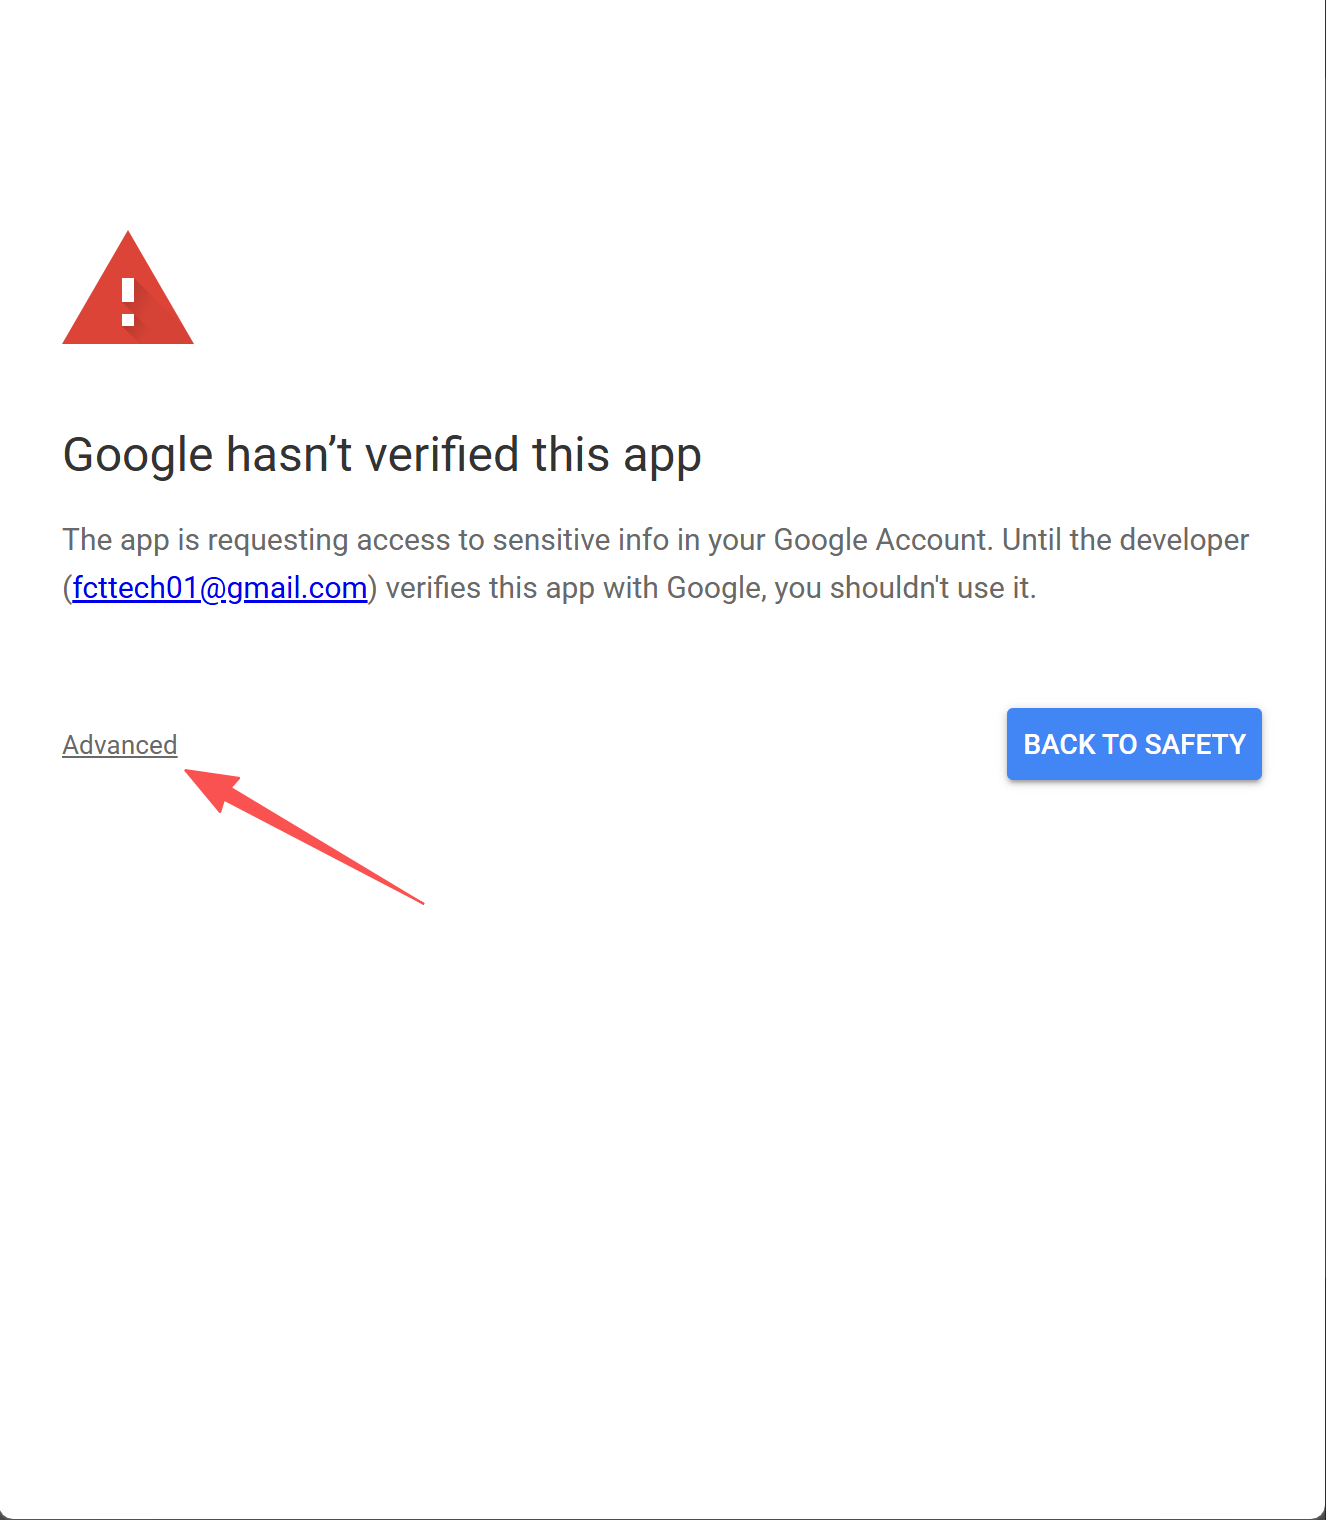
12. Click "Go to FCT_Google_Sheet (unsafe)" to continue — this is your own script, so it's safe.
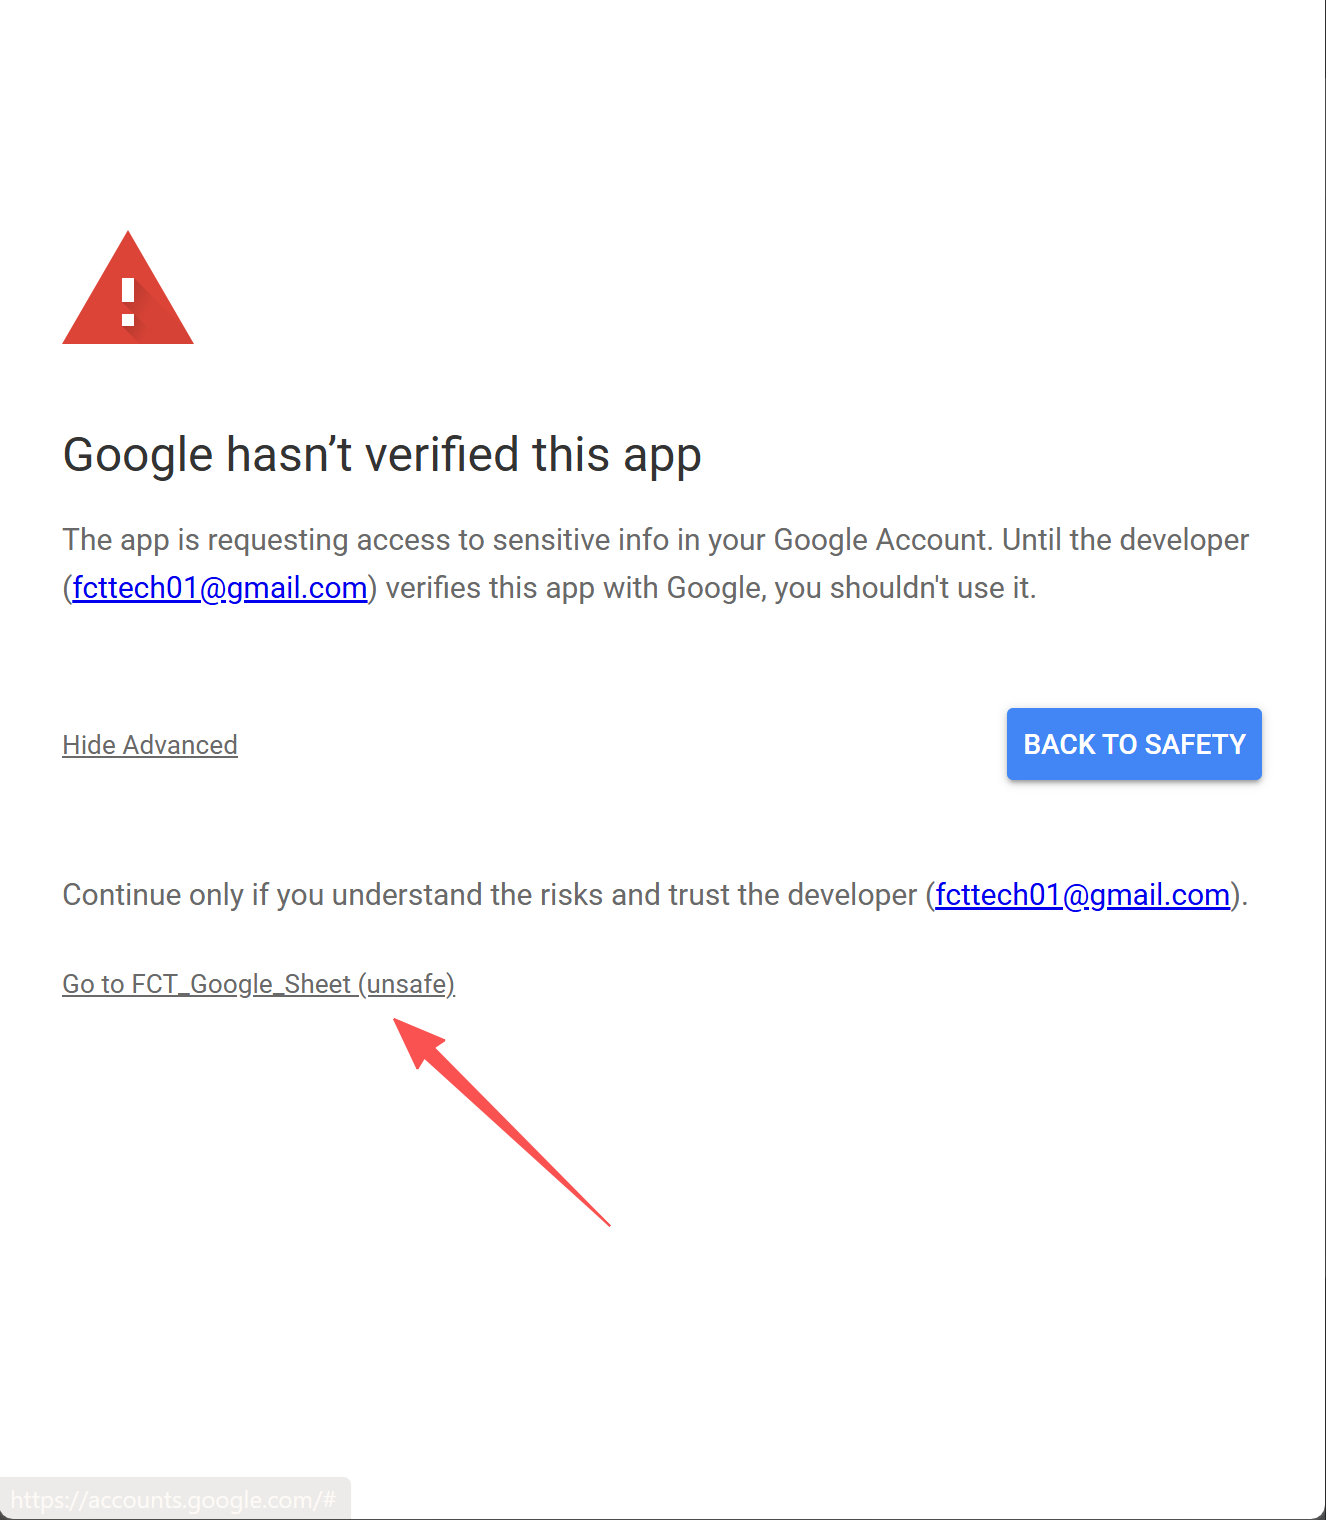
13. Review the permissions and click "Continue" to allow access.
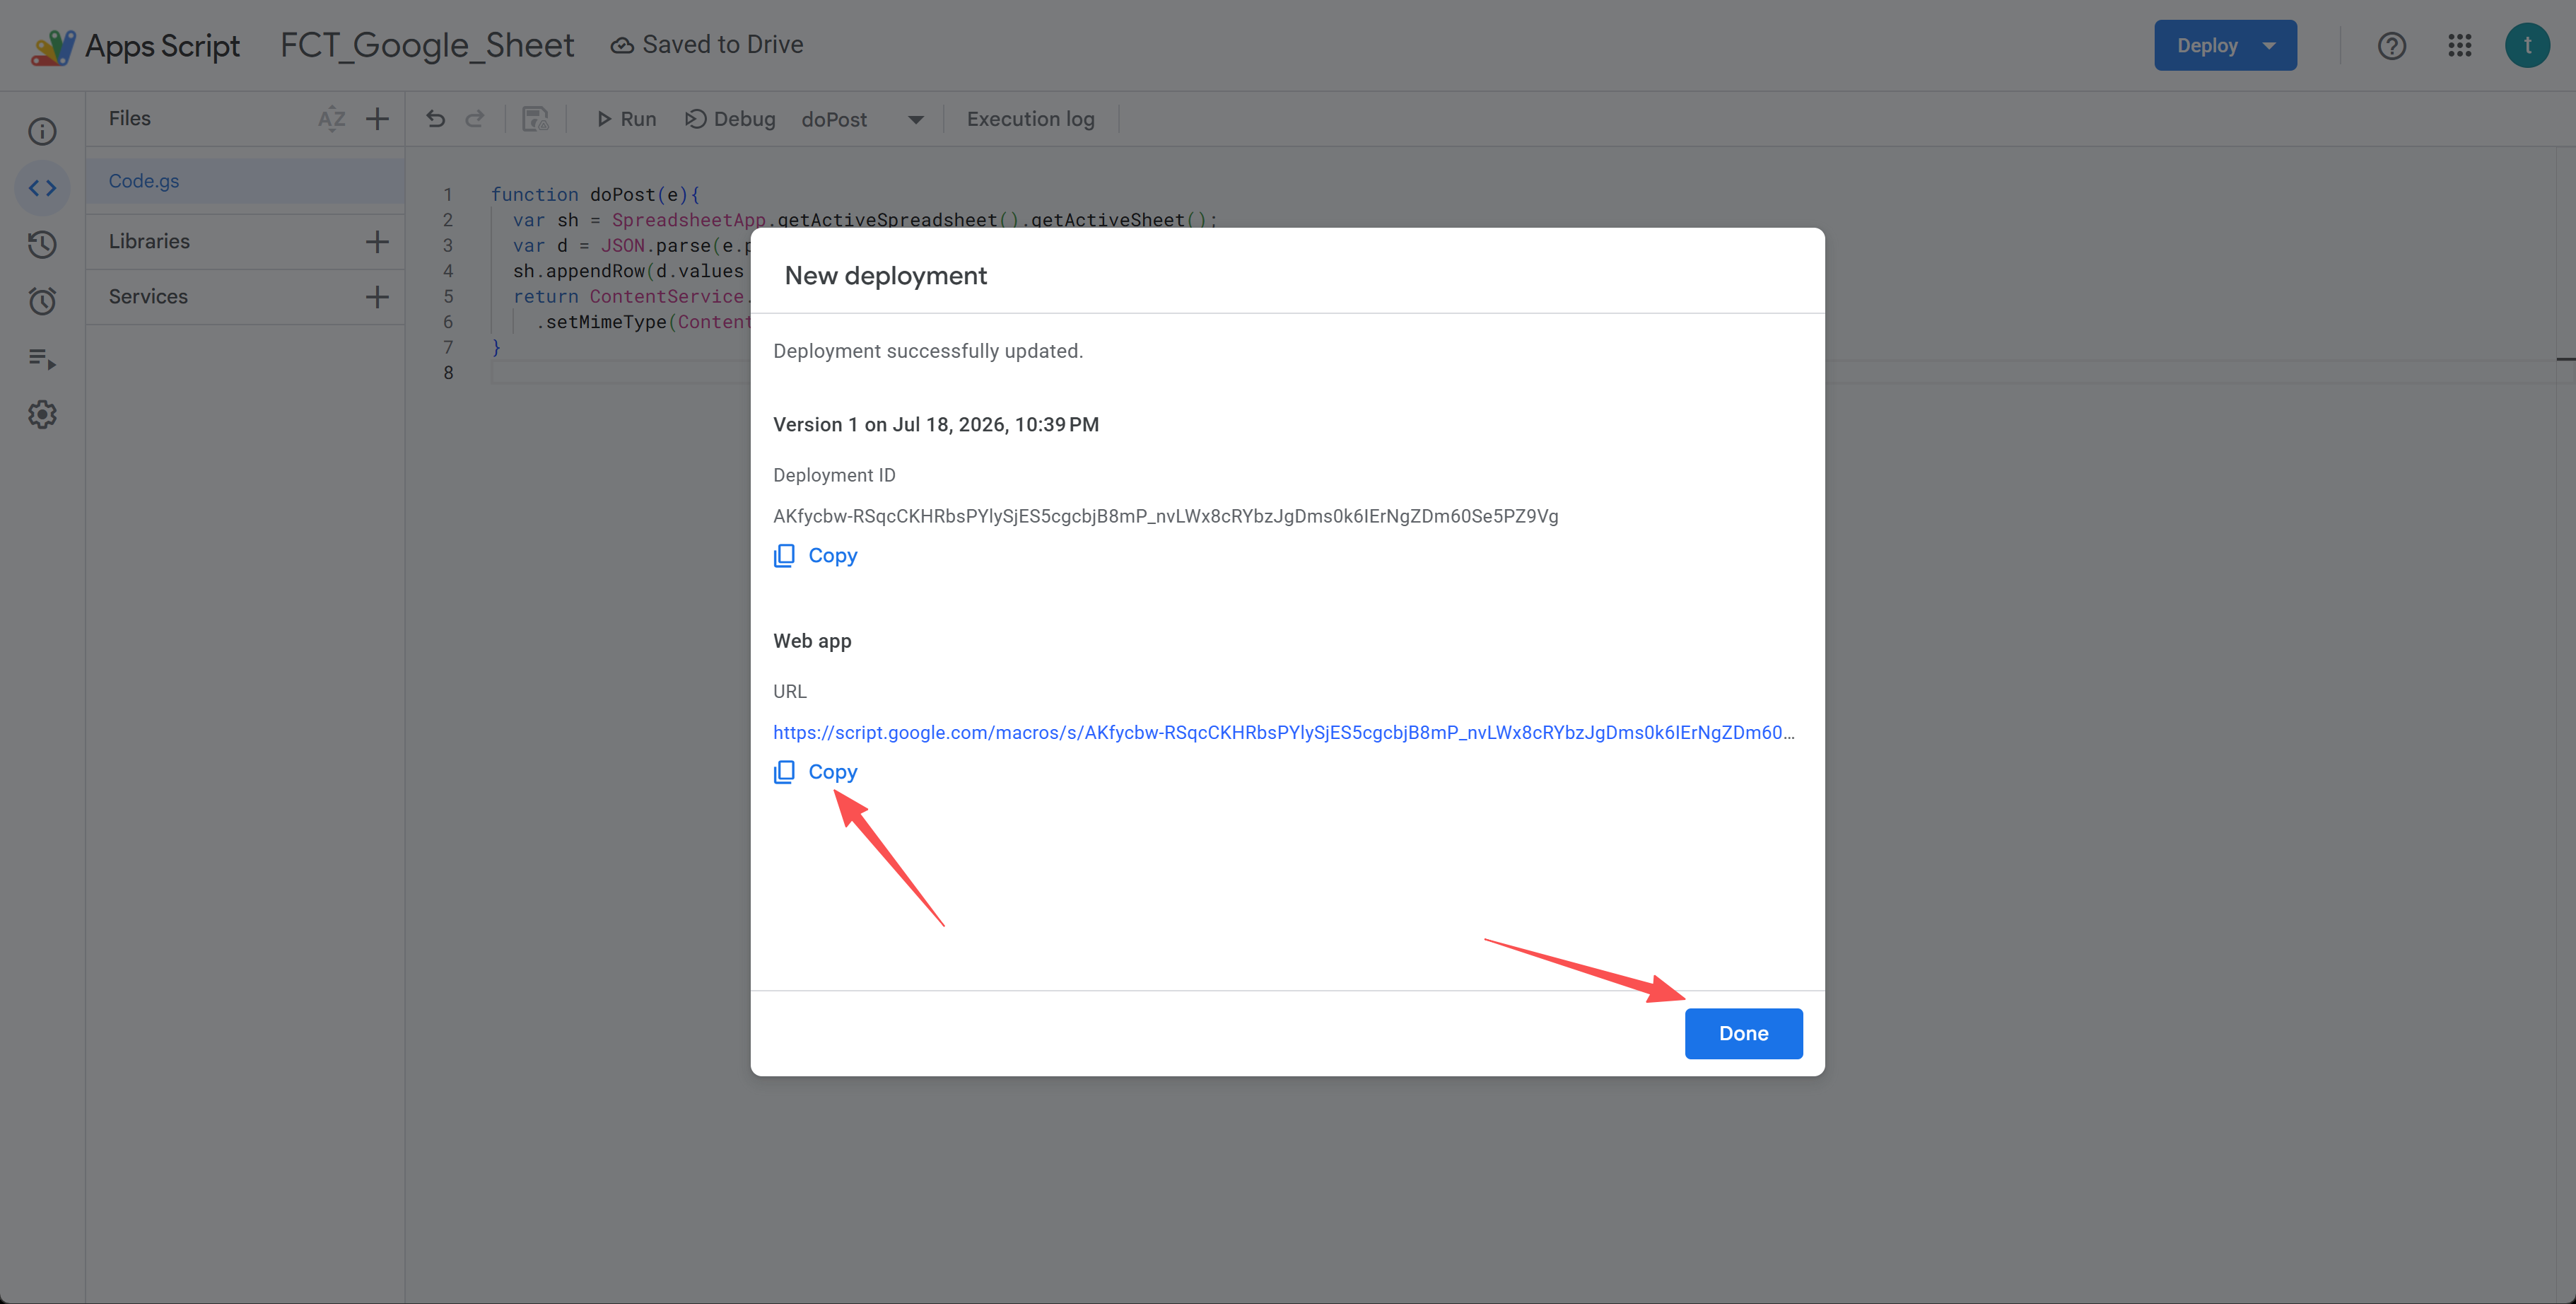
14. Copy the Web app URL it gives you (it ends with /exec), then click Done.
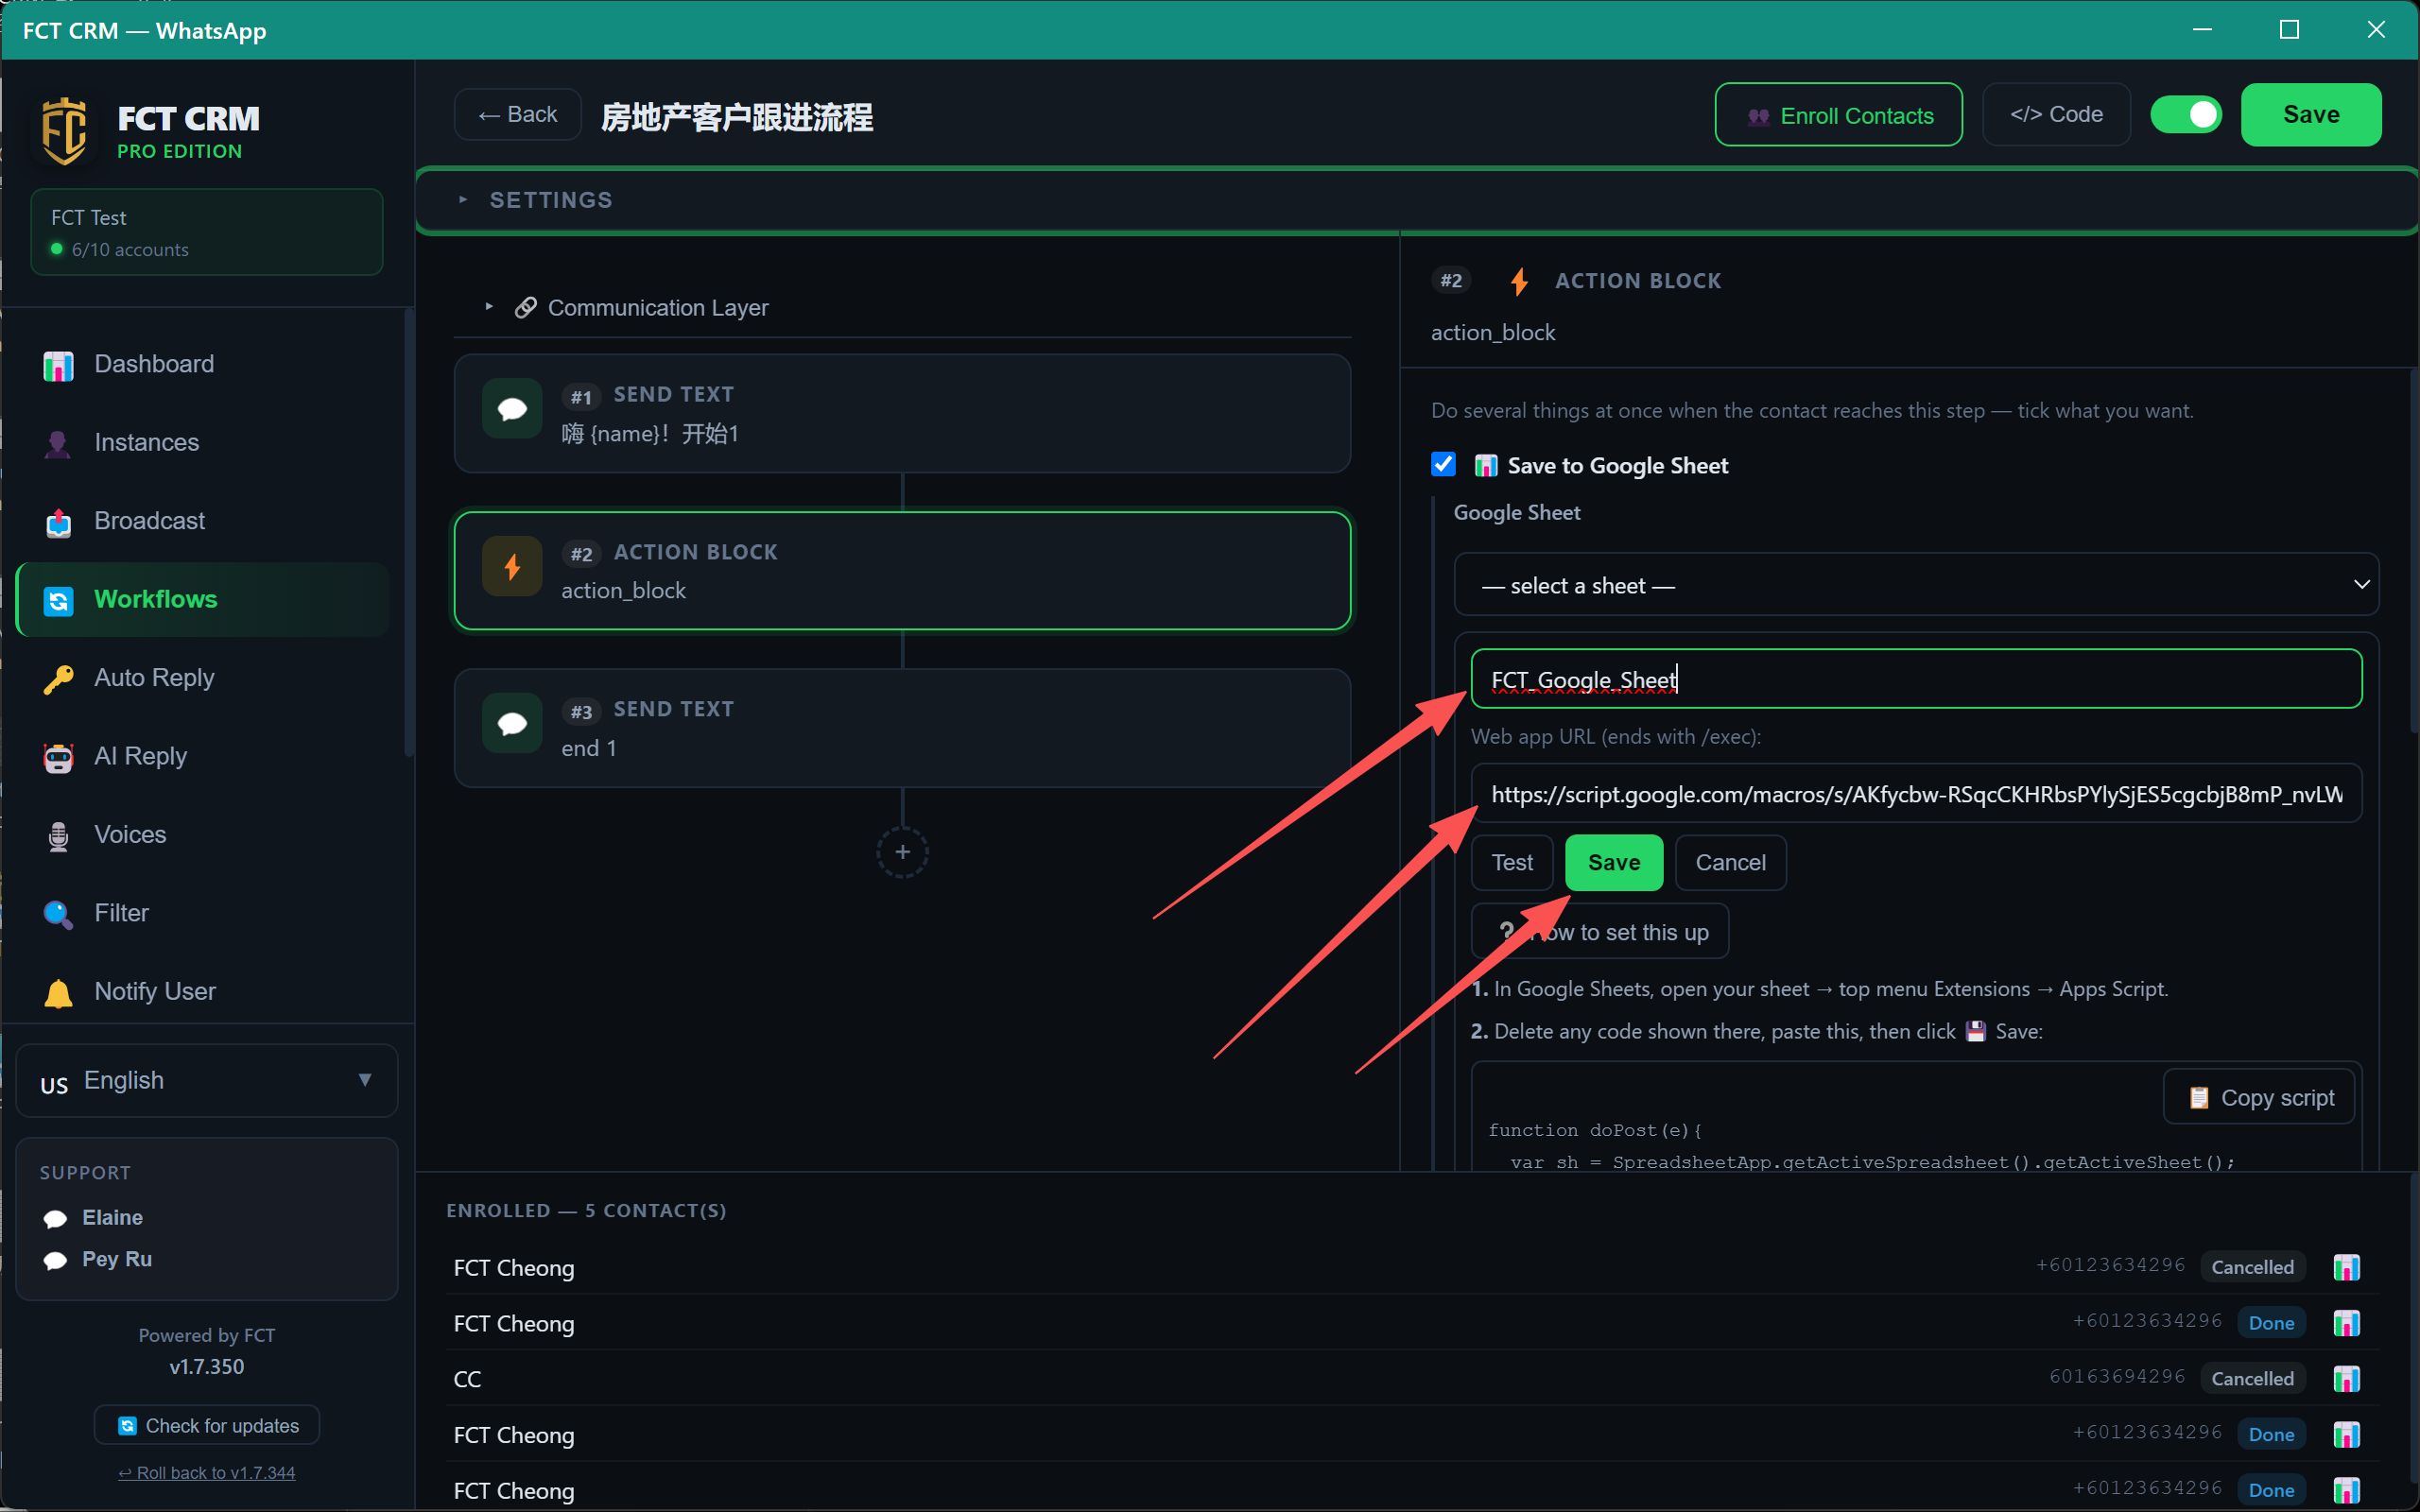
15. Back in FCT CRM, give the sheet a name, paste the Web app URL, and click Save.
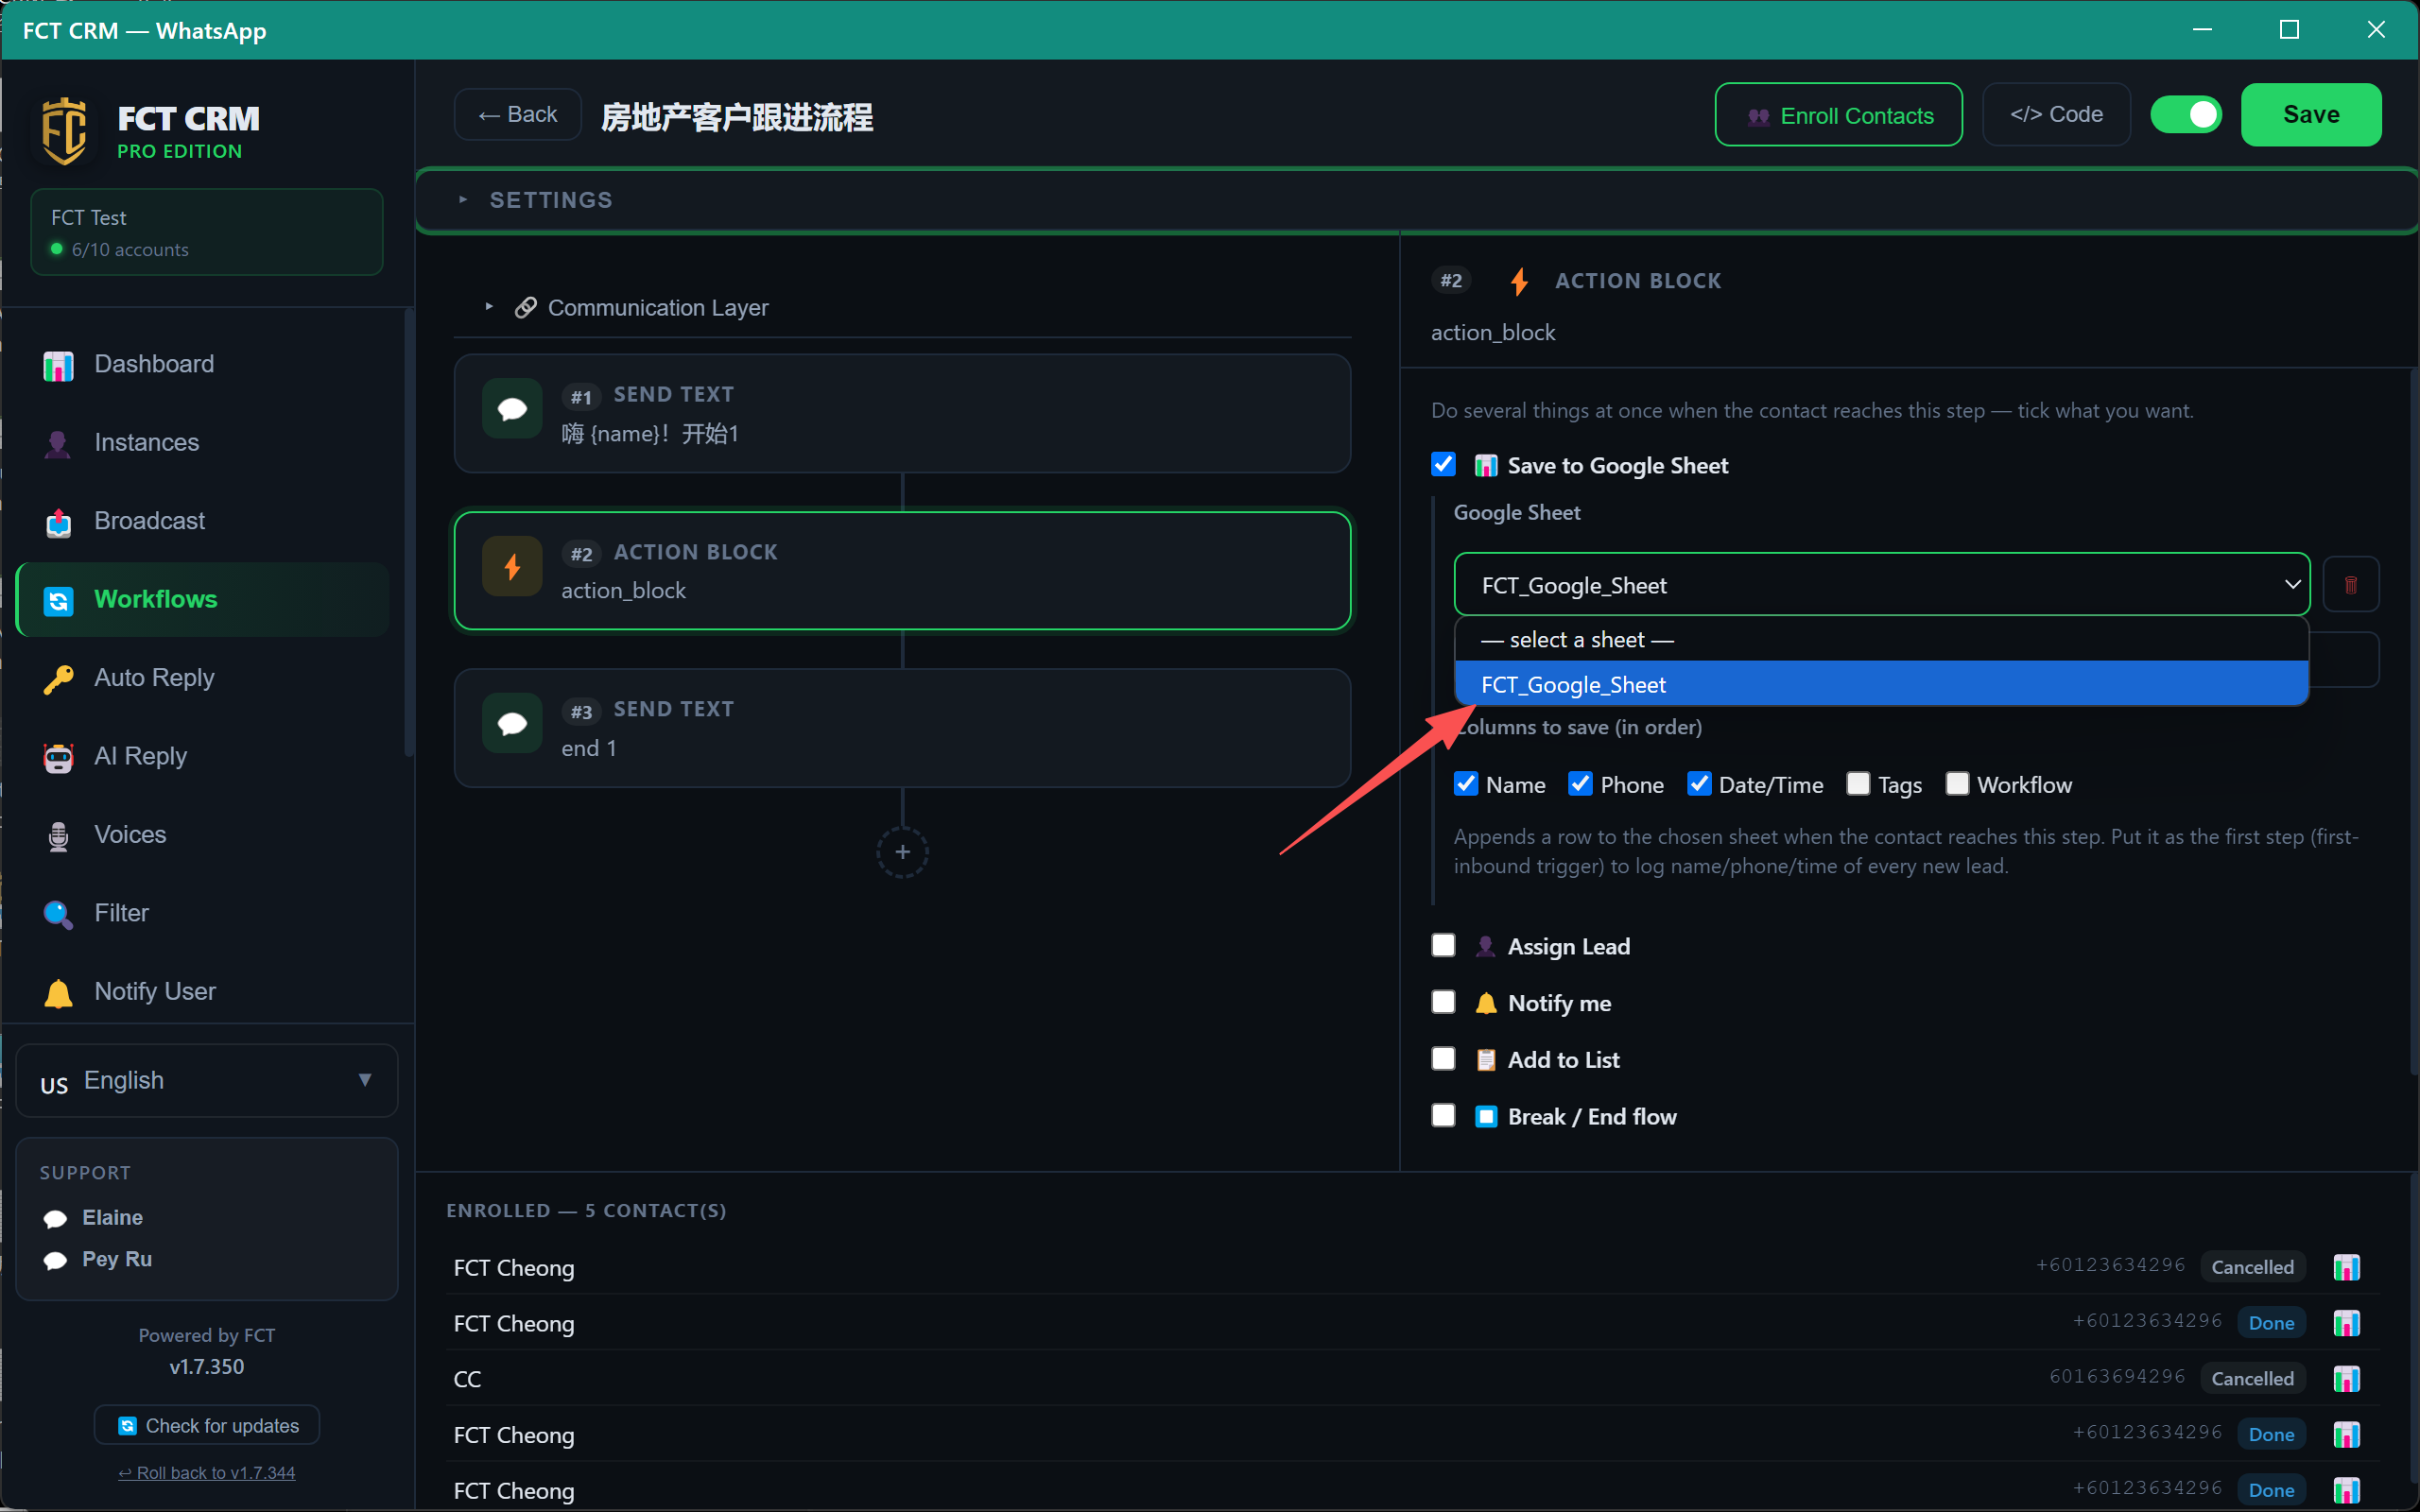
16. Select your new sheet from the dropdown.
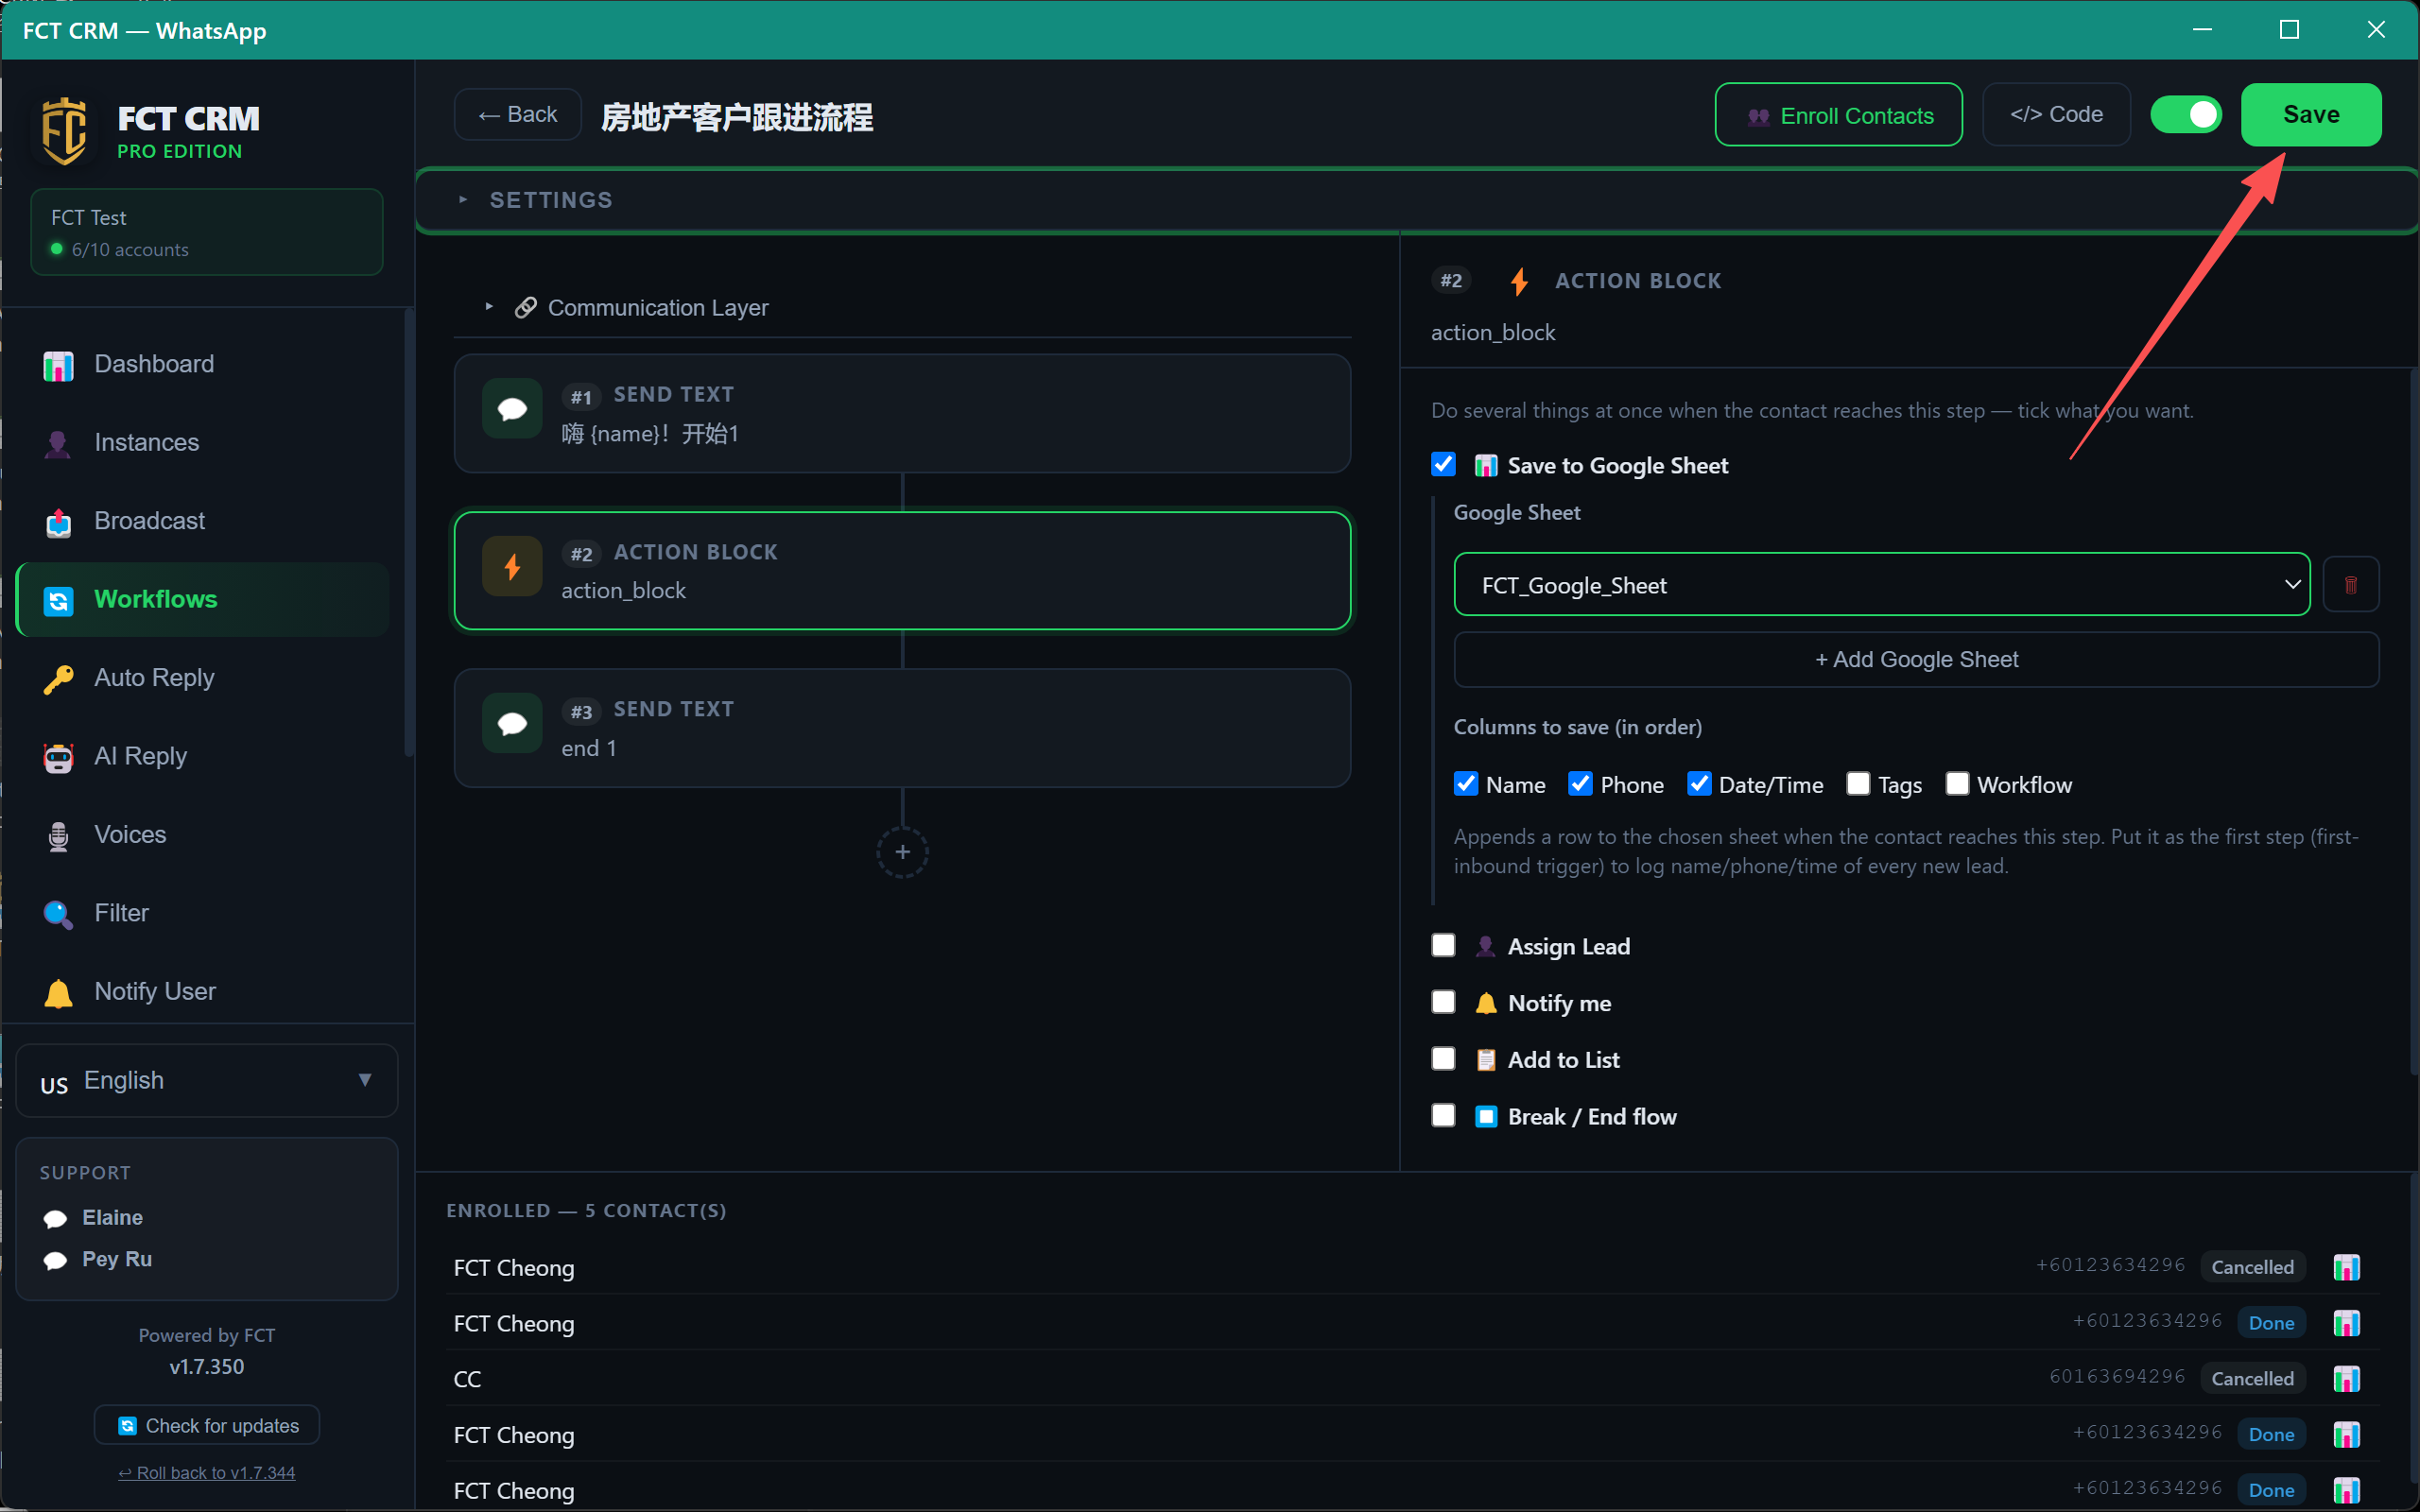
17. Confirm the columns to save, then click Save at the top to finish.
18. Done — each new lead now appends a row (name, phone, date/time) to your Google Sheet.